Under The Sea Sugar Cookies
Need sugar cookies for an “under the sea” party theme? This under the sea sugar cookies tutorial will walk you through some cookie decorating basics! Use my delicious buttery sugar cookie recipe and easy 2-ingredient royal icing recipe. Check out the video to help guide you!

This site uses affiliate links which may result in a small commission at no cost to you. Thanks for supporting Midwest & Wonder!
Birthday parties, baby showers, creative parties, or just because you want to practice decorating, you name it. These cookies are a great addition to an ocean or under the sea themed event. Trust me, everyone will be complimenting your cookies.
Start Here!
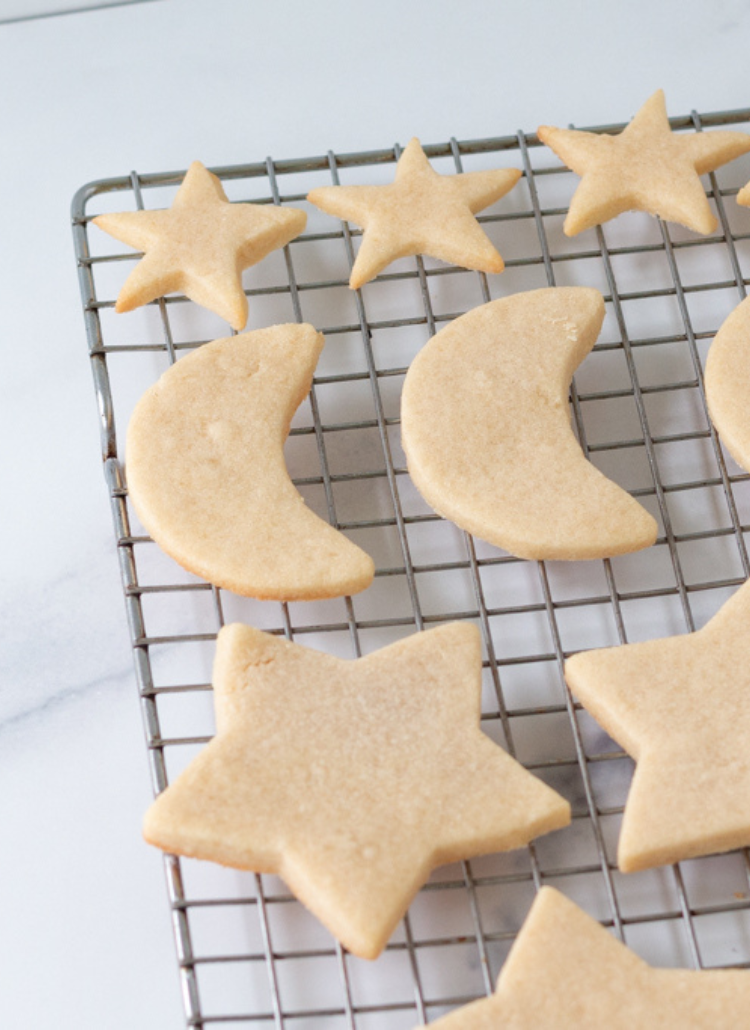
To get started, make my sugar cookie recipe! These sugar cookies are buttery and with slightly crisp edges. This recipe pairs perfectly with royal icing because it’s not overly sweet.
Then, make my 2-ingredient royal icing recipe. You only need one icing consistency for this recipe, which is pipe-able consistency. Follow the recipe and you’ll have just what you need!
Why you’ll love these recipes
These sugar cookies are delicious, if I do say so myself.
- Buttery, soft with slight crisp edges
- Cool quickly which is great for decorating
- Only 6 ingredients
- Delicious homemade taste
- Works well with royal icing because they aren’t very sweet
- Holds their shape
- Easy to make royal icing, even for beginners!


What do I need for decorating under the sea sugar cookies?
Before you get started, you’ll need to find a few tools. If you’re into sugar cooking decorating, these tools will come in handy again and again.
- Gel food dye like this AmeriColor 12 color kit
- Octopus cookie cutter
- Seashell and starfish cookie cutter set
- Seahorse cookie cutter
- Jellyfish cookie cutter (I hand cut mine because I didn’t have a cookie cutter, but this one is so cute and will give you clean edges)
- Piping bags
- Scribe tool or toothpick
More Sugar Cookie Decorating


Watch the video

Preparation
Sugar Cookies
Bake your sugar cookies and let them cool completely. While they cool, make the royal icing.
royal icing prep
In this tutorial, you’ll need to make two royal icing consistencies.
Pipe-able consistency: has a higher water ratio and flows faster which makes it ideal for flooding cookies but not for details.
Stiff consistency: has more added powdered sugar to make it thicker. Ideal for piping on small details.
- Make the 2-ingredient royal icing recipe.
- Divide the icing evenly into 6 bowls, including white.
- Dye the icing using a small drop of food gel dye (a little goes a long way, add more if needed)
- I used royal blue + sky blue, sky blue, deep pink, super red, violet)
- Scoop about 2/3 of each into piping bags, set aside.
- Add 1-2 teaspoons of powder sugar into the remaining icing and mix until it no longer runs off a spatula. Don’t add too much to avoid making a paste. If it turns into a paste, add small amounts of water to thin it.
- Scoop into piping bags and set aside.
A few helpful tips
Cookie Guide
We’ll pipe on “dots” to elevate the detail of these cookies. Sounds simple right? Piping on dots is easy and with them on each design, it ties the cookie set together. Dots also remind me of bubbles under the sea!


Seahorse
Flood the cookie using different pipe-able icing colors. Let them dry for 10 minutes.
Use the blue stiff icing to outline the edges of the cookies. Pipe white stiff icing onto the belly. Pipe white lines for texture (as shown above) and a few dots on the face and tail.
To make a face, dip a toothpick into the black food gel (comes in the AmeriColor set linked above). Gently draw the eyes on.


jellyfish
First, make flood the cookies with white pipe-able icing. Let them dry for 10 minutes.
Pipe the tentacles using stiff icing by piping lines and adding teardrop shapes. Let it dry.
Pipe on the another layer of tentacles with a different color using a squiggly motion. Let it dry.
Pipe on white icing in a squiggly motion. Then, pipe a quick back and forth line at the base of the jellyfish head and let it dry for a few minutes.
Finally, create the jellyfish head by piping it’s shape and filling in, making sure to let some of the white base layer show. Add white dots for added detail.


seashell
Flood the cookie with the color of your choice, I’m using pink and red pipe-able icing. Quickly pipe on horizontal white lines and use a scribe tool or toothpick to drag down vertically. The cookies will dry with a cute seashell pattern! This is called the wet-on-wet technique.

octopus
Flood the cookie with red pipe-able icing and let it dry for about 10 minutes. Pipe the suckers on using dots on it’s legs with the stiff white icing.
Pipe a few red dots onto it’s face with the stiff red icing.
To make a face, dip a toothpick into the black food gel (comes in the AmeriColor set linked above). Gently dot the eyes are draw a mouth.


fish
Start by flooding the cookie with blue pipe-able icing. Let it dry for about 10 minutes.
Use stiff icing to pipe blue and white lines onto the tail fin. Pipe a fin in the center and add some white dots.
To make an eye, dip a toothpick into the black food gel (comes in the AmeriColor set linked above). Gently dot the eye.


starfish
Use pipe-able icing to flood the starfish, let it dry for 10 minutes.
Use the same color stiff icing as the base layer and pipe a large dot in the center. Pipe medium sized dots on the arms, and little dots in the center for texture.

Glitter details
Brush the cookies with edible rose shimmer dust. When I think of the sea, I think of sparkly waves (plus I just like adding glitter to everything).
Mix edible glitter with 1/2 teaspoon vodka or vanilla extract (evaporates as it dries). Brush on using a large fluffy food safe brush.
How long does royal icing take to dry?
Let the cookies dry overnight before serving or packaging. Avoid stacking because even when dry, cookies can crack because they are delicate.