Rustic Camping Sugar Cookies
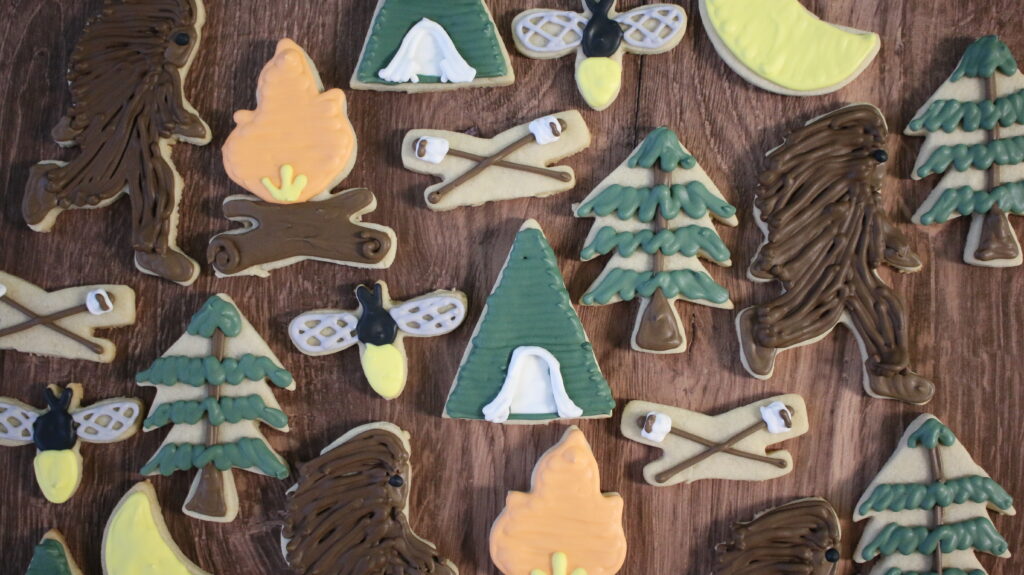
Campfires, and tents, and bigfoot, oh my! This post will show you how to decorate camping sugar cookies with easy step by step pictures.
Tools We Need to Get Started
Cookie Cutters
We are using a variety of cookie cutter shapes for this set!
Pine Tree 1 & Pine Tree 2 (I bought a tree set at target last year. I linked some other cute pine tree shapes!)
Roasted Marshmallows (This is the camp fire cutter, but just the logs!)
Gel Food Coloring
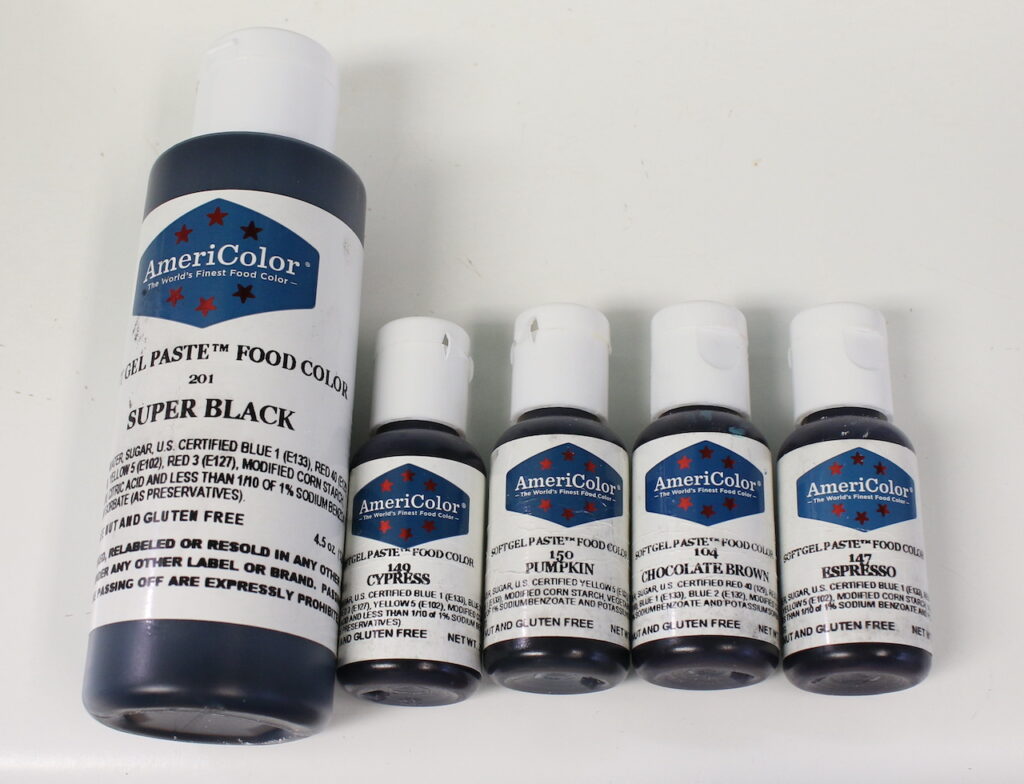
There are 6 gel food colorings used for this set:
- AmeriColor Cypress
- AmeriColor Pumpkin
- AmeriColor Super Black
- AmeriColor Chocolate Brown
- AmeriColor Espresso
- AmeriColor Electric Yellow
Piping Bag/Tips
This set does not require any special piping tips.
We are using tip less piping bags, which is a piping bag tip that has been cut to whatever size hole you need, without any metal or plastic tips added.

Icing Preparation
| COLOR | AMOUNT | GEL |
| White | 1/3 cup | |
| Orange | 1/4 cup | 1 drops orange |
| Yellow | 1/4 cup | 1 drop electric yellow |
| Brown | 1/2 cup | 1 drop espresso + 1 drop chocolate brown |
| Cypress | 1/2 cup | 2 drops cypress |
| Black | 1/3 cup | 4-5 drops super black |
| Grey | 1/4 cup | 1 tiny drop black |
How to Decorate Sugar Cookies
Bigfoot
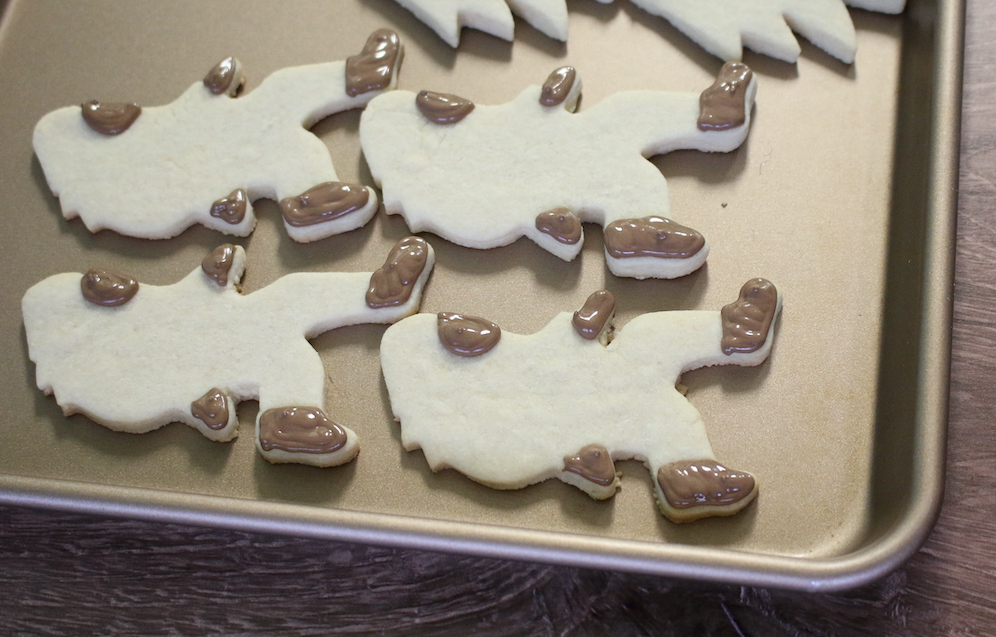
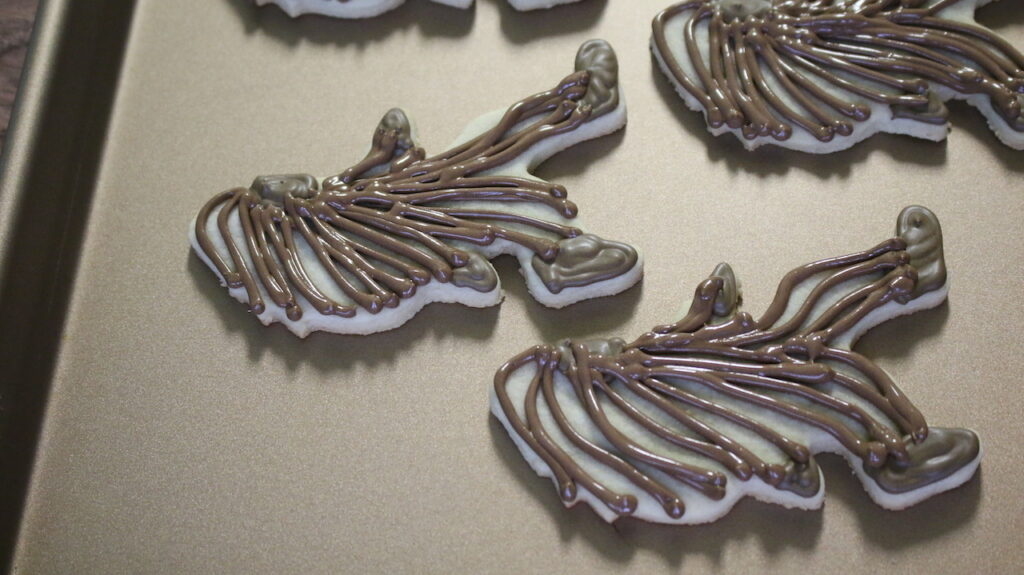
Start by piping on the face, hands, and feet with the brown icing. Let it dry for a few minutes. Then add long, imperfect lines of icing for his shaggy hair, following the shape of the cookie.
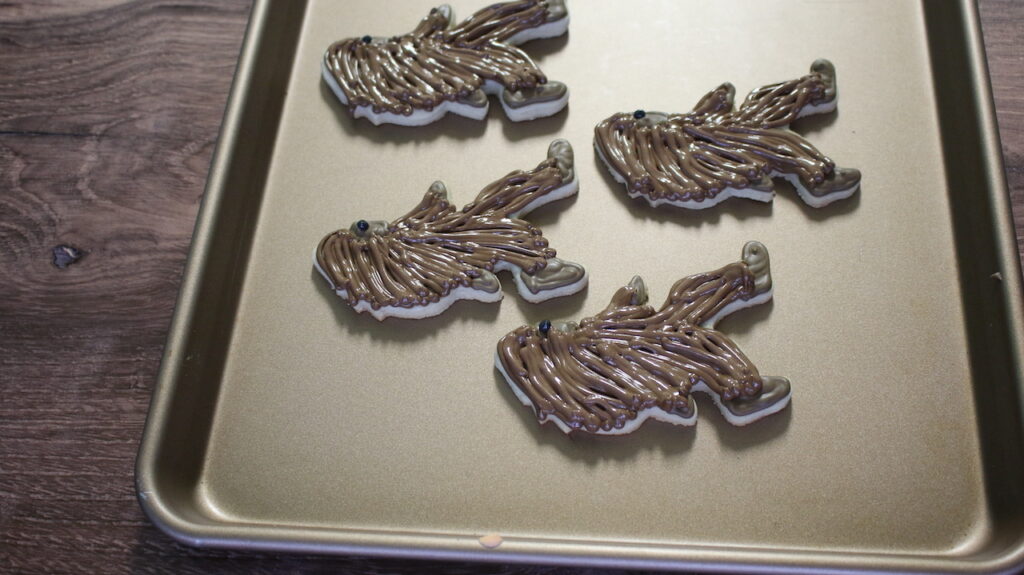
Keep adding some more “hair” and a black dot for his eye.
Pine Trees
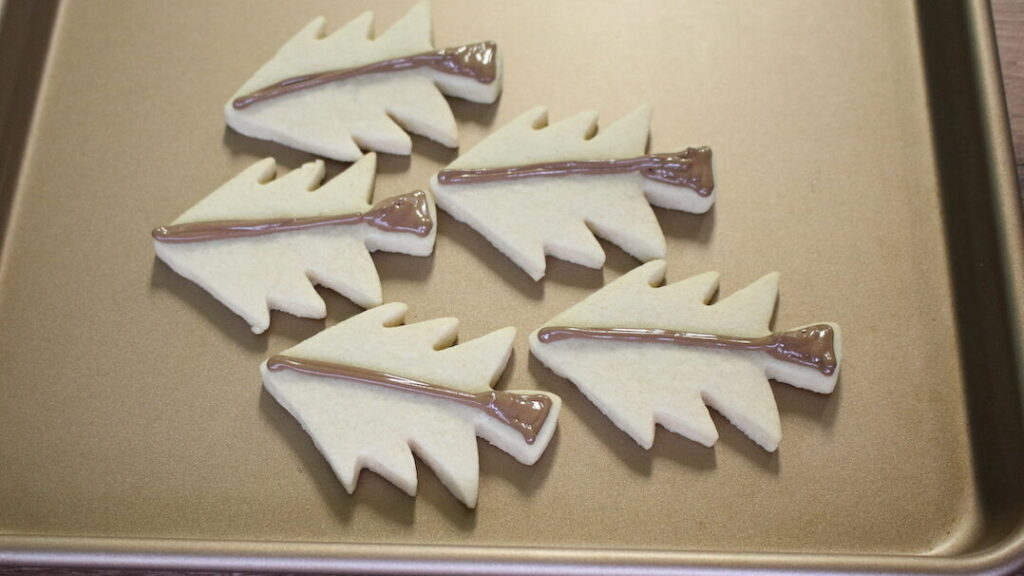
First, pipe the tree trunk and create a little triangle at the base. Let this dry for a few minutes.
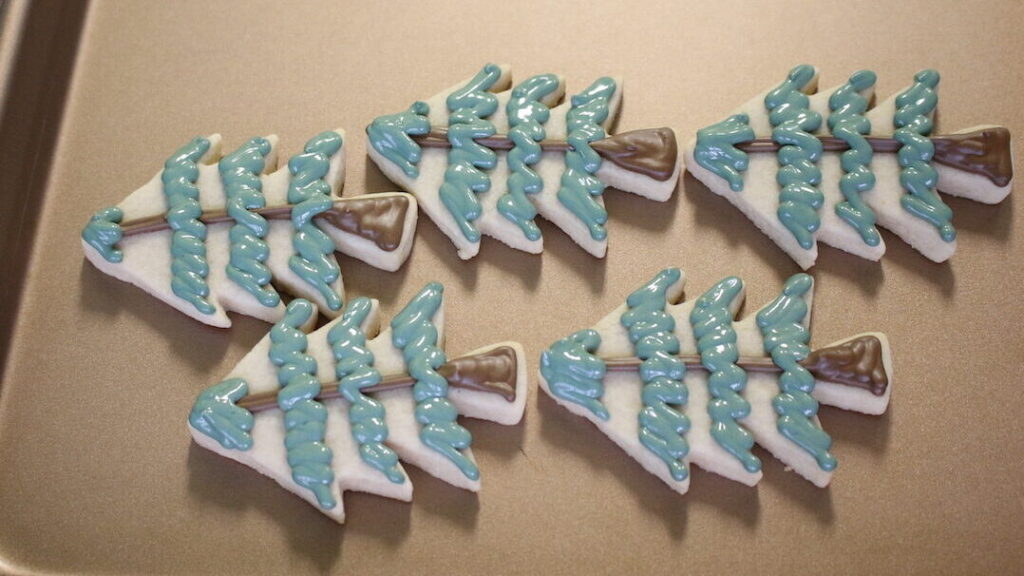
Then, using cypress green icing, create up and down squiggly lines for the leaves.
Campfire
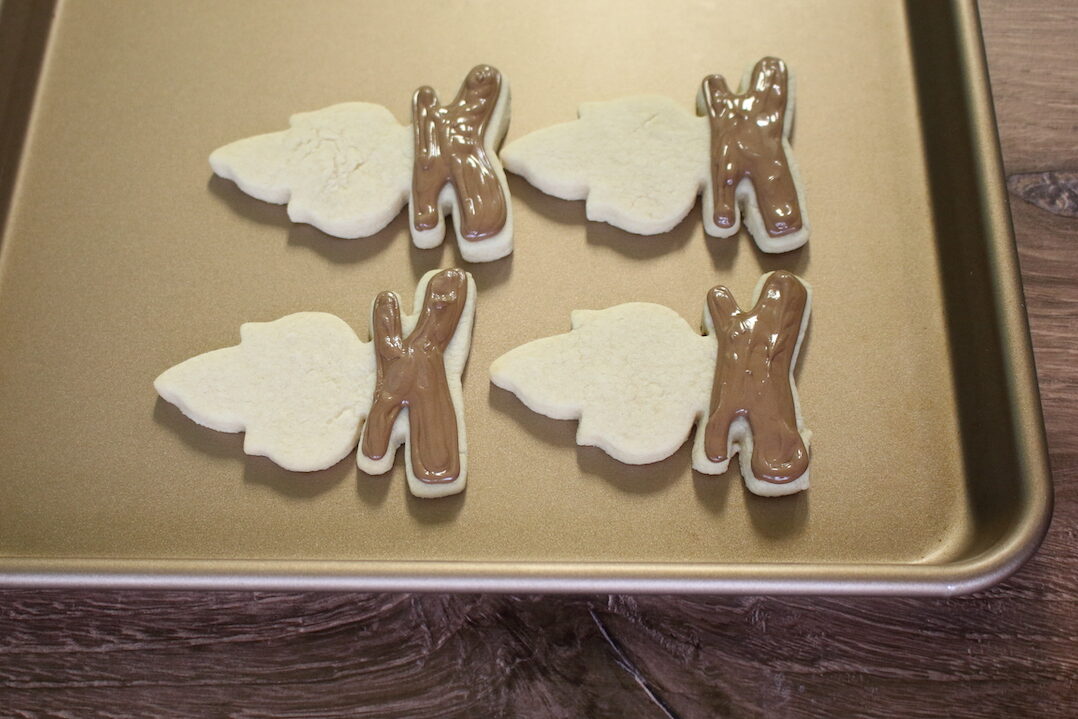
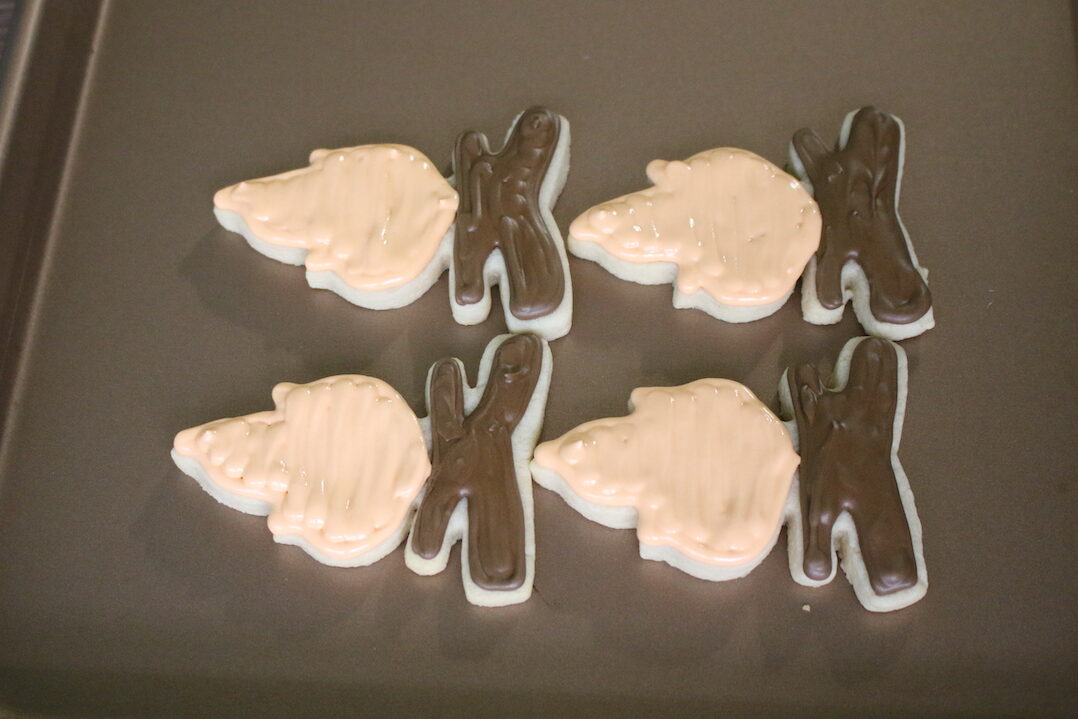
Use the brown icing to pipe the wood logs. Then, add an outline with orange icing and fill this in!
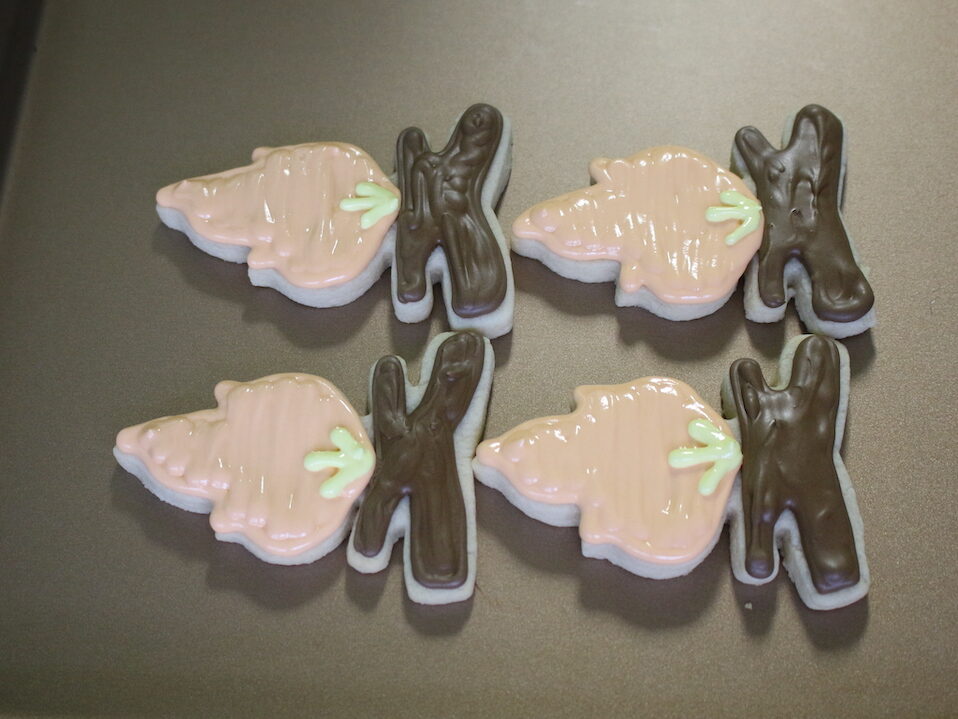
Add some little yellow details to the center of the fire.
Fireflies
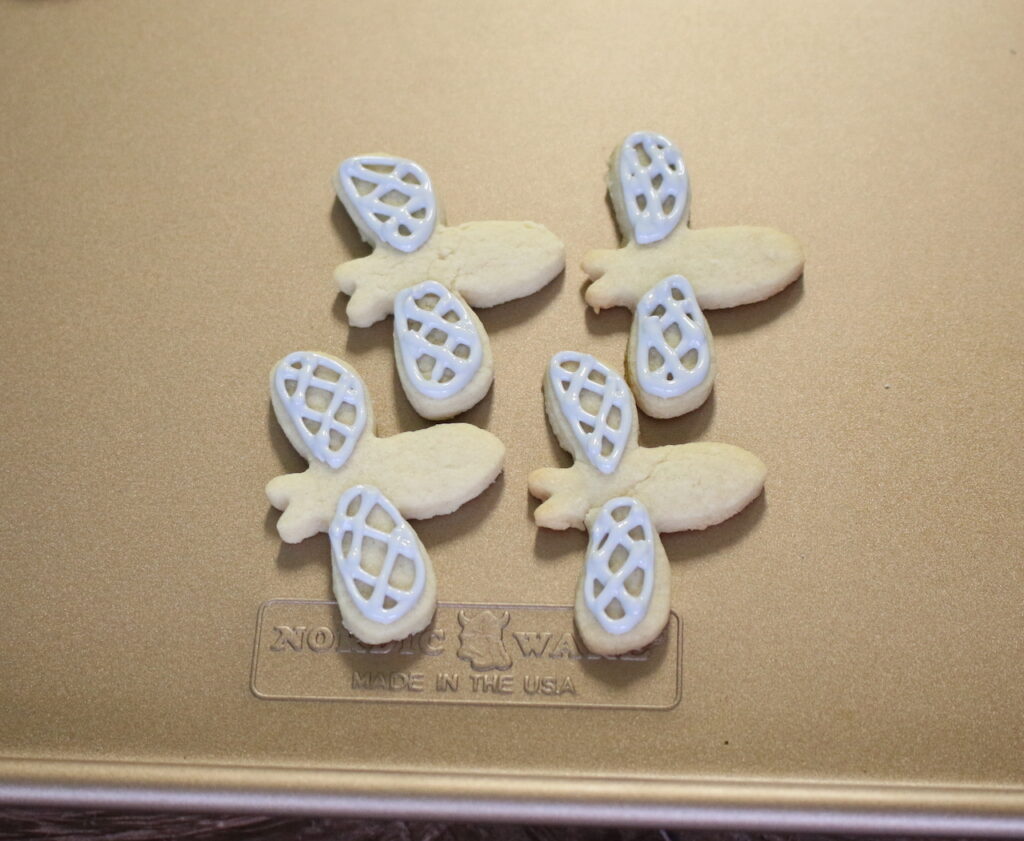
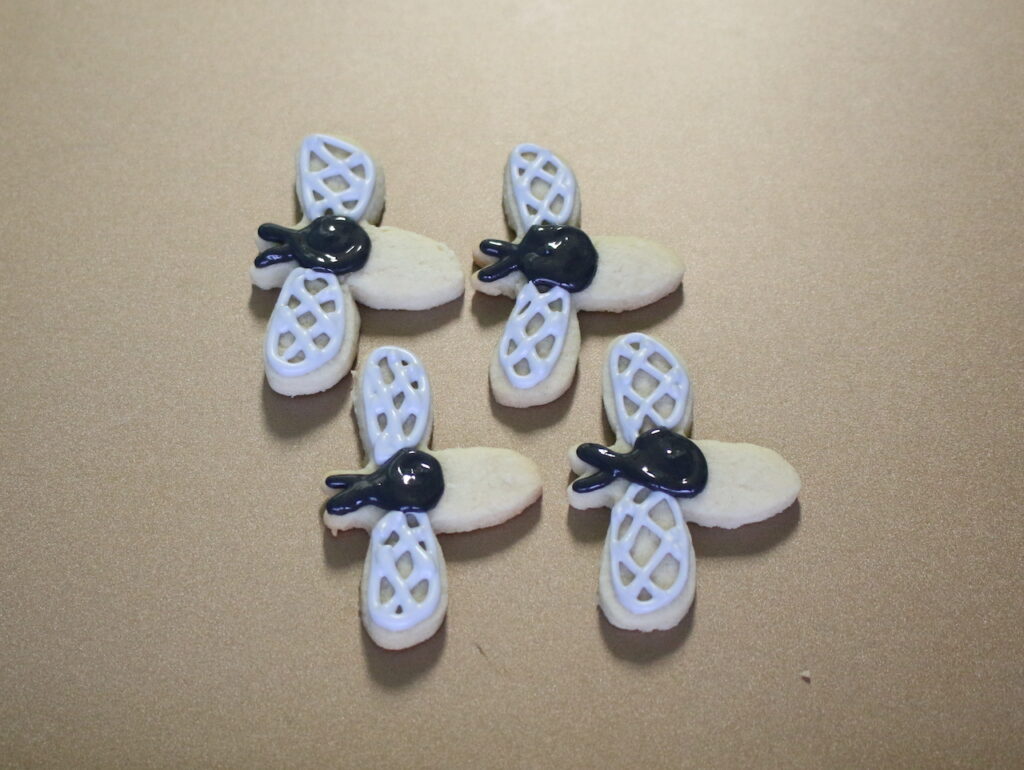
Fireflies or lightning bugs? Either name you call them, these are cute! First, using the grey icing, create an outline around the wings. Pipe small lines in one direction, then pipe lines in the other direction to look crisscrossed. After this dries for a few minutes, pipe on the body, head, and antenna using black icing. You can use a toothpick or scribe tool to make the antenna look pointed.
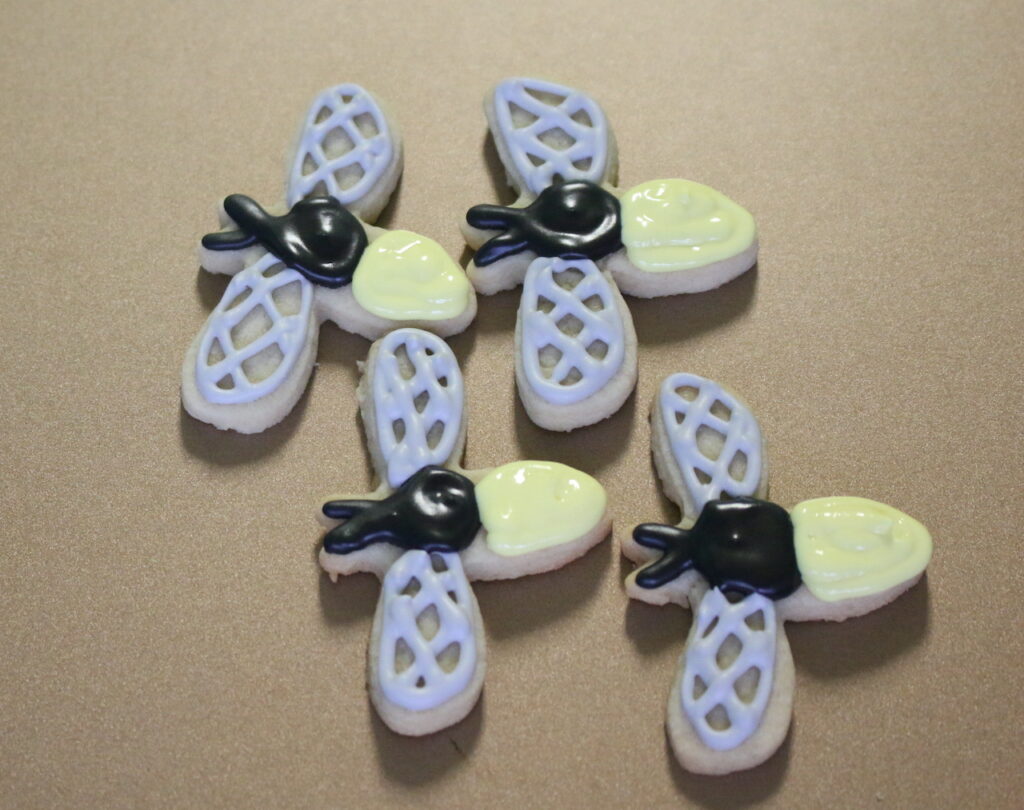
After the black icing has dried for a few minutes, add the yellow icing for their glow!
Tent
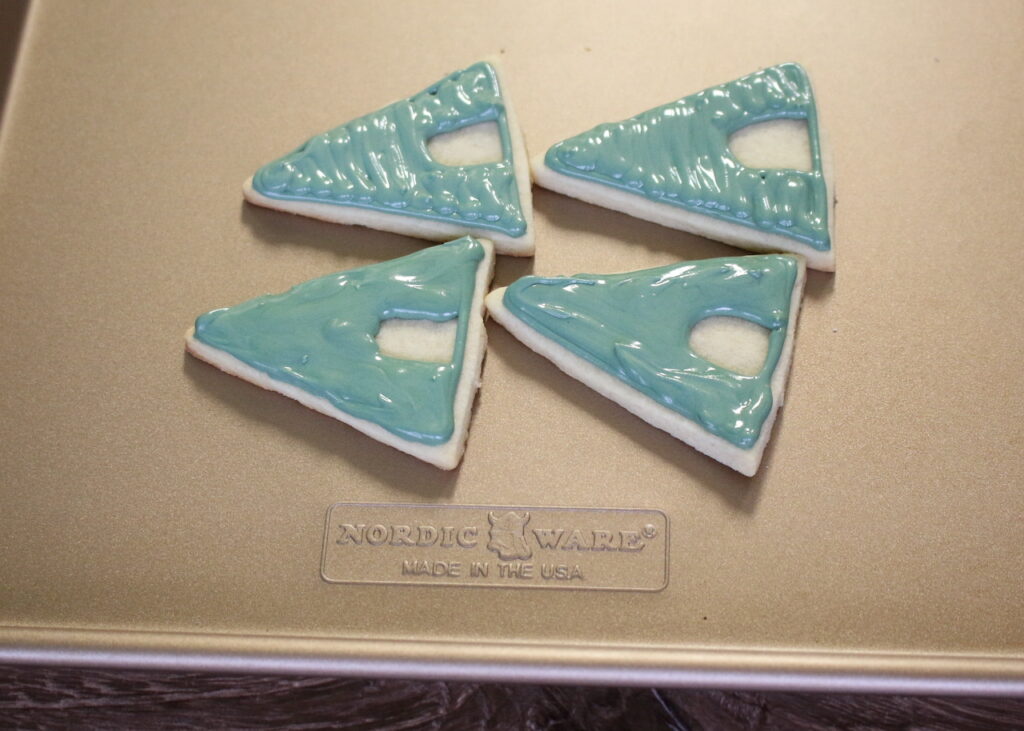
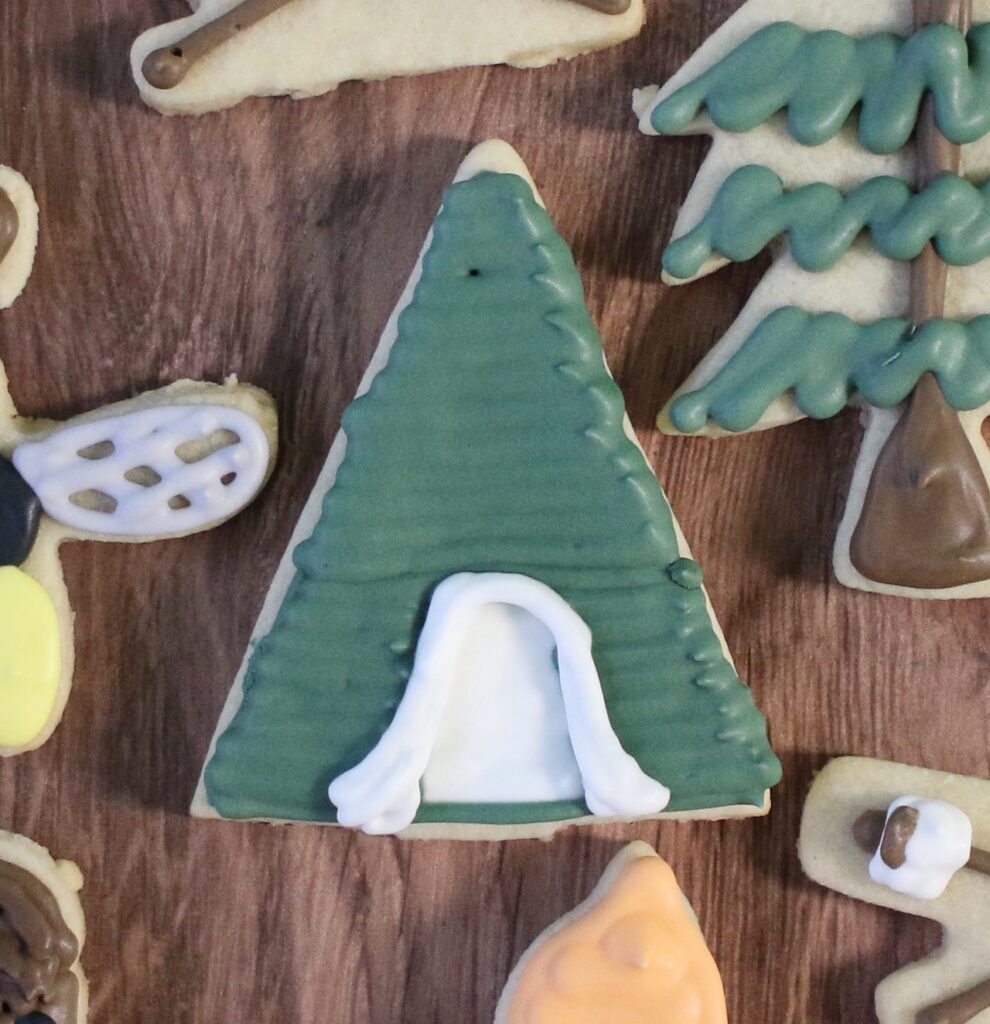
The tent was tricky to make. In the end, I decided on keeping it very simple. Outline the cookie with cypress green icing. Then, fill in the cookie with icing. Once this is slightly dry, add an “archway” shape in the center with white icing.
Add horizontal lines using the cypress green icing, but be careful not to go over the white arch. Finally, add the tent opening flaps using white icing.
Roasted Marshmallows
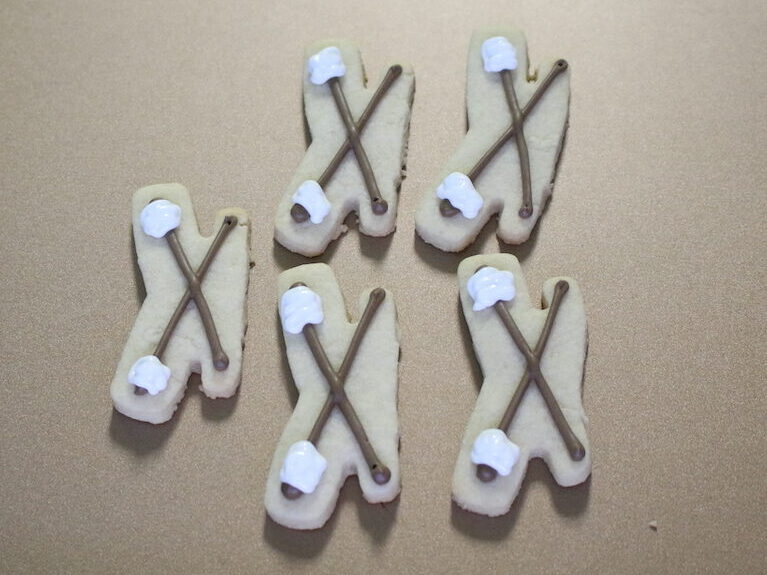
Use the brown icing to create a long “X” shape on the cookie. Let it dry for two minutes.
Add little white squares on the edge of the sticks, leaving a little bit of brown showing. (To make them look “roasted” add a small bit of brown onto the white marshmallow.)
Crescent Moon
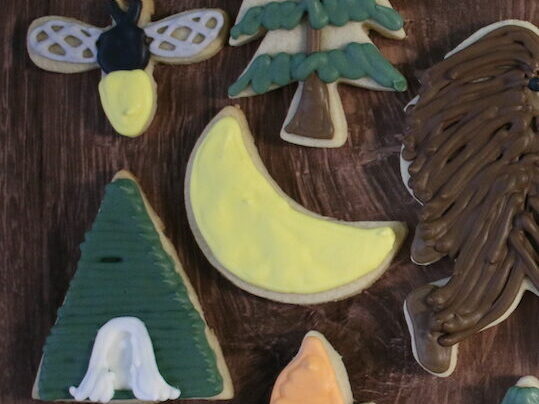
Outline and then fill in the moon cookie using the yellow icing.
Drying Time
It can take between 12-24 hours for cookies to dry depending on the weather, how humid your home is, how runny your icing is. I recommend to let the cookies dry completely overnight before serving or packaging.
How to Store Cookies
- Sugar cookies can be stored in an air tight container at room temperature for up to 1 week.
- I do not recommend keeping these cookies in the fridge or freezer because royal icing does not tolerate condensation well.
- Don’t stack cookies on top of each other as they are still delicate even when dried. If you have to, lay parchment paper in-between each layer.
How to Package in Cellophane Bags
- Let the cookies dry overnight
- Add to a cellophane bag the next day and tie or tape the bag to keep in freshness
If you recreate this, tag me on Instagram #alissasbakeshop – I’d love to see!
Check out these other posts!
Easy Royal Icing Recipe with Egg Whites
4 Tips to Streamline Your Home Baking Business to Make More Profit
