Buttercream Flower Cupcakes
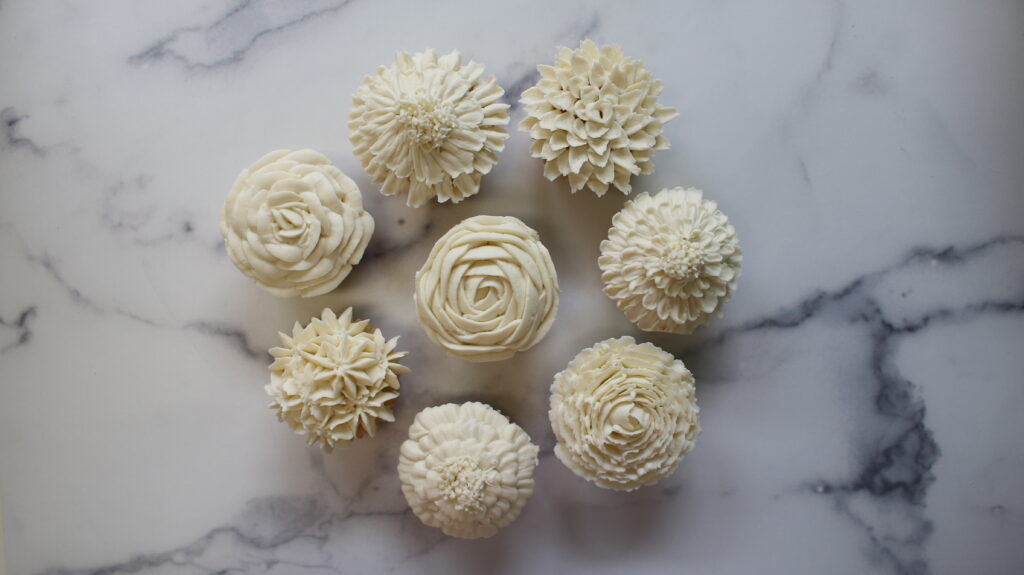
Buttercream flower cupcakes are easy to make when you break down the process! Bake fluffy vanilla cupcakes and whip up vanilla buttercream to pipe on 8 different styles of flowers.
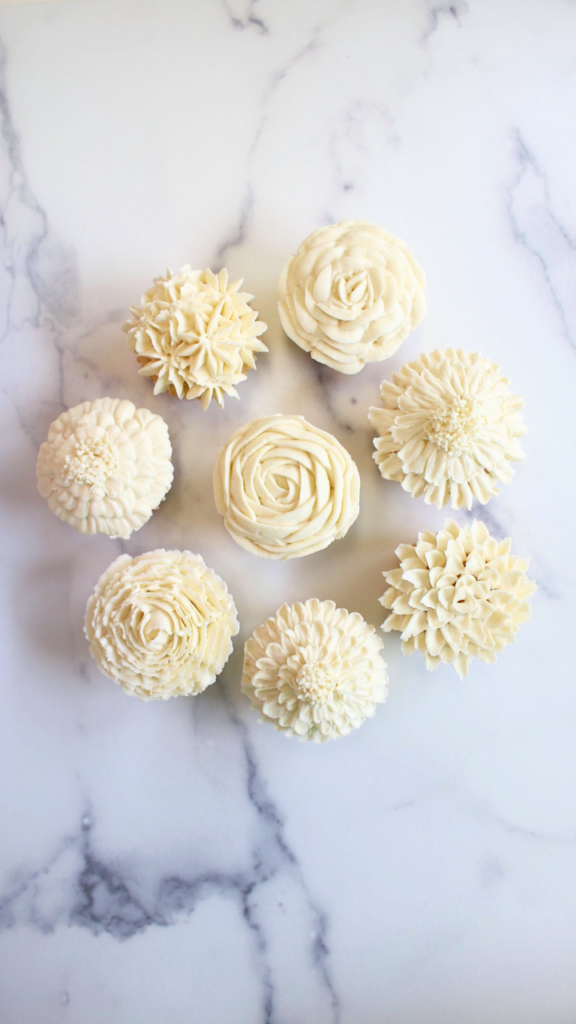
Pretty buttercream flower cupcakes are great for birthdays, weddings, baby showers, receptions, and garden parties!
Buttercream Flower Inspiration
The flowers that inspired these cupcakes are:
- Rose
- Peony
- Calendula
- Chrysanthemum
- Zinnia
- Hydrangea
Please note that 2 of the designs are inspired by flowers and not one specific flower.

Preparation: Pipping Tips and Tools
To pipe pretty buttercream flowers, we’ll need the help of some piping tips! There are 4 piping tips you’ll need to make 8 different buttercream flower designs.
- Ateco closed star tip; This tip makes the traditional swirl you see on decorated cupcakes. We’ll use it to create hydrangeas.
- Ateco petal tip #104: Can create endless amounts of flowers including roses, peonies, and zinnias.
- Wilton grass tip #233: Pipes frosting to look like grass. We’ll use this to fill in the centers of the flowers.
- Ateco curved tip #61: A curved tip to make petals for chrysanthemums.
You’ll also need 2 piping bags. I like using 12-inch piping bags with a coupler. A coupler allows you to switch out piping tips which eliminates using multiple piping bags.
1 piping bag will be for the Ateco closed star tip which is too large for a coupler.
Step #1 Bake Vanilla Cupcakes
- Prep! Preheat the oven to 335℉ (168℃). Add cupcake liners to your muffin pan.
- Make cupcakes. Whisking together the flour, baking powder and salt in a large bowl and set aside.
- Mix. In a stand mixer with a paddle attachment, beat the butter on high speed for 1 minute. Add sugar and beat on high for 2 minutes. Scrape down the sides of the bowl with a rubber spatula. Then, on medium speed, add the eggs 1 at a time. Add vanilla extract and mix until just combined.
- Add dry ingredients. While the mixer is on low speed, add half the dry ingredients and half of the milk and mix. When just incorporated, add the remaining half of the dry ingredients and milk. Stop mixing when just combined.
- Bake. Scoop batter into prepared cupcake liners, about ¾ of the way full. Bake for 25-28 minutes or until a toothpick inserted into the center of the cupcakes comes out clean. Transfer to a wire rack to cool.

Step #2 Make Vanilla Buttercream
One batch of my vanilla buttercream decorates 12 cupcakes, depending on the design. The recipe card shows a double batch of buttercream since piping flowers requires a lot!
I use a 4.5 qt stand mixer. If you have something smaller, divide the buttercream recipe into two.
- Make the buttercream. In a stand mixer with a paddle attachment, beat the softened butter on high speed for 1 minute. Then add 1 cup of powdered sugar and mix on low speed for 30 seconds. Continue to add powdered sugar one cup at a time to avoid mess.
- Mix. While on medium speed, add salt, vanilla extract, and heavy whipping cream and mix for 30 seconds. Then change the speed to low and mix for 5 minutes.
- Test. Dip a spatula into the buttercream. If there is a slight curl at the top, it’s ready but if the buttercream stands straight up, it’s too stiff to use. Add 1 tbsp of additional heavy whipping cream and mix on low. Continue to add whipping cream until you get a slight curl.
- Prepare. Fit a piping bag with the large closed star tip. Prepare a second piping bag with a coupler.
WATCH THE VIDEO
Buttercream Flower Cupcakes Step-by-Step
- Less hand pressure when squeezing the piping bag = delicate petals
- More hand pressure when squeezing the piping bag = thicker petals
Rose/Peony Inspired Buttercream Flowers

Attach a #104 petal tip and point the tapered side up.
While holding the cupcake in your hand, pipe a small base of buttercream in the center of the cupcake.
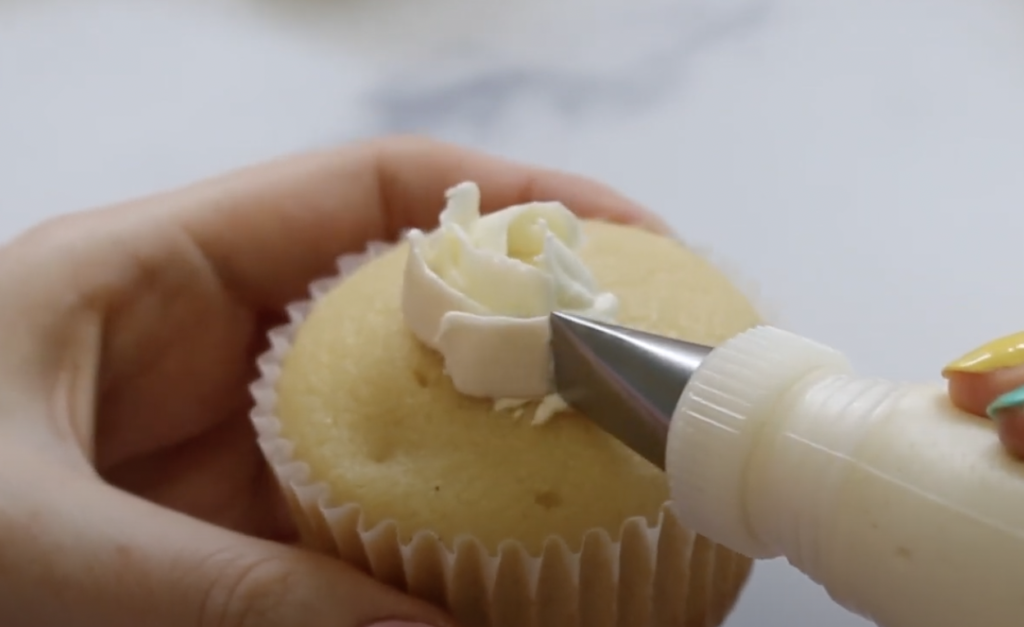
Then, with the tip horizontal to the cupcake, pipe 3 small petals to overlap each other.
Hold the cupcake in your hand and slowly pipe horizontal petals that start in the center of the last piped petal. Do not clean the tip in-between petals. This is going to give a more realistic appearance.
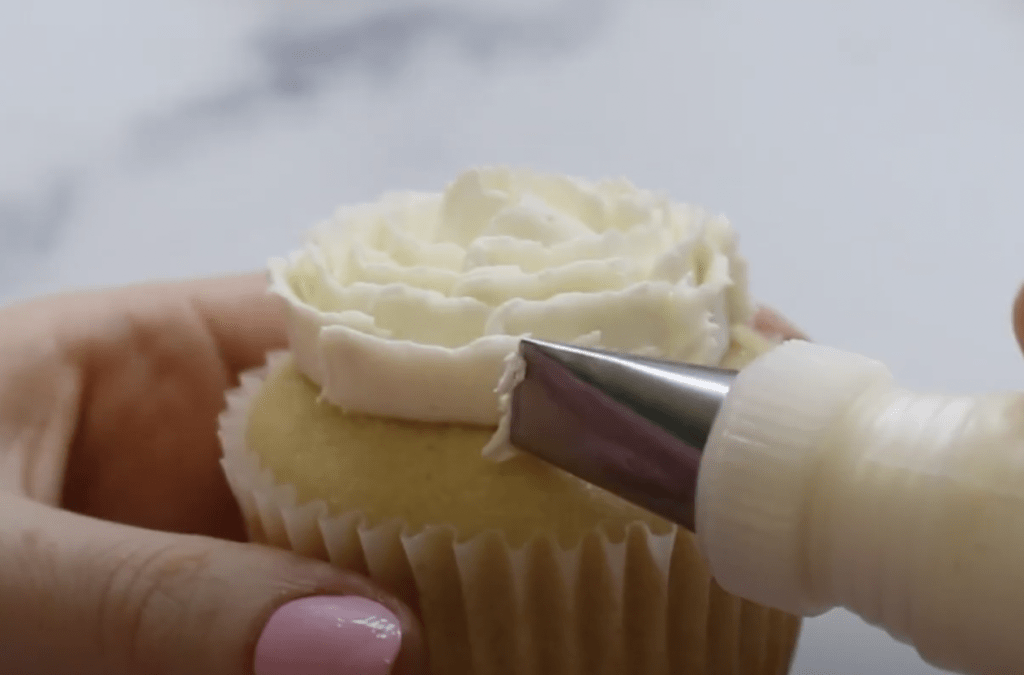
Continue piping overlapping petals while staying horizontal to the cupcake. Once you reach the edge of the cupcake, angle the tip outward to create the look of petals opening, then the cupcake is complete!
Rose Buttercream Flowers


Attach the #104 petal tip to the piping bag and pipe a small base in the center of the cupcake.
Keep the piping tips tapered side pointing up. Pipe three petals that form a tight, triangle shape as shown above. Use more hand pressure to squeeze the buttercream out slightly thicker.

Pipe a few horizontal petals to stabilize the center bud.
Then, angle the tip slightly outwards, squeeze the piping bag slightly harder, and pipe a rainbow shape. This will make the petals looked curved like a rose.


Pipe the same upside-down rainbow motion with the tip pointing outward while turning the cupcake with your hand. To cover up the edges of the cupcake, make sure to pipe petals to the very edge.
Closed Peony Style Buttercream Flowers
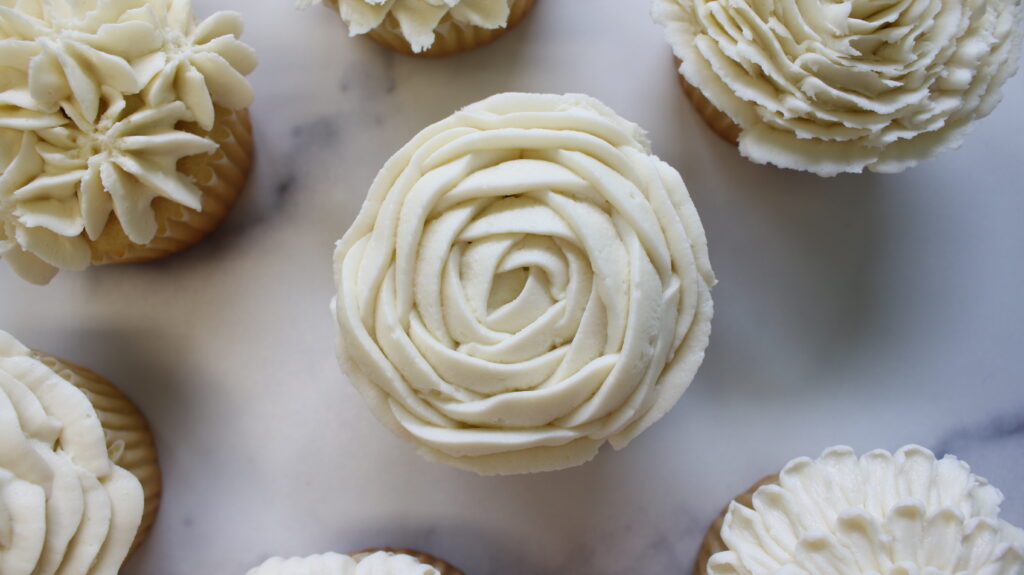


Attach the #104 tip and pipe out a small base of frosting using back and forth motions.
For the center bud we want the petals to lay flat. Firstly, place your tip on the cupcake, pipe a petal and pull the frosting over the base. Then, pipe two more flat petals, slightly overlapping each other but leave a little space in the center.

Continue to pipe the buttercream petals one over the other, pulling the buttercream across in flat, downwards motions. This creates a closed appearance like a peony before it blooms.
If you turn the cupcake slowly with your hand, then it will make piping much easier than decorating a cupcake sitting on the table. This is because turning the cupcake gives you more control!

When you start to get towards the edge of the cupcake, you’ll notice the sides are thicker and higher than the center which is what we want! Higher sides makes the center of the peony look more enclosed just like the real flower.
As seen above, your petals may be longer in length, which is okay once you get to the last layer of petals!
Calendula Inspired Buttercream Flowers
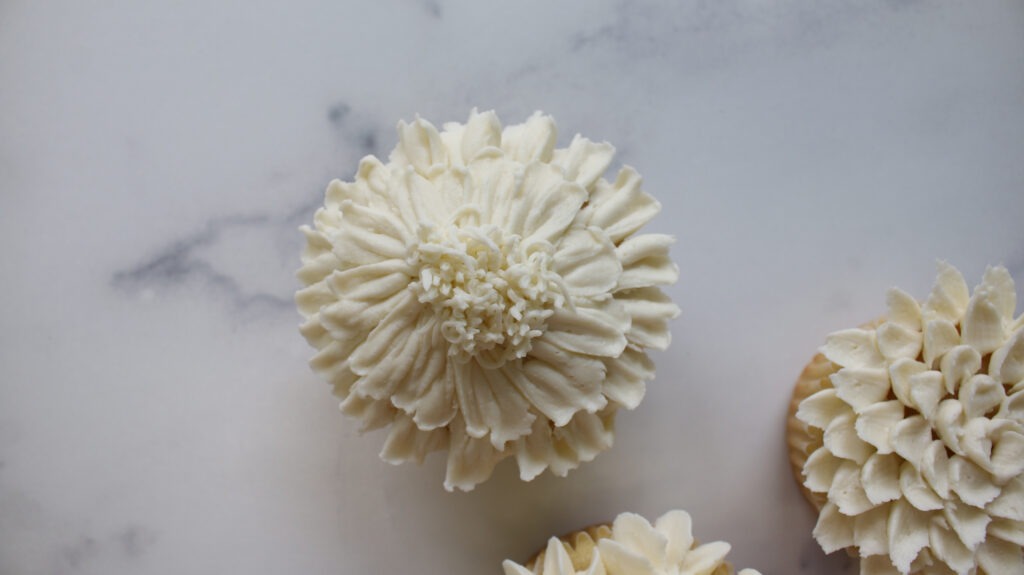
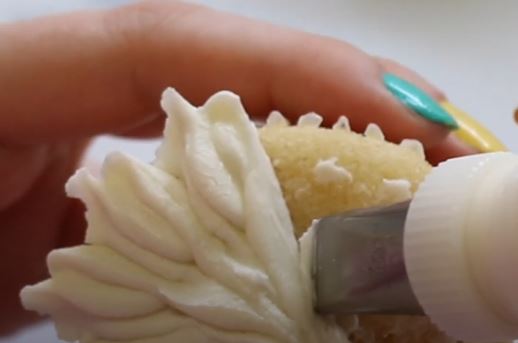
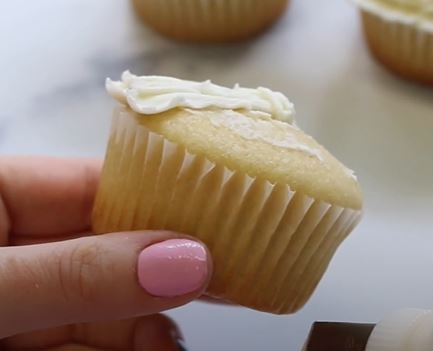
Attach the #104 petal tip and keep the tapered pointing out. Start in the center of the cupcake and keep the tip touching the cake. Squeeze the piping bag while pulling the buttercream up to the edge of the cupcake. Once at the top, create a heart motion and pull the buttercream down back toward the center.
We want the first layer of petals to be as thin as possible because we are building it up with another layer of petals. To keep the petals thin, use the piping tip to really push the icing flat against the cupcake as you pipe.
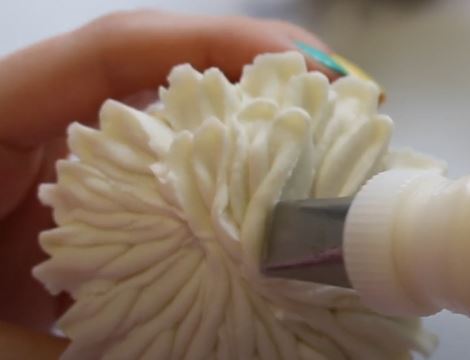
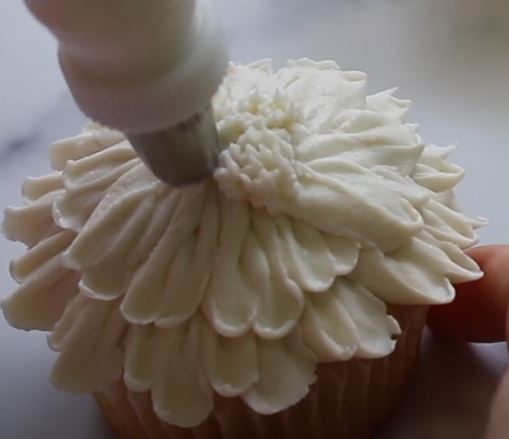
Pipe a second layer of petals by starting in the center of the cupcake, piping buttercream and creating a heart motion before pulling the buttercream back down. Make sure that these petals don’t go to the edge of the cupcake so we can still see the first layer of petals.
Remove the #104 tip and replace it with the grass tip, then pipe straight down onto the center of the flower.
Chrysanthemum Inspired Buttercream Flowers
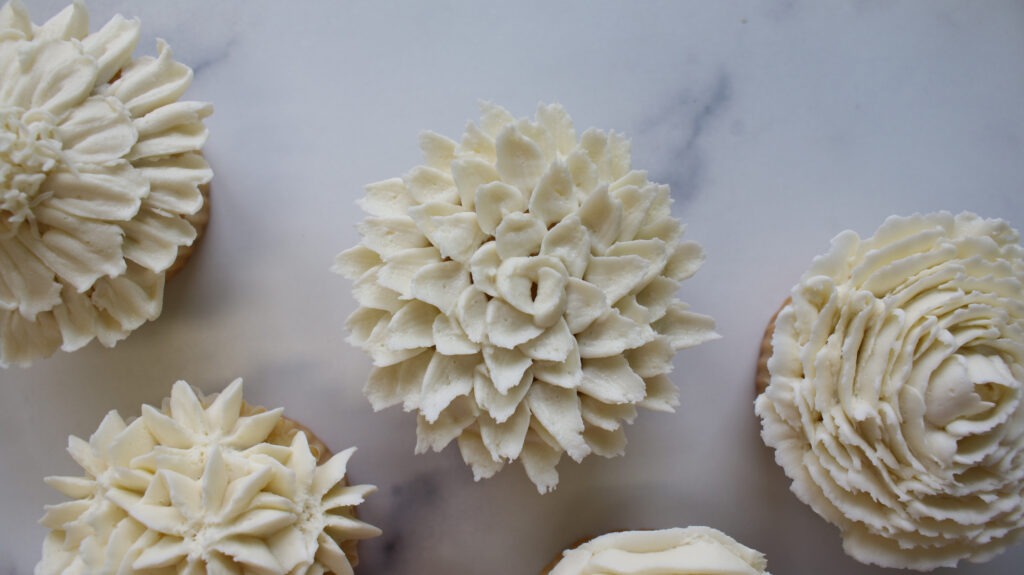


Firstly, attach the curved #61 tip. Then, angle the tip outwards and start by pipe icing around the outside edge. After you pipe a petal and begin to pull the tip away, loosen your grip and stop pushing out buttercream to make the petals look pointy. Since we are using a crusting buttercream, it will support the gravity of the petals standing up.


Repeat the same technique for our second layer of petals. Make sure you pipe the petals slightly smaller so you can still see the first set of petals. Continue with the same process for a third row of petals.

Add a fourth row of petals. This design is fairly simple but requires many little petals! Finally, add the center petals to the cupcake and make sure they are even smaller!
Zinnia Buttercream Flowers
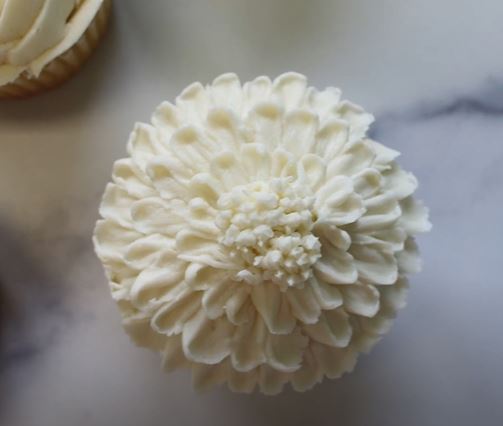

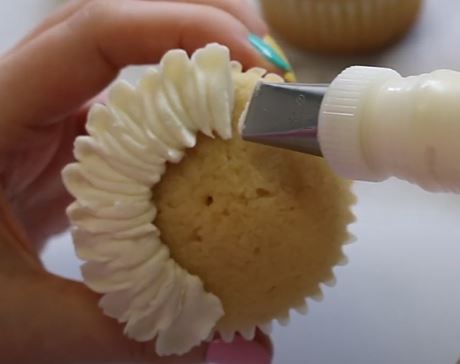
Begin by attaching the #104 tip with the tapered side pointing outwards. Then, create tiny petals using a quick up and down motion making sure the petals are piped without any gaps.
Continue to pipe the petals around the edge of the cupcake but leave the center of the cupcake open.
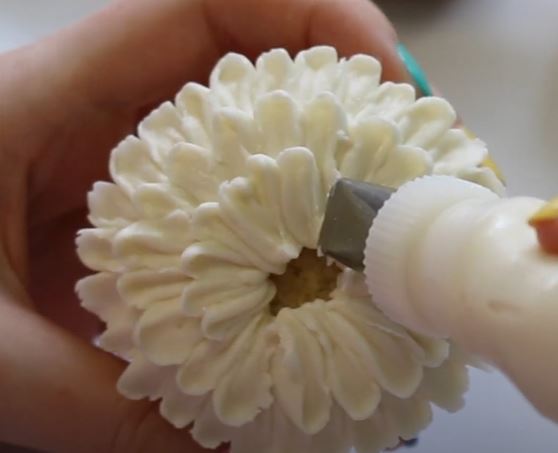
Once you finish piping the first petals, we are going to add a second row of petals while continuing to leave a small hole in the center.
Add one last layer of small petals but still continue to leave space in the center for our grass tip.
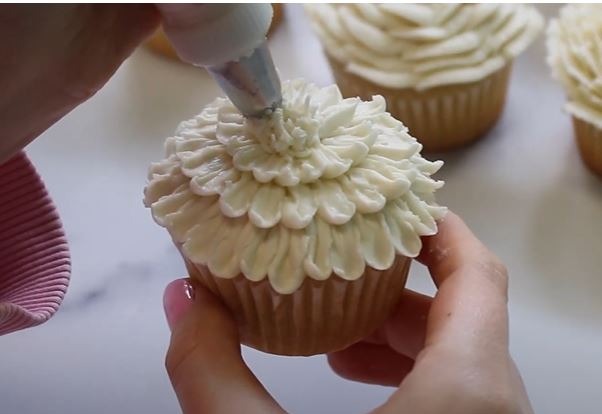
As shown above in step 5, switch out the petal tip with a grass tip. Now that the petals are done, pipe the center bud by gently squeezing the piping bag.
Hydrangea Buttercream Flowers


Attach a closed star tip to a piping bag. Hold the cupcake in your hand and push the buttercream firmly onto the cupcake so we can keep the star shape flatter.

Pipe six flowers around the edge of the cupcake. Then, finish the design by adding two flowers to the center.
Zinnia Inspired Buttercream Flowers
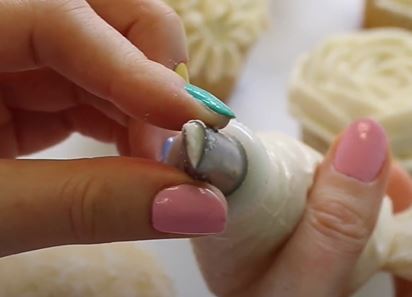
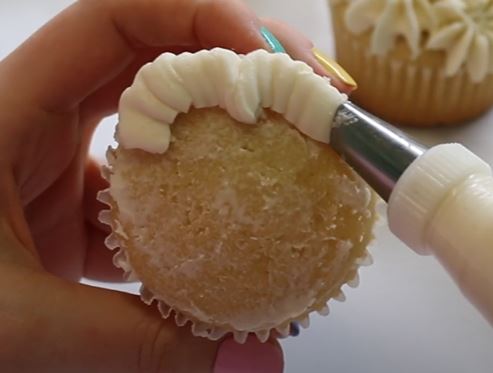
Attach the #104 petal tip and keep the tapered side pointing down.
To create petals pipe on the edge of the cupcake, quickly moving the tip up and down to make ruffles. We also want the petals to be slightly curved, so much sure to pipe the buttercream in a rainbow shape.
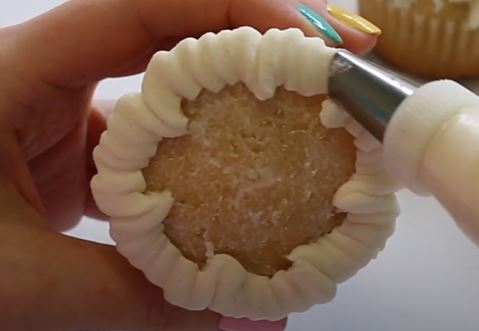
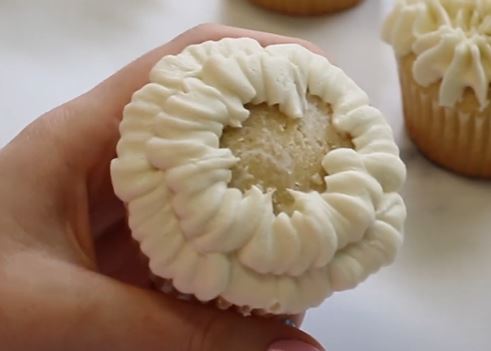
Create the same two motions by piping petals all around the edge of the cupcake.
Once the first layer of petals is piped, repeat for a second layer of petals but make them slightly smaller so we can still see the first petals.
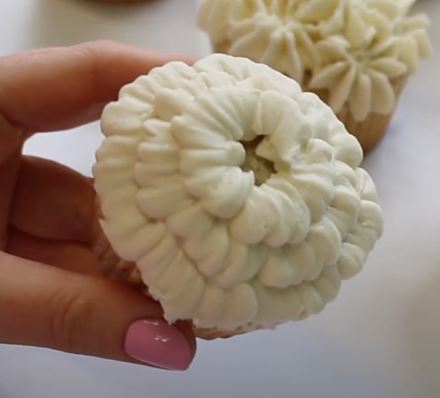
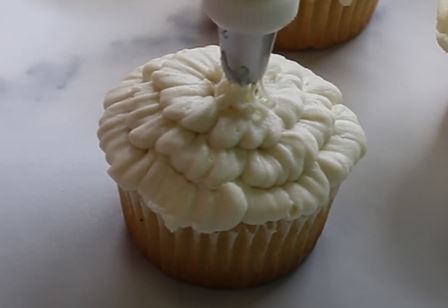
Repeat the same motion to make the 3rd row of petals. Finally, attach the grass tip to add buttercream to the center.
Overall, these designs are not overly complicated but it may take some practice if you are new to piping petals. That’s okay!
In time, with practice you’ll get the hang of it. There are so many designs that you can make, and the best part is that you can get creative and come up with your own designs!
Storing
Undecorated or decorated cupcakes can be frozen in airtight containers for up to a month. Decorated cupcakes are good for 5 days at room temperature in an airtight container.
RECIPE CARD
Vanilla Buttercream Flower Cupcakes
Equipment
- Stand mixer with paddle attachment or handheld mixer
Ingredients
Vanilla Cupcakes
- 3 cups all-purpose flour (360g)
- 2 tsp baking powder
- 1/2 tsp salt
- 1 cup unsalted butter at room temperature (2 sticks or 226g)
- 2 cups granulated sugar (400g)
- 3 eggs at room temperature
- 2 tsp pure vanilla extract
- 1 ½ cups whole milk at room temperature (370ml or 12oz)
Vanilla Buttercream
- 2 cups unsalted butter at room temperature (452g)
- 7 ½ cups powdered sugar (confectioners sugar) (938g)
- 1 tsp salt
- 1 tbsp pure vanilla extract or vanilla paste
- ¼ cup heavy whipping cream (or whole milk) (2oz)
Instructions
Vanilla Cupcakes
- Preheat the oven to 335℉ (168℃). Prepare your pan with cupcake liners.
- In a large bowl, whisk together the flour, baking powder and salt. Set aside.
- In a stand mixer with a paddle attachment or a handheld mixer, beat the butter on high speed for 1 minute. Add sugar and beat on high speed for 2 minutes. Scrape down the sides of the bowl with a rubber spatula.
- On medium speed, add the eggs 1 at a time, mixing in-between additions. Add vanilla extract and mix until just combined.
- Turn the mixer on low speed and add half the dry ingredients and half of the milk. When just incorporated, add the remaining half of the dry ingredients and milk. Stop mixing when just combined.
- Scoop batter into prepared cupcake liners, about ¾ of the way full. Bake for 28-32 minutes or until a toothpick inserted into the center of the cupcakes comes out clean. Transfer to a wire rack to cool.
Vanilla Buttercream
- In a stand mixer with a paddle attachment or handheld mixer, beat the butter on high speed for 1 minute.
- Add 1 cup of powdered sugar and mix on low for 30 seconds. Continue to add powdered sugar one cup at a time. (Cover your stand mixer with a dishtowel while mixing to avoid mess). After all the powdered sugar is all added, scrape down the bowl with a spatula.
- Add salt, vanilla extract, and heavy whipping cream and mix on medium speed for 30 seconds.
- Change the speed to low and mix for 5 minutes. After 5 minutes, dip a spatula into the buttercream. If there is a slight curl at the top, it's ready. If the buttercream stands straight up, it's too stiff. Add 1 tbsp of additional heavy whipping cream and mix on low. Continue to add whipping cream until you get a slight curl.
Notes
- Cake batter: Stop mixing cake batter as soon as it’s combined. Over-mixed batter results in dense and rubbery cupcakes.
- 4.5 qt Stand mixer: A double batch of buttercream can fit in a 4.5 qt stand mixer. Anything smaller than that and you have to divide the buttercream recipe in half.
- Buttercream: Make buttercream while the cupcakes cool to save time. When not using the buttercream, cover the bowl with a damp paper towel to prevent crusting.
- Crusting: This buttercream crusts once dried so place a damp towel over the bowl while not using.
- Decorate: Be patient and keep trying! Making flowers takes lots of practice. Scrape off the buttercream and try again.
- Tools to bake great cakes and smooth buttercream: USA Bakeware 12- Cavity Muffin Pan | Stand Mixer or Handheld Mixer | Piping Bags | Rubber Spatula | Digital Scale | Couplers |


the instructions for each flower was nice to see thanks