Bunny Crown Cake

Bunny Crown Cake
A bunny crown cake is a springtime celebration whether for Easter or a party! Learn how to decorate a bunny cake – two ways! Follow step by step tips for making a buttercream crown or a crown of real flowers.
This site uses affiliate links which may result in a small commission at no cost to you. Thanks for supporting Midwest & Wonder!
Bunny Crown Cake Ideas
Bunnies are the cutest things! Because I like rabbits so much, I couldn’t really decide on just one design. This post will show you how to make two fun designs and you can decide which suits your party!
Design #1 is a minimalistic floral crown made using real flowers (plus find some information about how to safely use flowers).
Design #2 is an easy crown design using buttercream.
How To Get Started
Whether you pick design #1 or #2, both require making fondant bunny ears and feet. You’ll need fondant, AmeriColor soft pink food gel, and super black to dye buttercream for the bunny face. You’ll need skewers for the fondant ears, a food safe paintbrush to wet fondant pieces to attach together and a Wilton 1A tip to cut-out the little pink fondant toes.
You can download and print the template I made below!
Watch The Video
Step #1: Prepare The Fondant
Before we start decorating the cake we need the fondant pieces to be fully dry so they will stay on the cake.
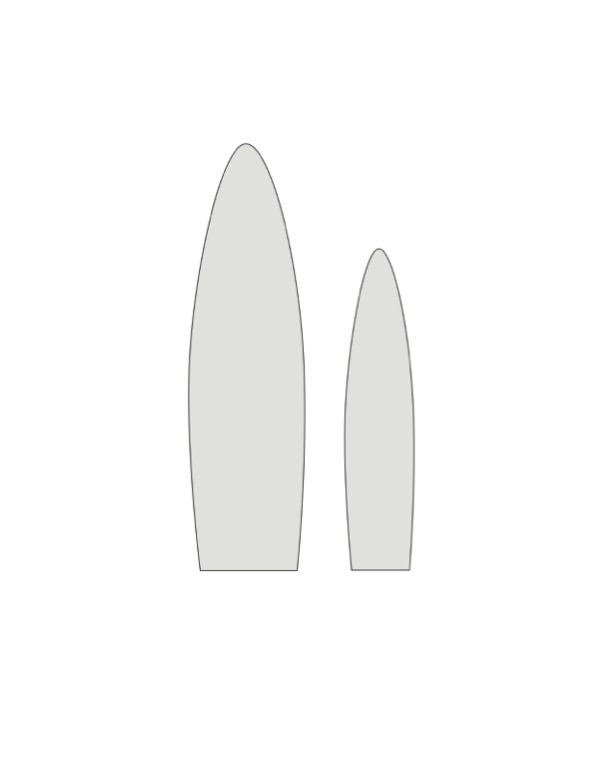
Bunny Ears


- Roll out fondant to 1/4-inch thick with a fondant roller. Place the printable cut out on the fondant and cut around with a knife.
- Use you fingers to smooth any jagged edges.


- Roll a new ball of fondant. Put one drop of pink food dye. Knead the fondant until it’s completely pink, you can wear gloves to avoid mess.
- Roll out the pink fondant to slightly less than 1/4-inch thick. Place the smaller inner ear cut-out on the fondant. Cut around the paper stencil using a knife and gently remove the extra fondant.


- Lay a skewer in the middle of the white fondant and gently press the skewer down. Lightly brush room temperature water on the fondant around the skewer (the water acts as the glue).
- Center the pink ear over the skewer – you do not need to press together as the water will bind (Optional, curl an ear when the fondant is still soft. Place the paint brush behind the curl so it will dry in this shape.
Bunny Feet

- Take a piece of fondant and cut it into two even parts then roll each part into round balls. Flatten each ball with the palm of your hand so they are about 1/2-inch thick.
- Using a butter knife, make an angular cut about 1/3 of the way to the center.
- Make another angular cut so that it looks like a triangle in-between the two cuts. Using your fingers, lightly round out the sharp edges and gently mold the fondant to make the foot slightly oval.


- Roll out the left over pink fondant until its less than 1/4-inch thick. Using a Wilton 1A tip (or any large round tip) press the largest end into the fondant and cut-out 2 circles. Then, use the same tip, but the smaller hole to cut-out 6 circles.
- Gently use your fingers to mold the larger two circles to make them slightly more oval.
- Lightly wet the paint brush and brush the center of the fondant foot. Place on the larger pink oval.
- Lightly brush water over the “toes” and add the smaller pink circles. Let both the fondant ears and feet dry overnight or longer.
Step #2: Bake Your Cake & Make Frosting
Please prepare any cake that suits your party! I went with a carrot cake – you know rabbits, carrots. If you’d like to make a carrot cake, I suggest using this recipe! I am working on cake recipes that I hope to share soon! This is a 6-inch cake cake with cream cheese filling.

- Put down a board (the size depends on the size of your cake) onto a turntable, then put down your first cake layer. Add cream cheese filling onto the first layer. Carefully place your second cake layer and add spread on cream cheese filling.
- Put your third layer on top of the last layer.


- Add buttercream to the outside of the cake using a knife or spatula. Use a bench scraper to evenly spread out buttercream. It doesn’t have to be perfect because this is the crumb coat. Place the cake in the refrigerator for 5 minutes.
- Take the chilled cake out of the fridge and add more buttercream, and use your bench scraper to smooth.
****Save leftover buttercream to dye black and pink for the bunny face.***
Step #3: Assemble The Bunny
- Add 1 tbsp of buttercream into a bowl and add 1 drop super black dye and mix.
- Add 1 tbsp of buttercream into a bowl and add 1 tiny drop soft pink and mix.
- Scoop buttercream into piping bags and cut a small hole across the tip of the bag.


- Carefully add the fondant ears by gently pushing down the wooden skewer (I eyeballed this but you can use a ruler to determine the spacing in-between the ears.
- Use a toothpick to gently outline the eyes and then pipe on the eyes (and eyelashes) with black buttercream. Add a heart nose with pink buttercream.
- Add a small amount of buttercream on the back of the fondant feet. Gently press the feet onto the cake.
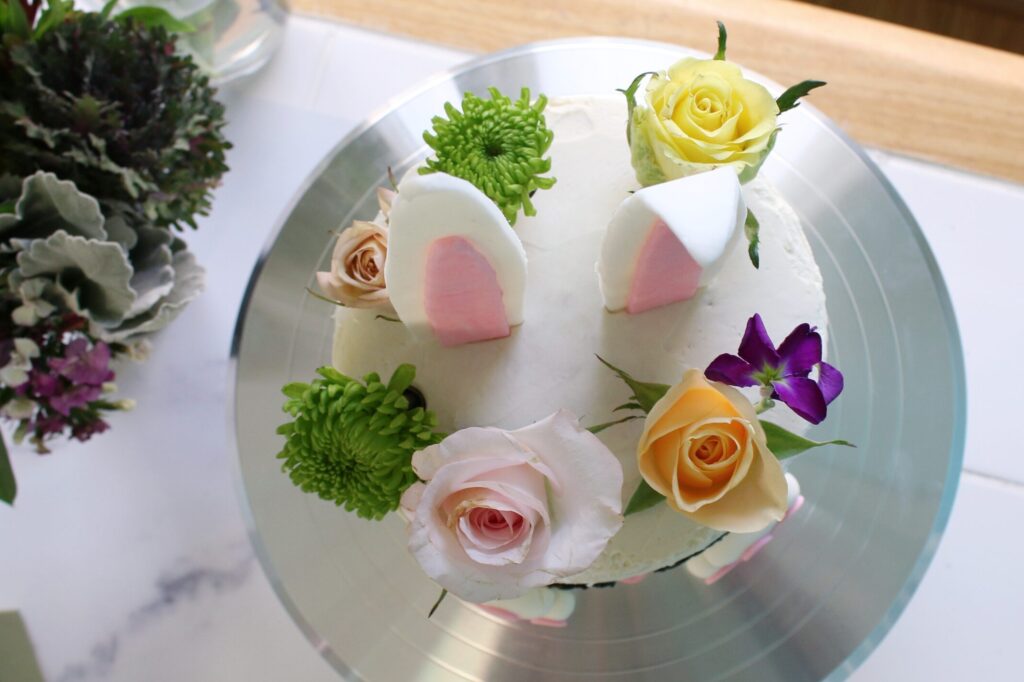

Design #1: Floral Crown
Adding real flowers to edible cakes is a bit tricky to navigate when you first start. What’s important to know is that not all flowers are edible and many grocery store flowers are sprayed with pesticides and can leak not great things into your cake.
Flower Safety
To make sure your flowers are prepared safely for adding to a cake, you’ll need floral tape in either white or green. Wrapping the stems in floral tape helps prevent any liquids that might leak into the cake. You’ll also need bubble tea straws which we push into the cake for the wrapped flower stems to sit. I’m using clear in this post, but colored straws do make it easier to see when cutting into the cake (especially if you’re a home baker who sells cakes to others!).
Lastly, you’ll need flowers of your choice! This website is a great resource, and this one is great too! I get flowers from a local shop that I trust but I always choose to be on the safe side and wrap stems with floral tape.
- Prepare your flowers by washing, removing leaves, and using sheers to cut stems short.
- Cut a piece of floral tape and stretch it to activate stickiness. Wrap stems completely by using floral tape.


- Cut your bubble tea straws in half. Gently push one into the top of the cake all the way down so you cannot see the straw. Add a flower into the bubble tea straw.
- Continue the same process until you are happy with your design, you can even put more than one stem in a straw if it fits – this is a good way to limit the amount of straws you use.
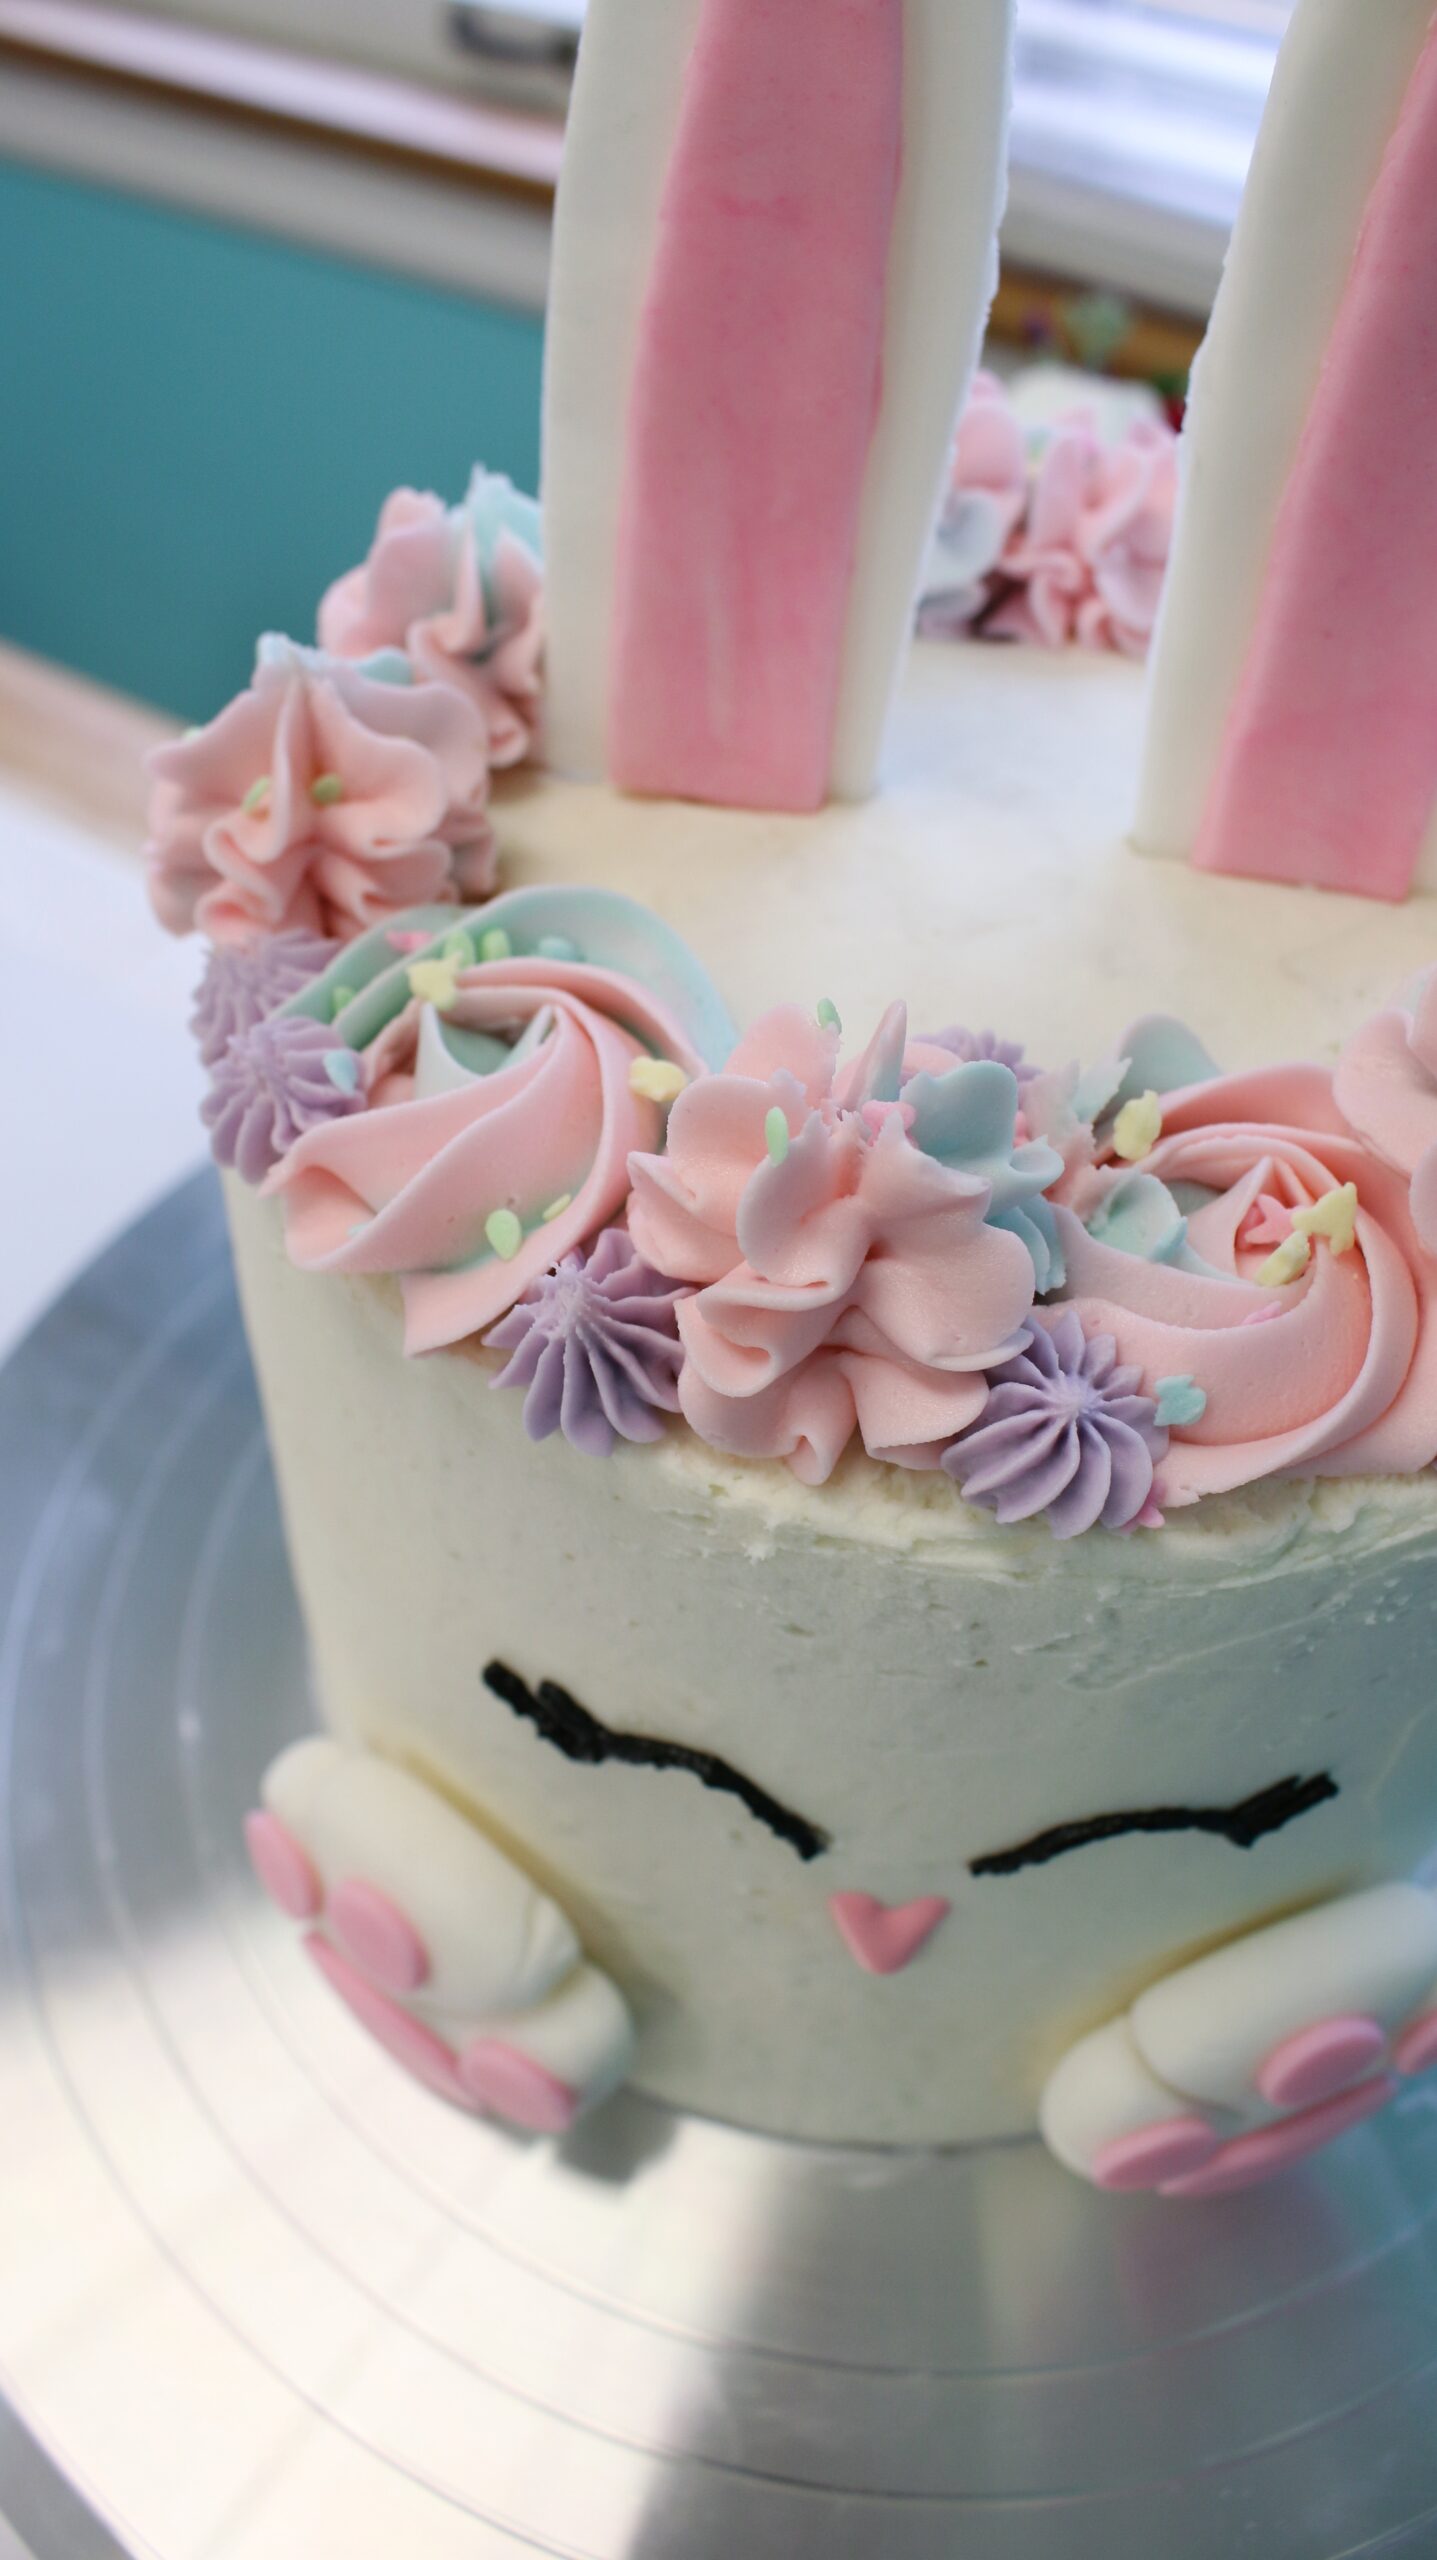
Design #2: Buttercream Crown
To make a buttercream crown, you’ll need a few piping tips. Using two types of tips will create a more interesting crown, but if you only want to use one piping tip, I recommend the Wilton 1M tip. This tip is versatile and makes rose swirls as well as dollops (shown in the picture above)!
I’m using my easy American buttercream recipe to pipe the crown. Divide it into three bowls, and use AmeriColor soft pink, AmeriColor sky blue, and Americolor electric purple to dye it.
Prepare a piping bag fitted with the Wilton #32 open star tip and scoop the pastel purple buttercream into it.
Prepare another piping bag with the Wilton 1M tip. For two-toned icing, use a spatula to press the pink icing onto one side of the bag, then add the blue icing.
To add the final touch, sprinkle the crown with pastel sprinkles.

- Make rosettes with the 1M tip by starting the swirl and swirling outwards. To make tall dollops, pipe straight down onto the cake, gently lift the bag and then pipe down adding pressing. Do this a few times to get high dollops.
- Continue to add dollops and rosettes around the border of the cake to make a crown.
- Add the purple buttercream in various places and to cover gaps. Sprinkle pastel sprinkles on the buttercream before it hardens.


