Valentine’s Bee Mine Sugar Cookies
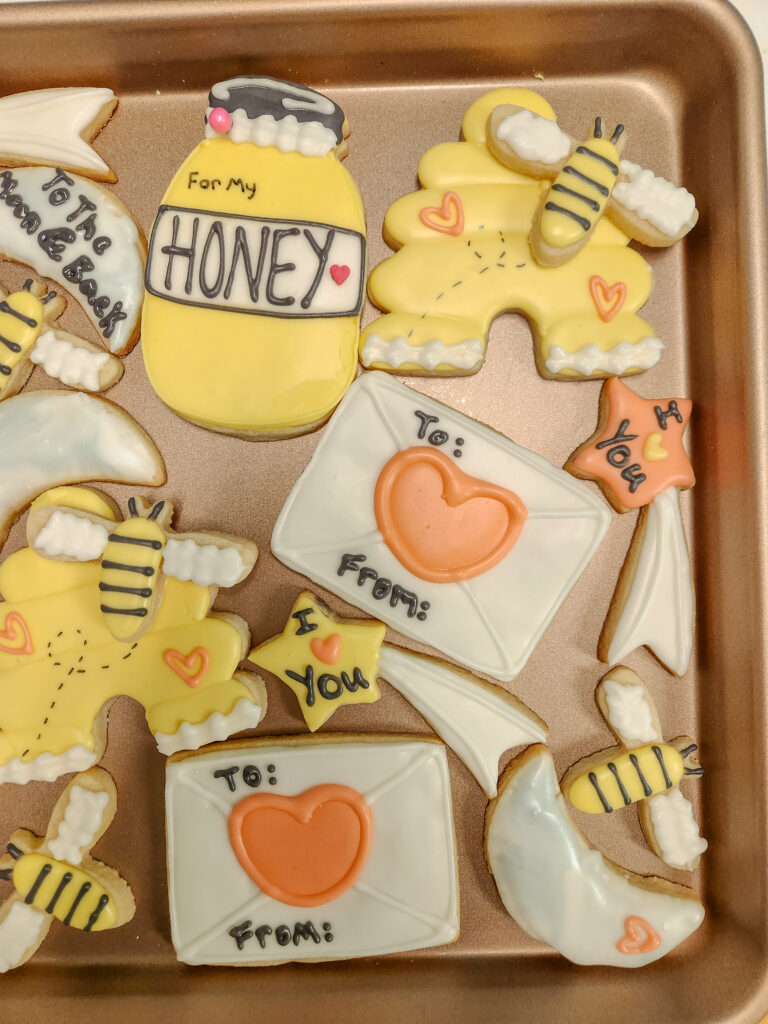
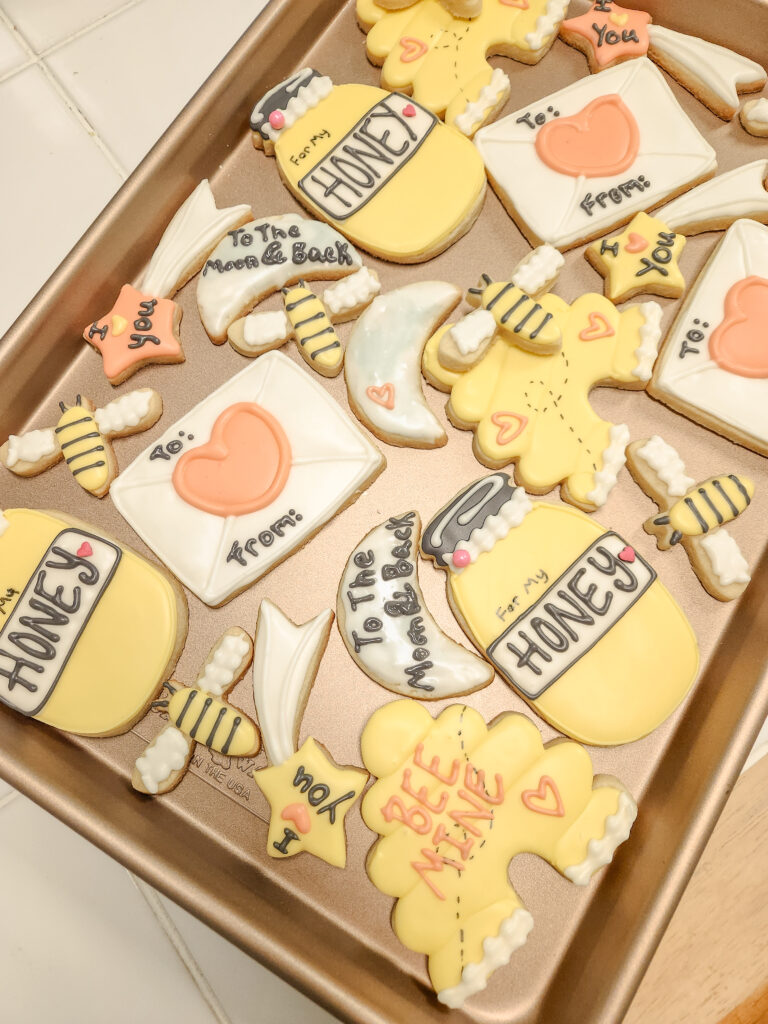
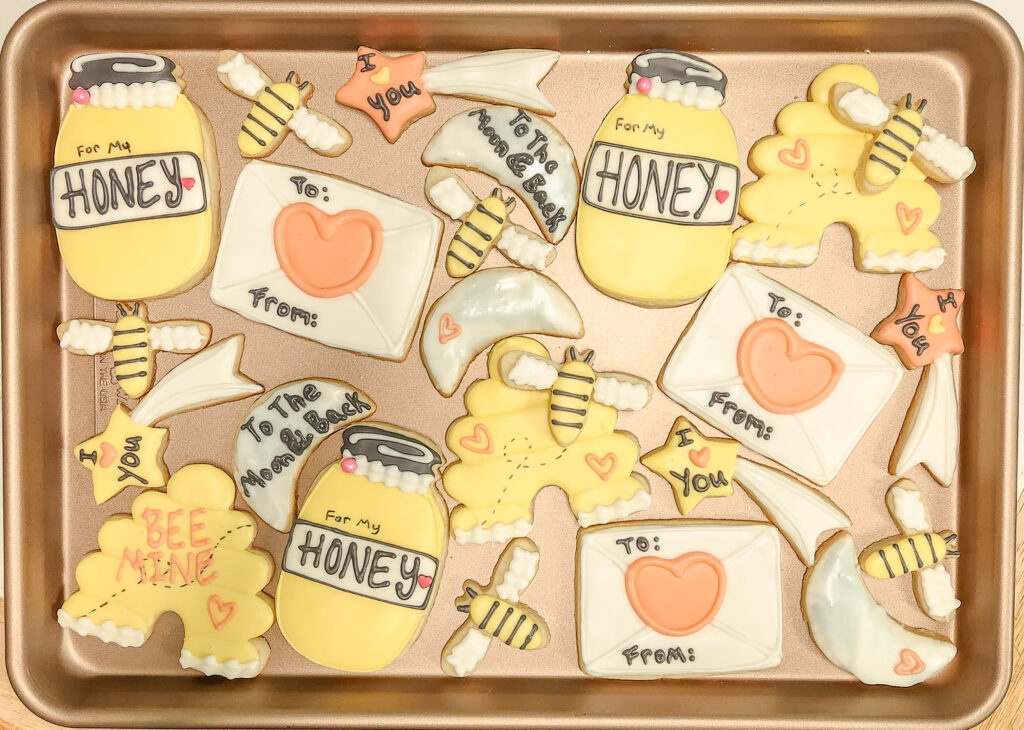
Want to make Valentine’s Sugar Cookies for your honey? This Valentine’s bee mine sugar cookies set is themed around love and bees! You’re the bees knees!
This site uses affiliate links which may result in a small commission at no cost to you. Thanks for supporting Midwest & Wonder!
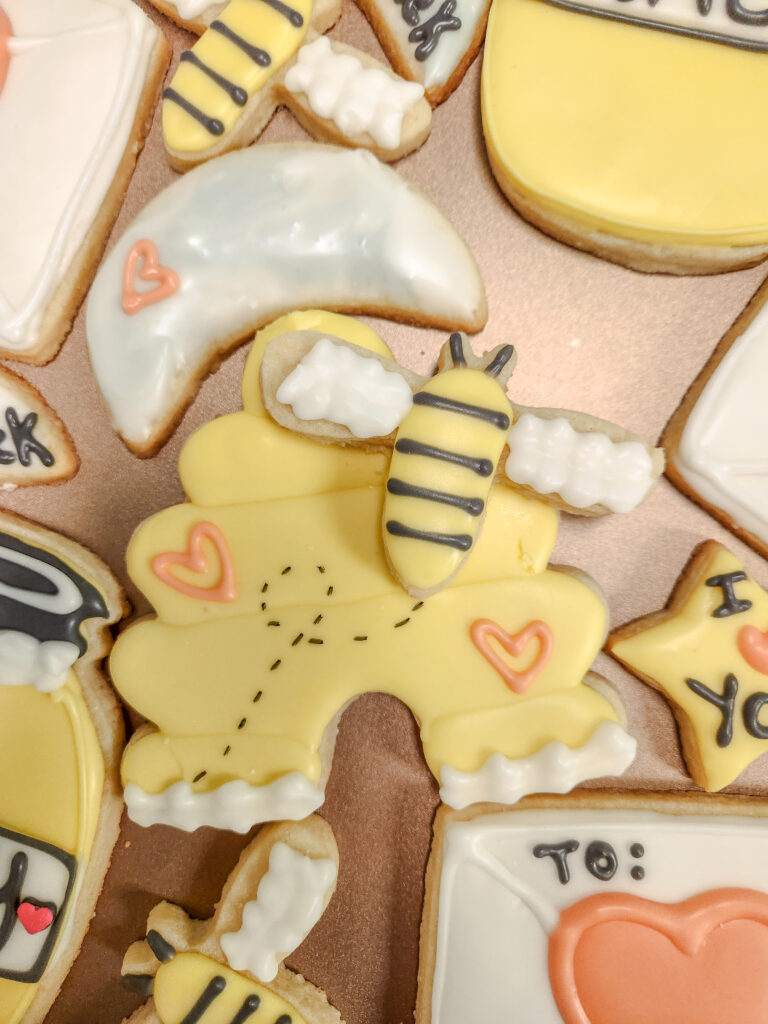
Tools To Get You Started
There are 6 cookie cutters I used to make these Valentine’s sugar cookies. Using metal cookie cutters will give sharp, clean cuts and are easy to clean! If I can find a shape in a metal cutter, I’ll buy that instead of a plastic one.
Cookie cutters: Mason Jar, Love Mail, Bee, Beehive, Shooting Star, and a Moon
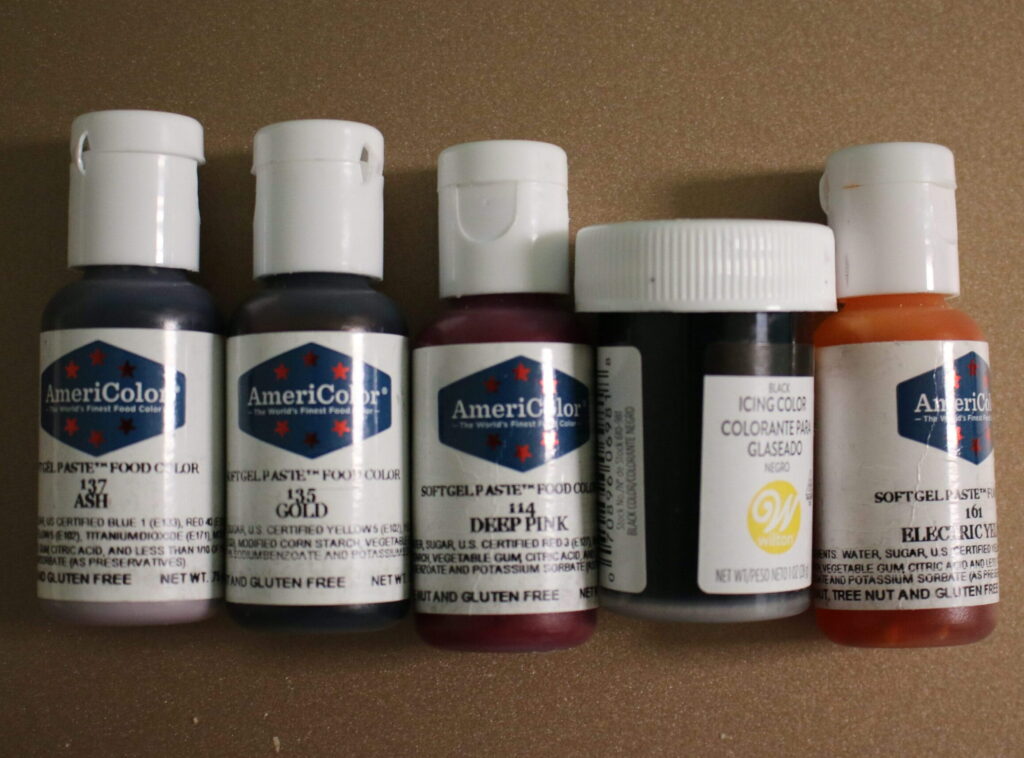
There are 5 gel food colorings used for this set. When dying royal icing, it’s much easier to use gel food coloring. Liquid food coloring will add unnecessary liquid to your frosting which can change the consistency. Another tip is to always add less drops of color instead of more. Over time, royal icing will deepen with color so it’s helpful to make cookies a day ahead!
The AmeriColor Gel food coloring I used: Ash, Gold, Deep Pink, and Electric Yellow
I ran out of AmeriColor super black dye, so I used a Wilton black icing color which I had on hand. It’s good in a pinch, but I prefer Americolor gel dyes.
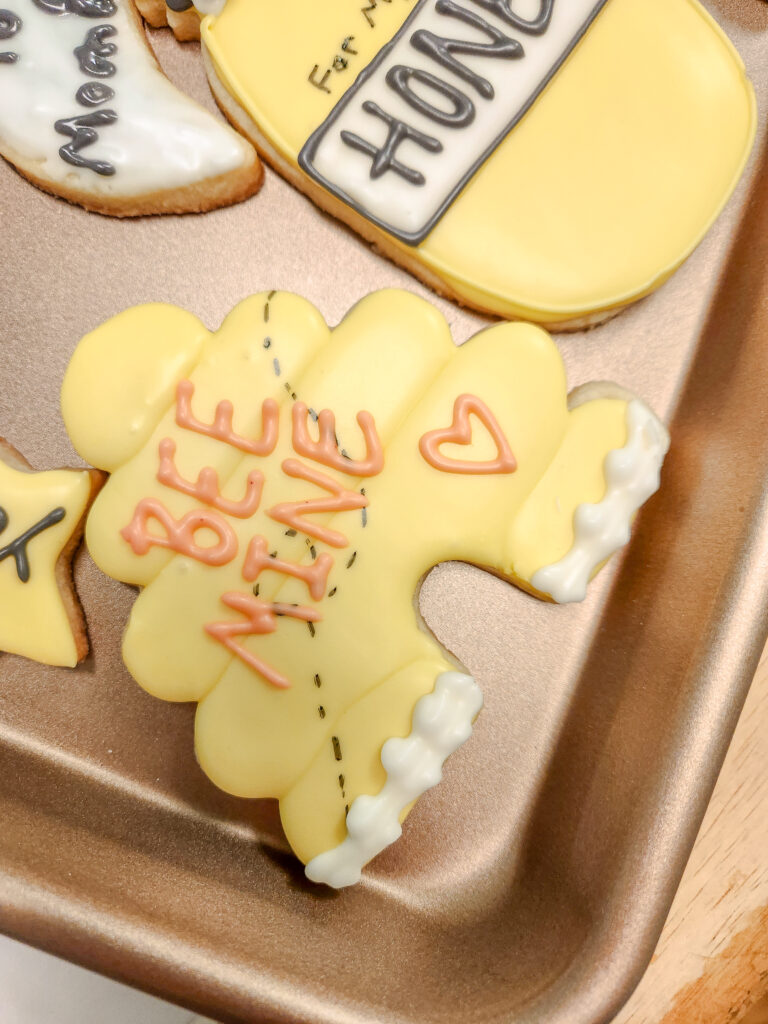
To pipe these bee mine sugar cookies, we’ll be using mostly tip-less piping bags. This is when you cut the tip off a piping bag and don’t add any metal tips. For the beehive cookies and little bees, you will need to use a leaf tip to make ruffles with stiff consistency icing (see picture above).
To draw on bee lines on the beehives, we’ll be using an edible food marker which really completes the details!
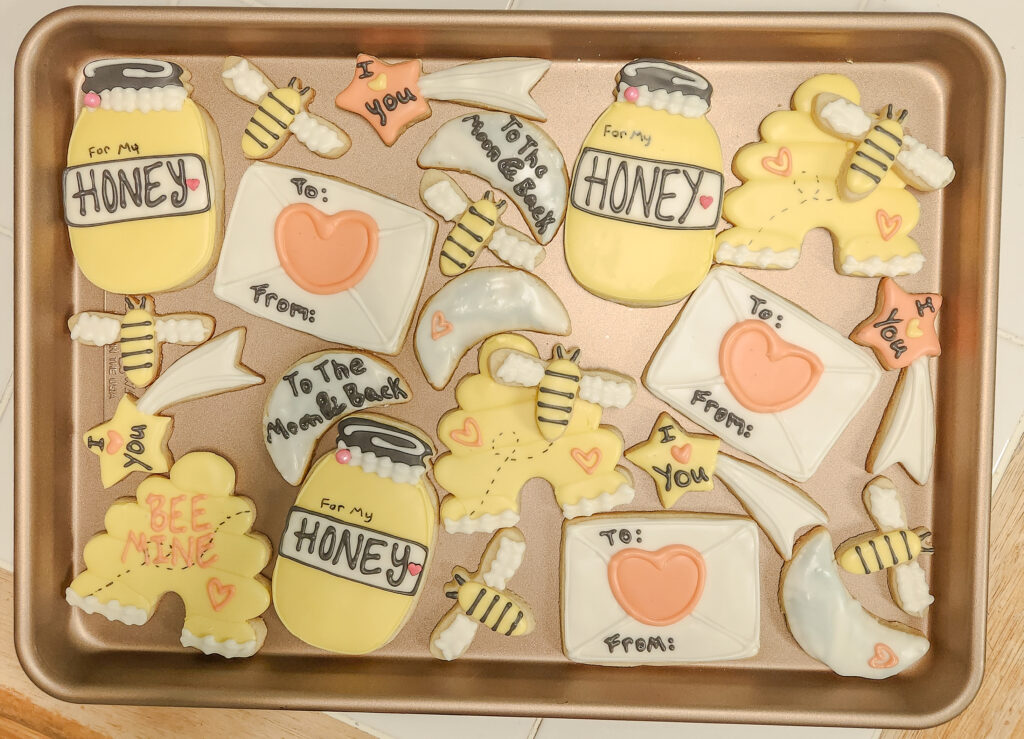
Step 1: Bake Sugar Cookies
Start by gathering your ingredients for my soft cut-out sugar cookie recipe. Let the butter and egg reach room temperature. This sugar cookie dough should be chilled for at least half an hour, so make sure you plan enough time for baking and decorating.
Helpful Tip: You can make the dough ahead of time and then bake the cookies and decorate the next day! Dividing up the baking and decorating can be super helpful.
When you’re ready to bake, roll out the sugar cookie dough and use your cookie cutters to cut out shapes. Place the cookies onto lined baking trays with parchment paper or silicone baking mats and bake cookies according to their size (3-4inch cookies bake 9-10 mins, and cookies less than 3inches bake 7-8 minutes).
Step 2: Royal Icing Prep
While cookies cool make royal icing. I use my easy two ingredient royal icing recipe. You can also make royal icing a day ahead and keep it in the refrigerator in an airtight container. Just give it a stir before using.
Follow the steps below to get the exact icing colors and consistency. There is a color chart for reference.
- Make royal icing.
- Transfer 1/2 cup of icing into a piping bag and set aside.
- Transfer 1/2 cup of icing into a shallow bowl and cover with a damp paper towel or dish towel, set aside.
- Transfer 1/4 cup icing into a separate bowl and add 2 drops of ash food coloring. Mix and pour into the shallow bowl in step 3. Use a toothpick or knife to gently swirl the white and ash icing together. This icing will marble the moon cookies, so don’t mix the colors too much. Cover the bowl and set aside.
- Transfer 1/2 cup of icing into a separate bowl. Add 30 grams or 1/4 cup powdered sugar and mix well with a spatula. We add powdered sugar to make stiff consistency icing to pipe the ruffles on the beehive and the bee wings. (Refer to the image above)
- Prepare a piping bag with a leaf tip. Transfer 1/4 cup of the stiff consistency icing from step 5 to a piping bag and set aside.
- To the other half of the stiff consistency icing, add 3-4 drops of black food dye and mix. Transfer to another piping bag and set aside.
Icing Chart:
| ICING COLOR + CONSISTENCY | PIPING BAGS | COLOR | |
| White medium consistency icing | 1 tip-less bag | ||
| White stiff consistency icing | 1 piping bag with leaf tip | ||
| Black stiff consistency icing | 1 tip-less bag (cut a very small hole for writing) | 3-4 drops black | |
| Ash medium consistency icing | In a shallow bowl with white icing for marbling | 2 drops ash | |
| White medium consistency icing | In a shallow bowl with ash icing for marbling | ||
| Yellow medium consistency icing | 1 tip-less bag | 2 drops gold + 4 drops electric yellow | |
| Peach medium consistency icing | 1 tip-less bag | 2 drops deep pink |
To make colors more cohesive, there is a little bit of color theory we can apply. You can mix colors in the same bowl without cleaning in-between! This trick has not only saves time, but this makes a cookie set cohesive by having a similar hue.
- With the remaining icing in your stand mixer bowl, add 2 drops gold and 4 drops electric yellow food gel and mix thoroughly.
- Transfer 1 cup of yellow icing to a piping bag and set aside.
- In the same bowl, add 2 drops of deep pink food gel dye to the icing and mix thoroughly.
- Add 1/2 cup to a piping bag and set aside.
This mixing bowl method works as long as you mix your icing thoroughly. I do not recommend using the mixing bowl method when you want true colors.
WATCH THE VIDEO
Sugar Cookie Decorating Tips
- Rotate which cookies you decorate while other cookies dry to save time.
- Cover your icing with a damp paper towel or kitchen towel when not in use to prevent crusting.
- You let royal icing dry for a few minutes so it can form a crust. It’s still very delicate but that thin crusted surface can help prevent colors from bleeding.
Love Mail Cookies
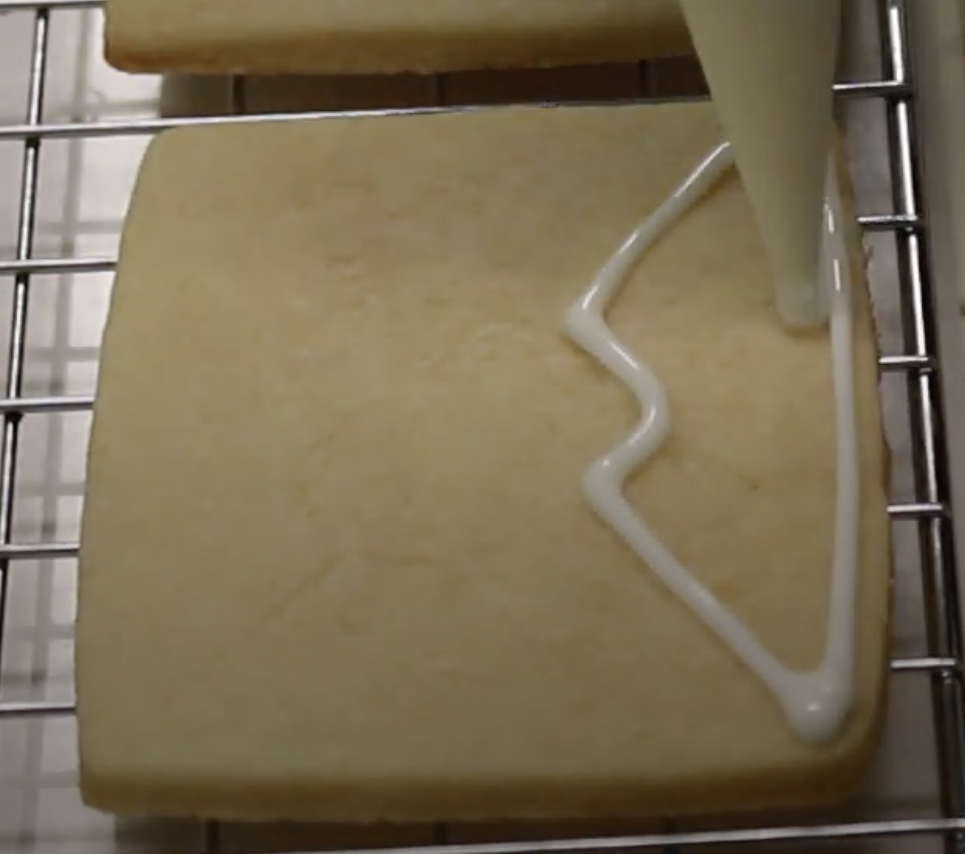
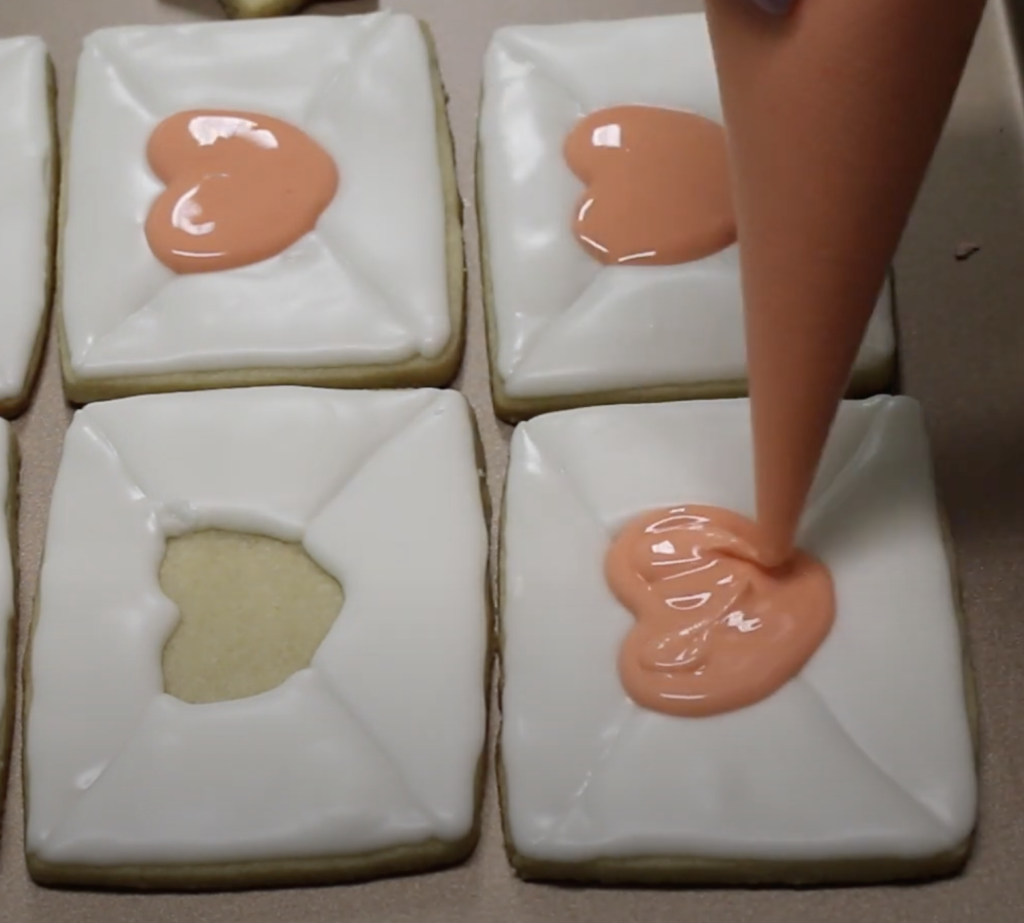
- Use medium consistency white icing. On the bottom section of the envelope, outline and fill in with icing. Let this dry for a few minutes then outline and fill in the left and right sides of the envelope. Let this dry for a few more minutes.
- Pipe the top of the envelope and let it dry before adding hearts.
- With peach icing outline the heart and fill in. Let the heart dry for a few minutes before outlining the heart with the peach icing.
- Outline the border of the envelope with white icing to mimic where the envelopes folds. Let the icing dry completely before writing on the envelope with either black icing or an edible food marker. Write TO: and FROM:
Optional: Give these as personalized gifts! Using an edible food marker, write the names of who it’s to and from!
Beehive Cookies
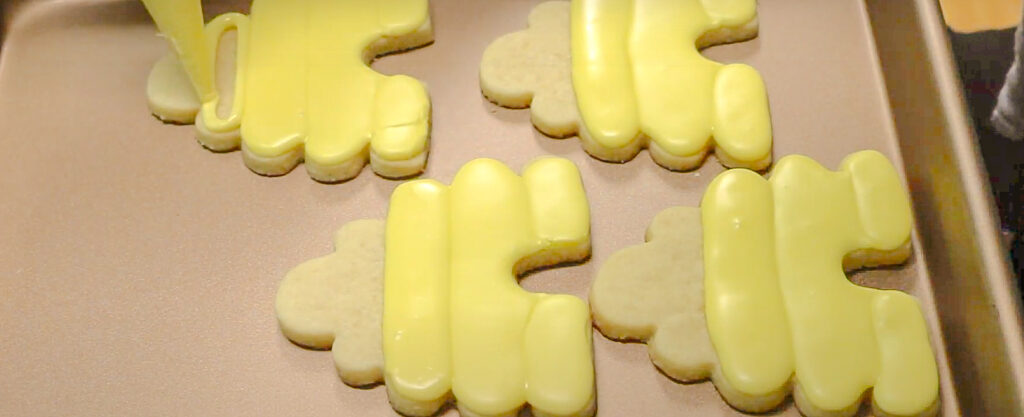
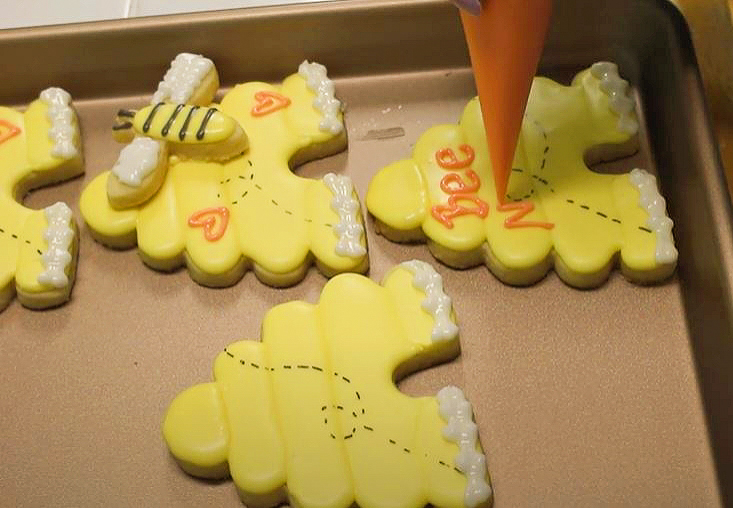
- With yellow icing, outline and fill the bottom first layer of the hive. Let this dry.
- Pipe the second layer of the hive and let dry.
- Pipe the third layer of the hive and let dry.
- Add the fourth layer of the hive and let this dry.
- Finally, add the fifth layer of the hive and let it dry completely.
- After the icing is dry to the touch, use a light hand to draw “bee line” designs with the edible food marker.
- Using stiff consistency white icing with the leaf tip to pipe ruffles on the first layer of the beehive.
- Write “Bee Mine” or add hearts using peach icing.
Optional: Glue mini bee cookies onto the hive using royal icing for a 3D effect.

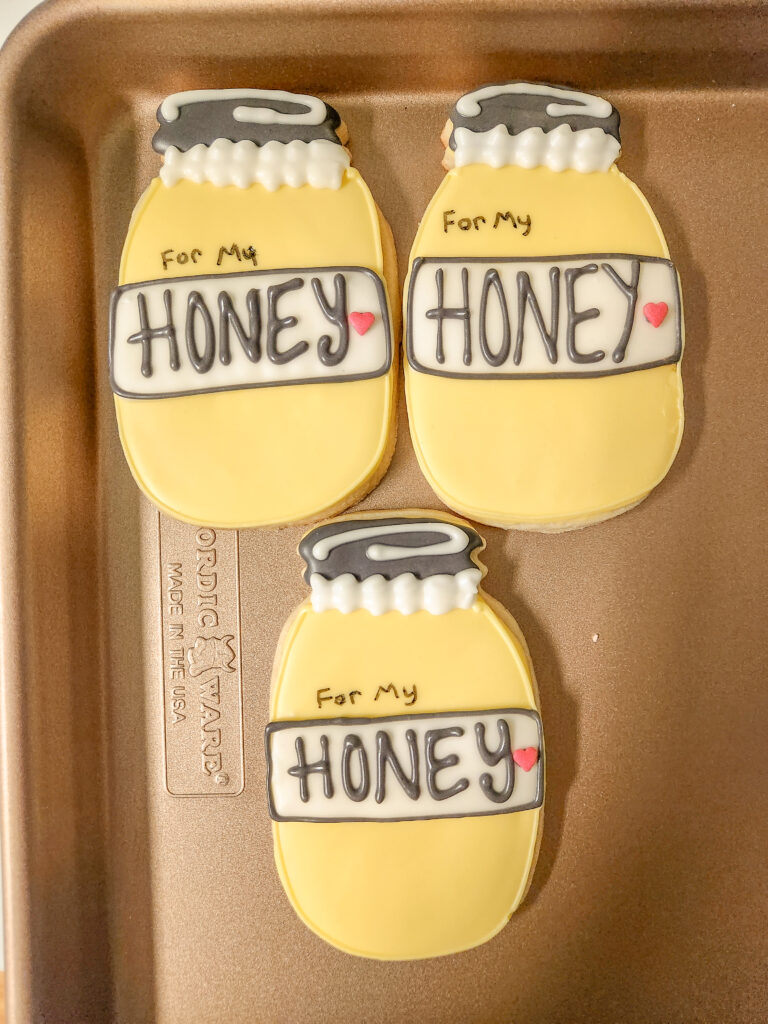
“For My Honey” Jar Cookies
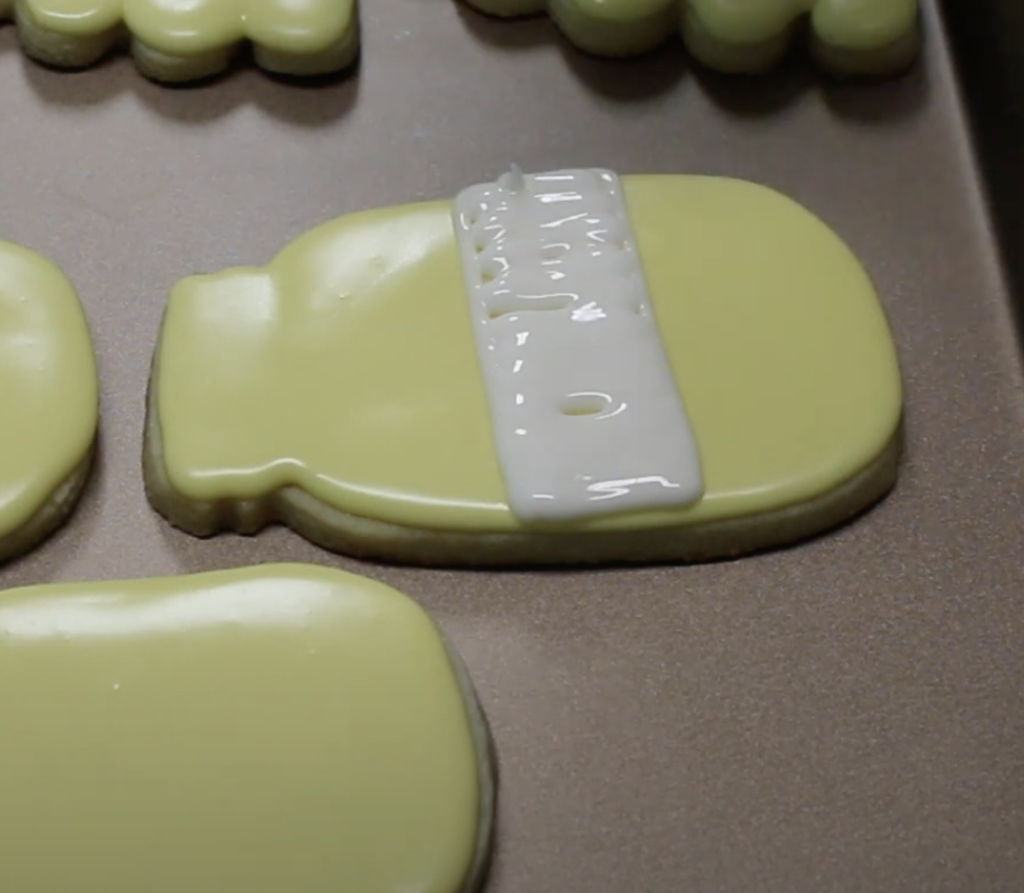
- First, with yellow icing, pipe a border around the cookie and fill in and let dry.
- Once dried, use medium consistency white icing and pipe a rectangle border in the center of the jar and fill in. Then pipe on a lid with black icing and let both sections dry.
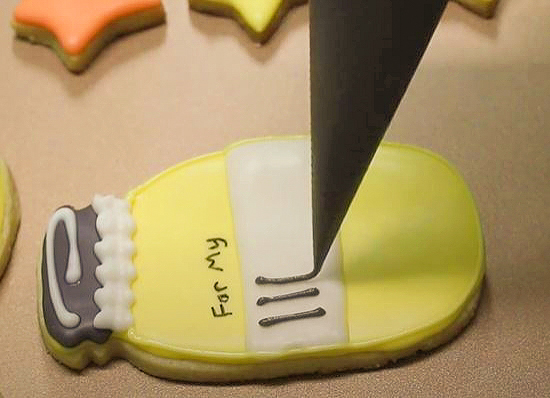
- Using the white icing with the leaf tip, angle your tip and use gentle pressure but a quick back and forth motion to pipe ruffles under the lid.
- Take the stiff black icing and slowly write HONEY using long up and down strokes.
- Add details such as a heart sprinkle or write “For My” using edible food markers.
- Outline your white rectangle with black icing (see below).
Little Bee Cookies
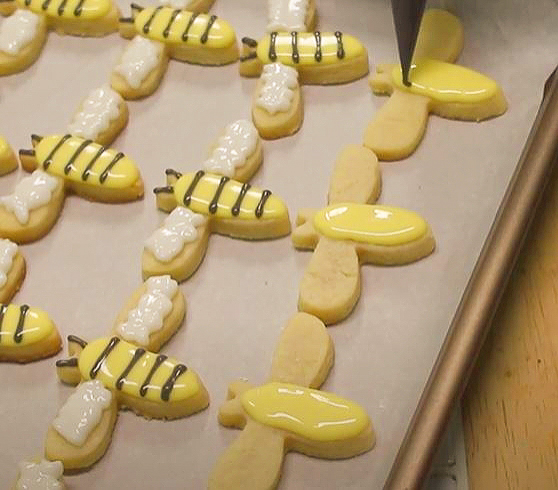
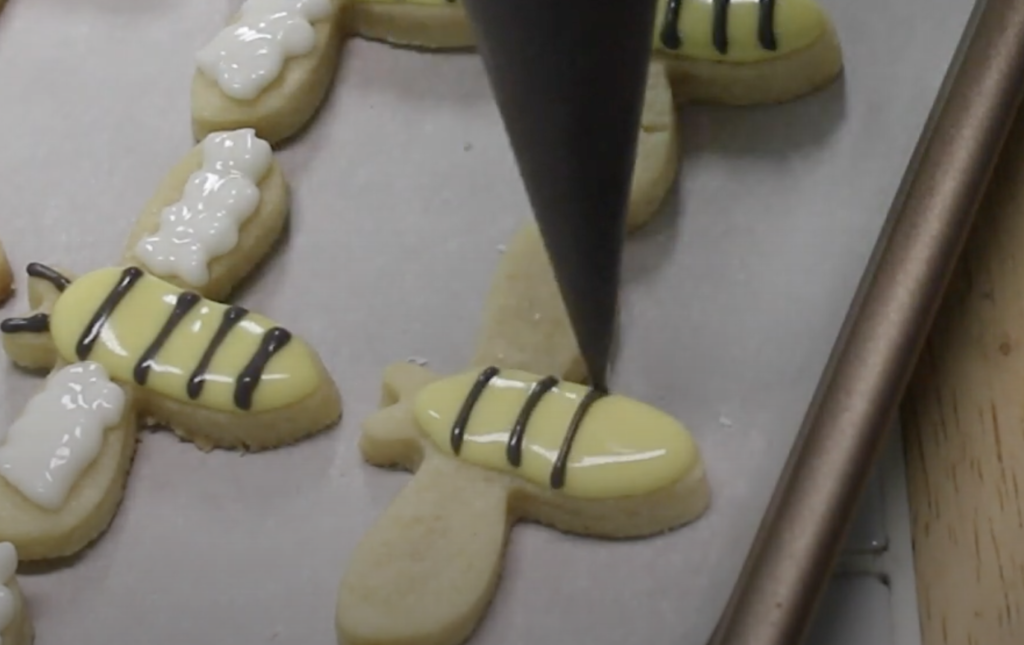
- Outline the bee’s body with yellow icing and fill in.
- Do not let the yellow icing dry! Using black icing, pipe horizontal lines. This is the wet on wet technique!
- Using the stiff consistency white icing with the leaf tip, add the bee’s wings!
- Using black icing, add antennas. Let the bees dry.
“I <3 YOU” Shooting Star Cookies
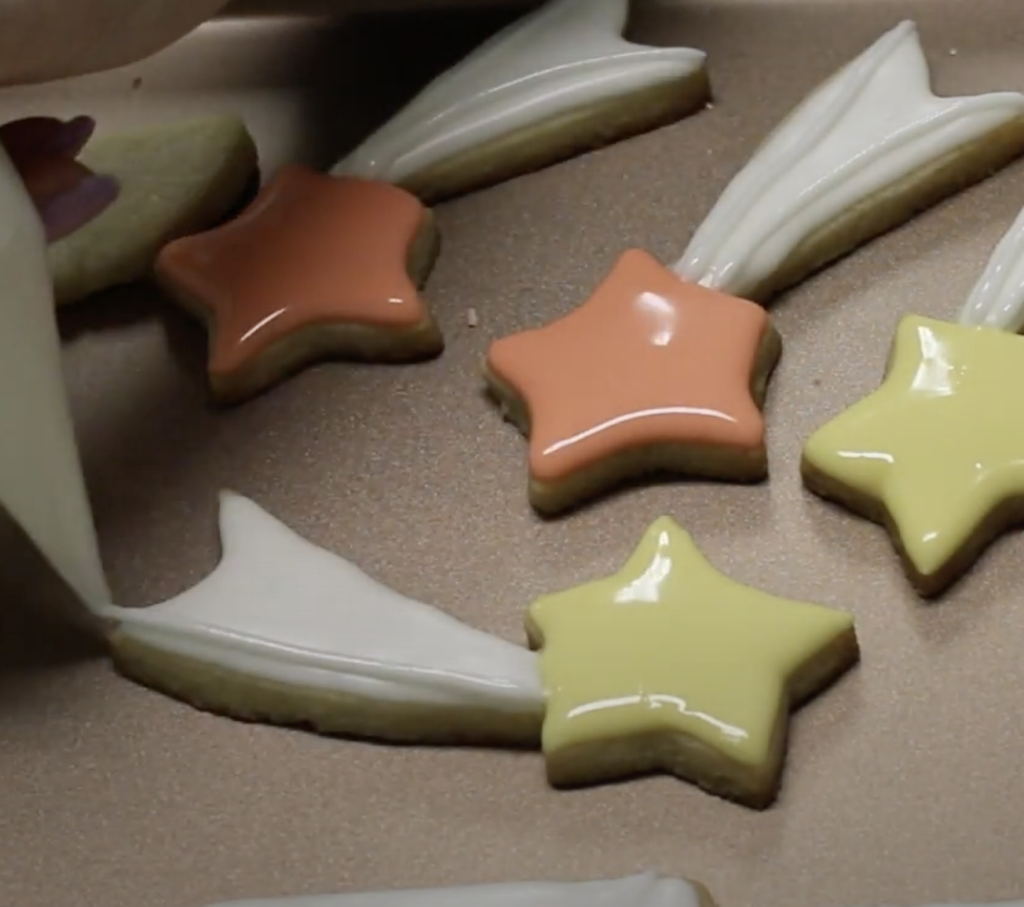
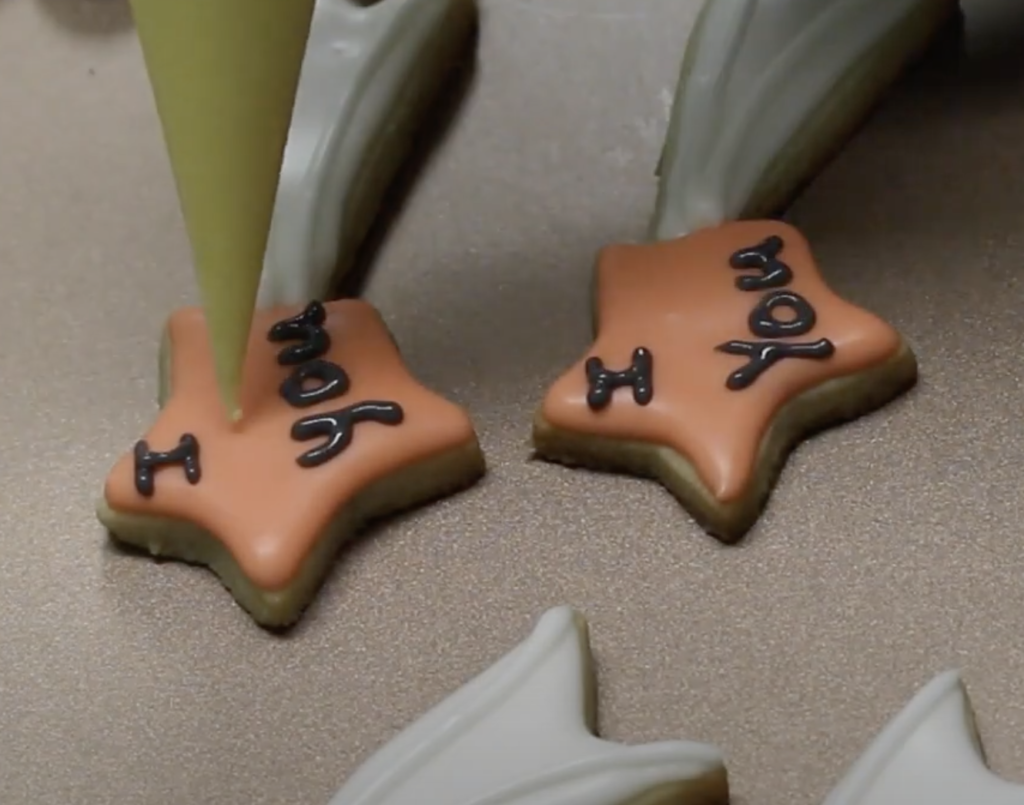
- Outline the shooting star tail with white medium consistency icing, then fill in and let this dry.
- Once crusted over (after about 5 minutes), fill in the star with yellow or peach icing and let it dry for a few minutes.
- Place your piping bag tip straight up and down and gently squeeze the bag, “pulling” the icing to make white lines on the shooting star tail.
- Write “I <3 You” with stiff black icing.
To The Moon & Back Cookies
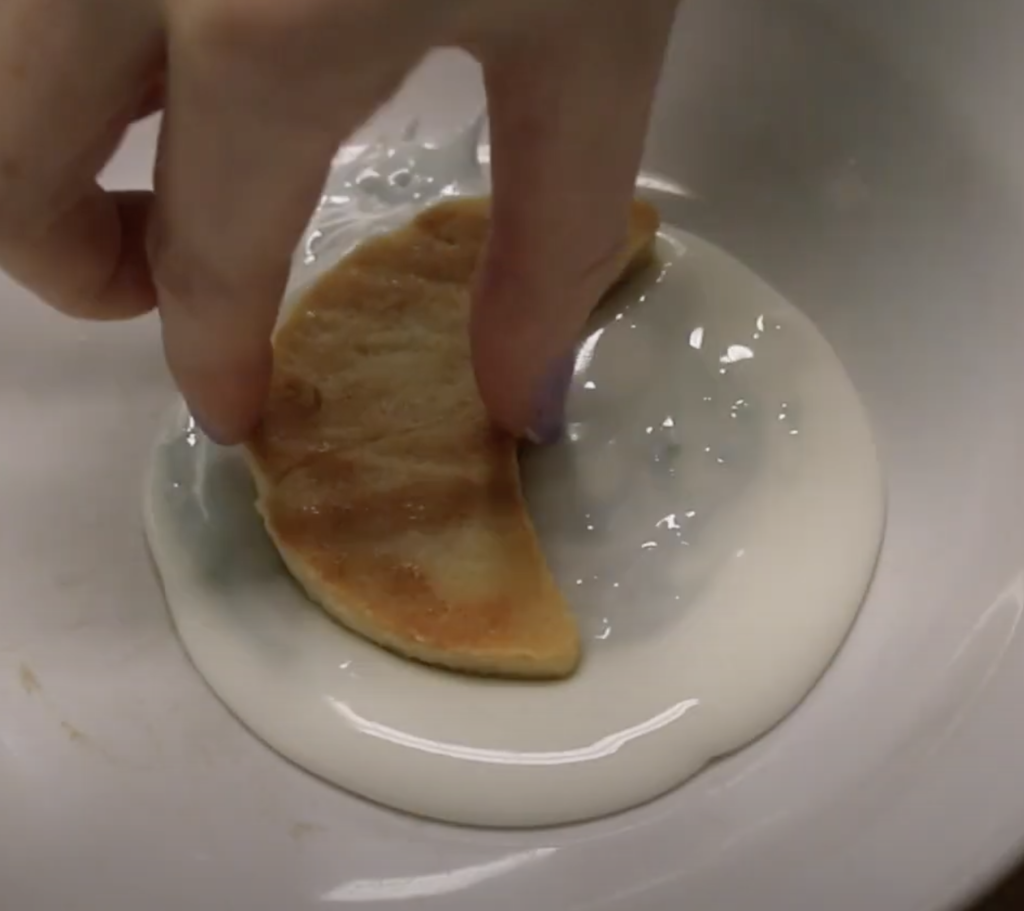
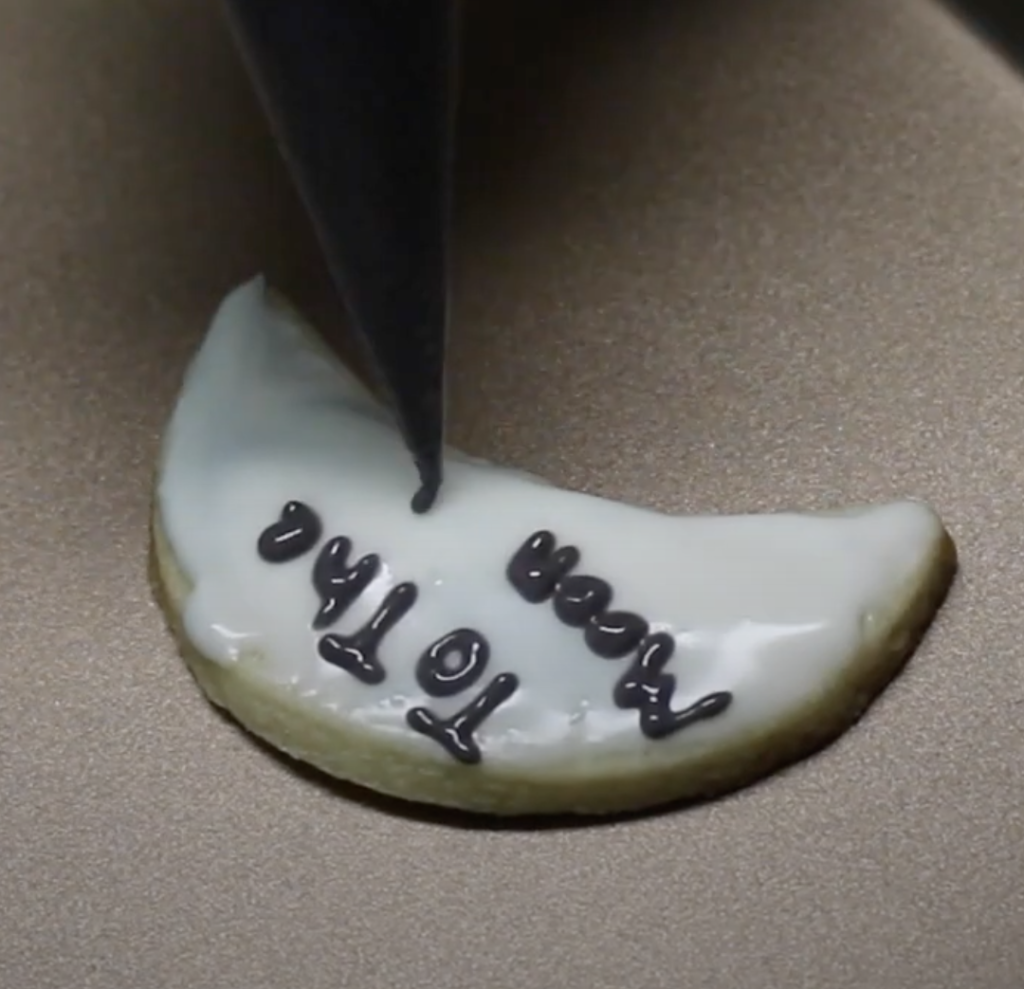
- Remove the damp paper towel or dish towel from the shallow bowl.
- Dip a moon cookie straight down into the bowl and gently pull up. Let the extra icing fall off. You can shake the cookie to flatten the icing. Set on a wire drying rack to crust over (about 5 minutes).
- With stiff black icing write “To The Moon & Back.”
Optional 3D Effect
Glue the little bee cookies onto the beehive or the honey jar with leftover royal icing to create a 3D cookie.
How to Gift Bee Mine Sugar Cookies
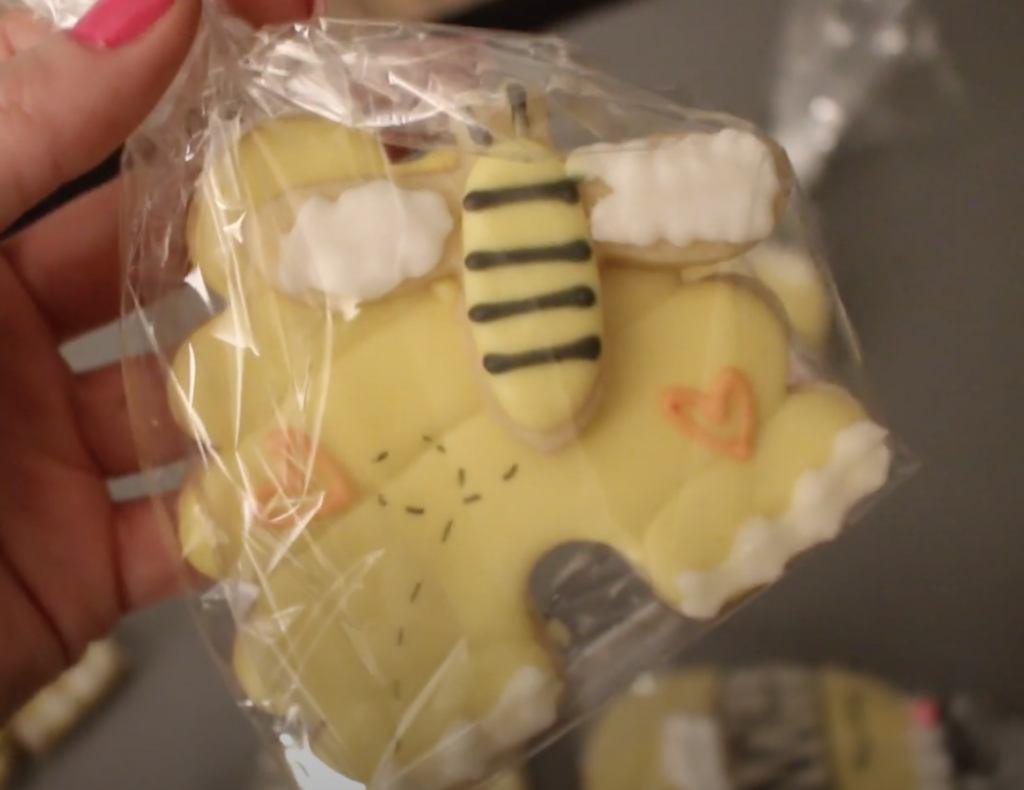
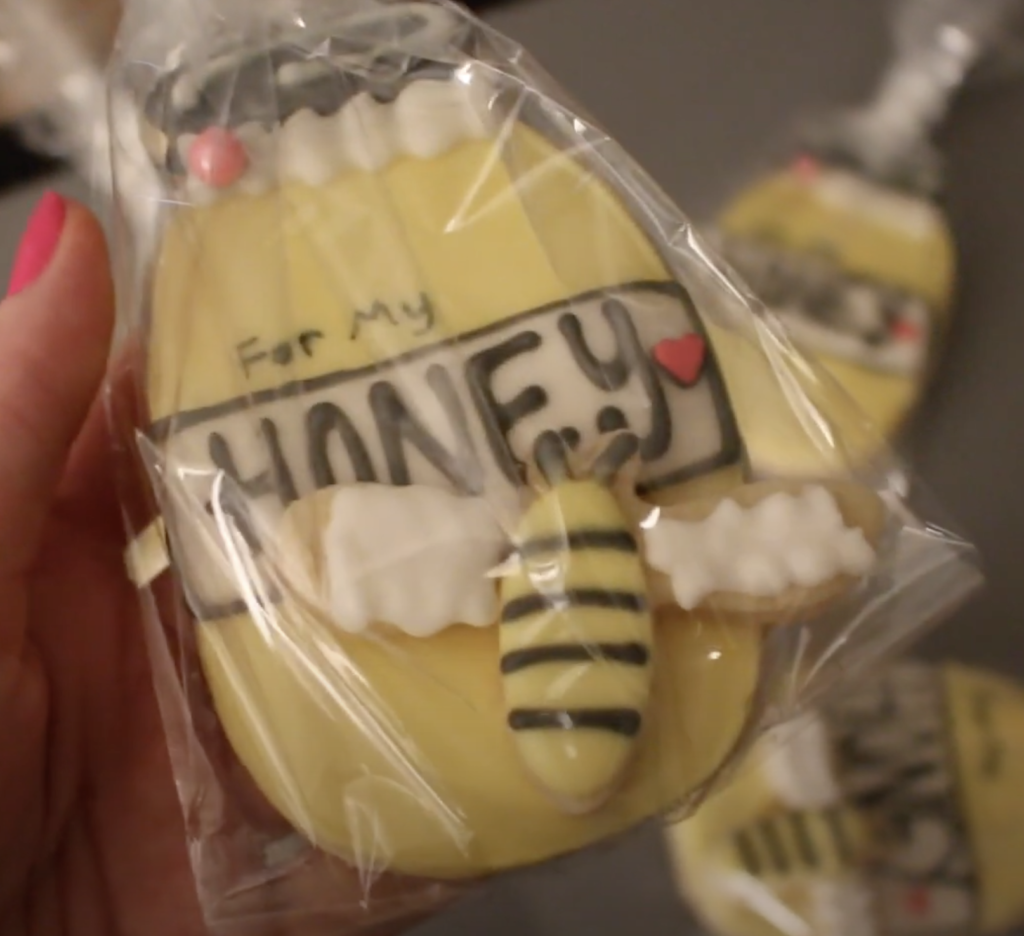
There are 3 cute ways to gift these cookies but before wrapping, make sure the cookies are fully dry!
- To keep in freshness, add one fully dried cookie into a cellophane bag and tie with ribbon. These cellophane bags come in multiple sizes. For cookies that are 4 inches or smaller, I purchase the 5×7 inch bags.
- Use self sealing cellophane bags that also come in handy for shipping cookies. These look professional like the single sold cookies at a bakery. These are my favorite self sealing bags. ?
- To really take the cookie gifting to the next level, place the cookies in a box with crinkle paper. After trying a few different boxes, I think these boxes are the best and they hold four medium sized cookies! Wrap with ribbon or add a bow.
How to Store Sugar Cookies
Undecorated cookies can be stored in an airtight container at room temperature for up to a week. You can freeze undecorated cookies in an airtight container for up to 2 months.
RECIPE CARD
Valentine’s Bee Mine Sugar Cookies
Equipment
- Stand mixer with paddle attachment or hand held mixer
Ingredients
- 2 sticks unsalted butter (room temperature) (226 g)
- 1 cup + 2 tbsp granulated sugar (228 g)
- 1 egg (room temperature)
- 1 1/2 tsp vanilla extract
- 1 pinch salt
- 3 cups all-purpose flour (360 g)
Instructions
- In the bowl of a stand mixer, equip the paddle attachment. If using a hand held mixer, equip beaters. Mix the butter on high speed for 30 seconds until creamy.
- Add the sugar and beat for 2 minutes on high speed. Scrape down the sides of the bowl with a spatula.
- Add the egg, vanilla extract, and pinch of salt and mix on medium until just combined.
- Add in half of the flour and mix until incorporated, then add the other half. Stop mixing when the flour has incorporated and the dough comes together.
- Spread out a piece of plastic wrap onto the counter. Turn out the dough onto the plastic wrap. If the dough is slightly crumbly, gently knead it together. Place in the refrigerator for 30 minutes.
- Once chilled, preheat the oven to 350℉ (177℃). Prepare your baking trays with parchment paper.
- Divide the dough into two parts. Lightly flour a clean flat surface and place the dough on top. Gently knead the dough and press flat with your palm. Roll out the dough, turning it as you roll for even thickness. If it's sticky, sprinkle flour on top of the dough. Roll the dough out to 1/4 inch thick.
- Cut out your shapes and place on a baking tray, 2 inches apart. 3-4 inch shapes should be baked for 9-10 minutes. Shapes smaller than 3 inches should bake for 7-8 minutes. Shapes larger than 4 inches should bake for 10-11 minutes.
- Once the oven goes off, take out the cookies and move to a cooling rack. Don't let them sit on the hot pan or they will keep baking.
- Allow the cookies to cool completely before decorating.
- Decorate cookies with royal icing. Let the royal icing air dry before covering. For gifting or mailing, let the icing dry for 12 hours or more.
- Plain cookies or decorated cookies can last in an airtight container for 1 week.
Notes
- Freezing: Cookie dough can be frozen up to 2 months. Let the dough thaw before rolling but not all the way until room temperature. Begin from step 7 above with slightly chilled dough. You can freeze undecorated cookies for 2 months. Let the cookies thaw before serving.
- Decorate: Ice cookies with royal icing. See my easy royal icing recipe with egg whites to answer all your royal icing questions. This royal icing recipe was made to pair with these sugar cookies. The cookies are buttery and not overly sweet, so the icing gives it a nice sweetness.
- Tools: The things that help me bake the perfect cookies: Nordic Baking Pans 13 x 18 inches | Stand mixer or Hand held mixer | AmeriColor soft gel paste food coloring | Piping bags | Rubber spatula | Digital scale | Rolling pin




I have to thank you for the efforts you have put in writing this blog. I am hoping to view the same high-grade blog posts from you in the future as well. In fact, your creative writing abilities has encouraged me to get my own blog now 😉
Thank you for the kind words!