6-inch Horoscope Heart Cake: Libra Baby
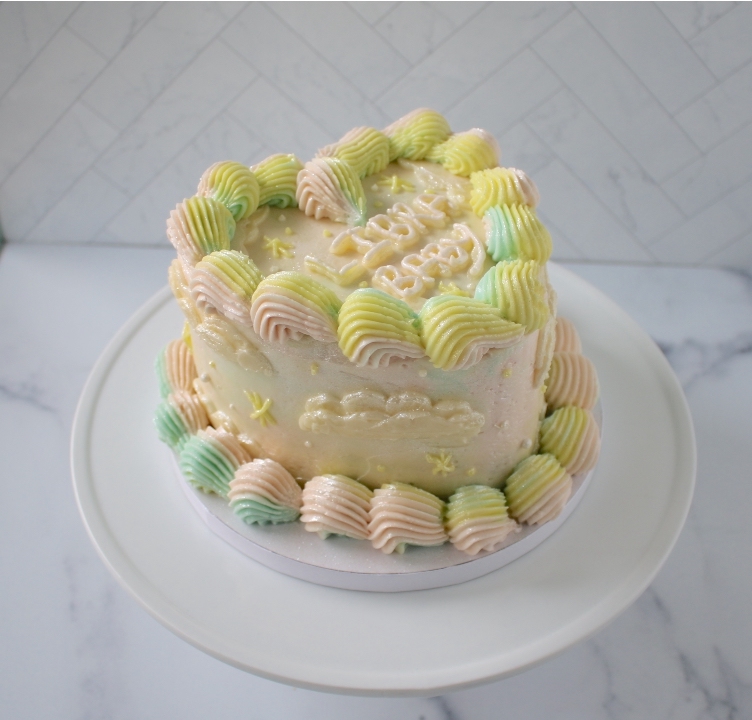
It’s Libra season and we’re celebrating with a matcha horoscope heart cake. The batter is baked in a heart shaped pan, and makes a delicious matcha cake paired with vanilla and strawberry faux Swiss meringue and fresh strawberries!
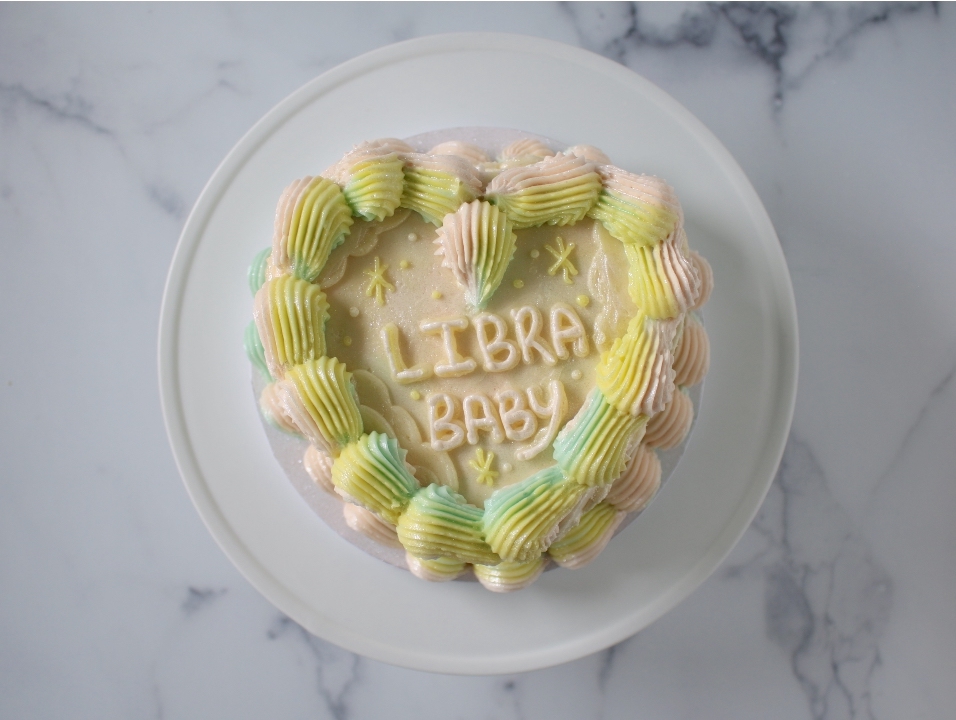
A horoscope heart cake is adorable! I wanted to celebrate the Libra season and what better than a heart shaped cake! Since I made this for my birthday, I went with one of my favorite flavors, matcha!
This site uses affiliate links which may result in a small commission at no cost to you. Thanks for supporting Midwest & Wonder!
Gather Your Tools
To decorate this cake, you’ll need a few different tools. One thing that I recommend when it comes to cake decorating is investing in some tools that will help you because they do make a difference. It’s just about practicing!
- 2 6in heart shaped cake pans
- Wilton #2 tip
- Wilton #4 tip
- 8in cake drum (not necessary but much thicker and studier than a cake board)
- Wilton French star tip #869
- Offset spatula
- Plastic wrap
- Piping bags
- Dusting pump (the best one I’ve tried)
- Edible glitter (in white diamond)
- LorAnn Strawberry emulsion (naturally dyes the buttercream pink)
- Americolor electric yellow, electric blue, electric pink* (if you’re not flavoring the frosting with strawberry emulsion)
Step 1: Bake Your Cake

This recipe makes a 2 layer, 6-inch matcha cake using 2 heart shaped pans. Bake the cakes following the recipe below. After the cake layers cool, level them with a serrated knife. This isn’t a fancy process, just carefully cut off the tops of the cake and look at them at eye level to see if they’re even.
Place a cooled cake layer on the bake board. Another really helpful tool for cake decorating is a turntable! If you want to seriously get into decorating, this is a must for straight edges 🙂
Step 2: Make the Frosting
While your cake is cooling, begin to make the frosting. I’m using my faux swiss meringue buttercream recipe. We’ll divide it into 4 parts (white, blue, yellow, pink). I flavored one part with 1/2 a teaspoon strawberry emulsion. An emulsion is a concentrated flavor and also naturally dyes the buttercream pink!
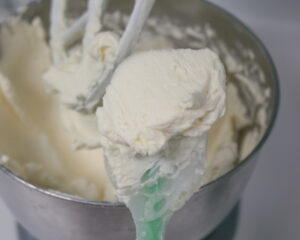
Faux Swiss meringue buttercream is not as sweet as American buttercream. But unlike American buttercream, it takes more time to whip up for that silky texture. It has the word “faux” because it’s there is no heat unlike a traditional Swiss meringue. We can skip the cooking process by using pasteurized egg whites which are safe for consumption. Looked for them in a carton in the refrigerator section!
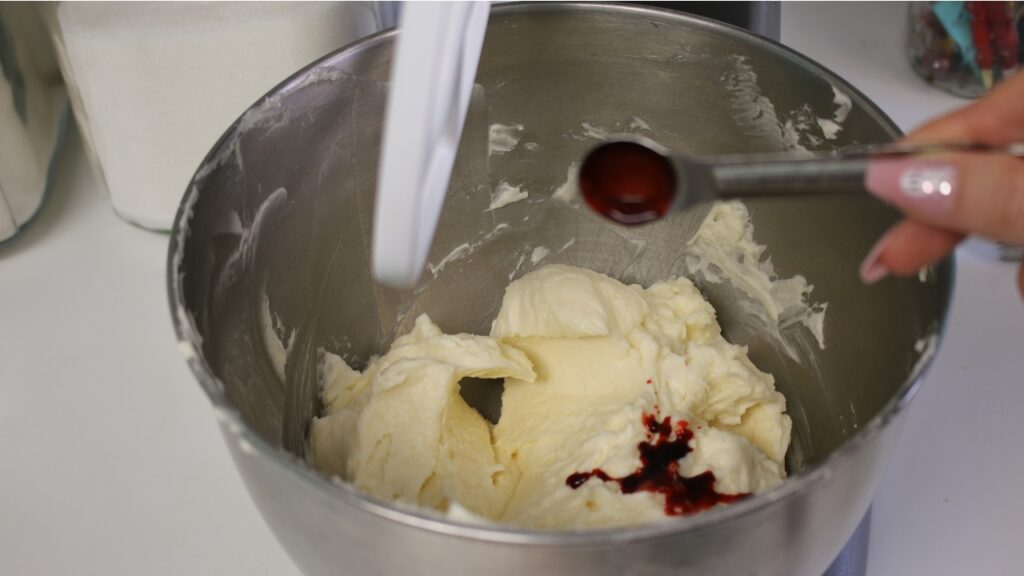
Watch the video here!
Step 3: Fill and Frost the Cake
Let’s assemble the horoscope heart cake 🙂
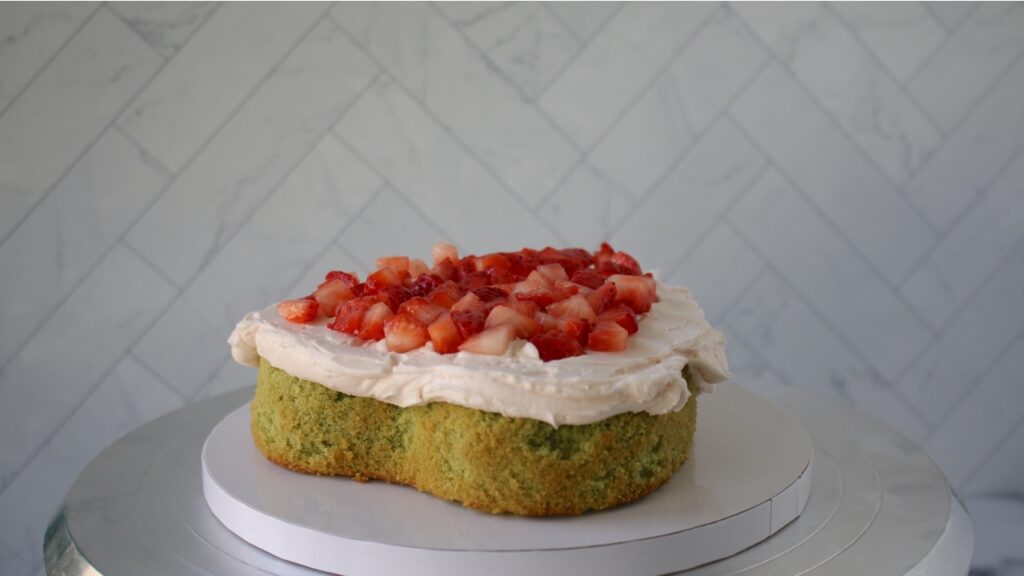
Place the cooled cake layer in the center of a cake drum on a turntable. Spread out a generous amount of strawberry frosting. Then add chopped fresh strawberries.
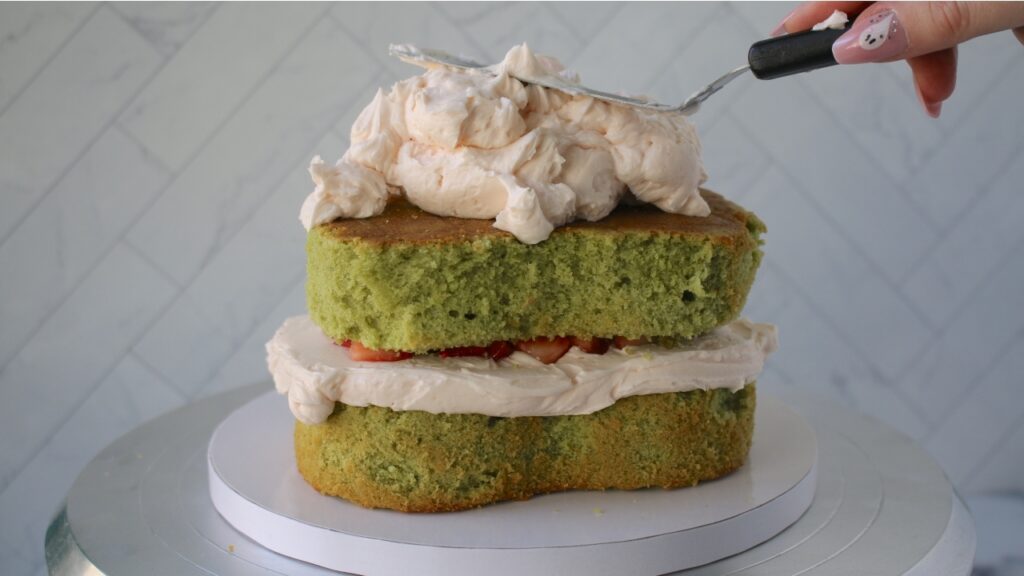
Add the second layer of cake and a generous amount of strawberry buttercream. Use the offset spatula to spread it out evenly. Turning the turntable while smoothing the buttercream will help make the process easier.
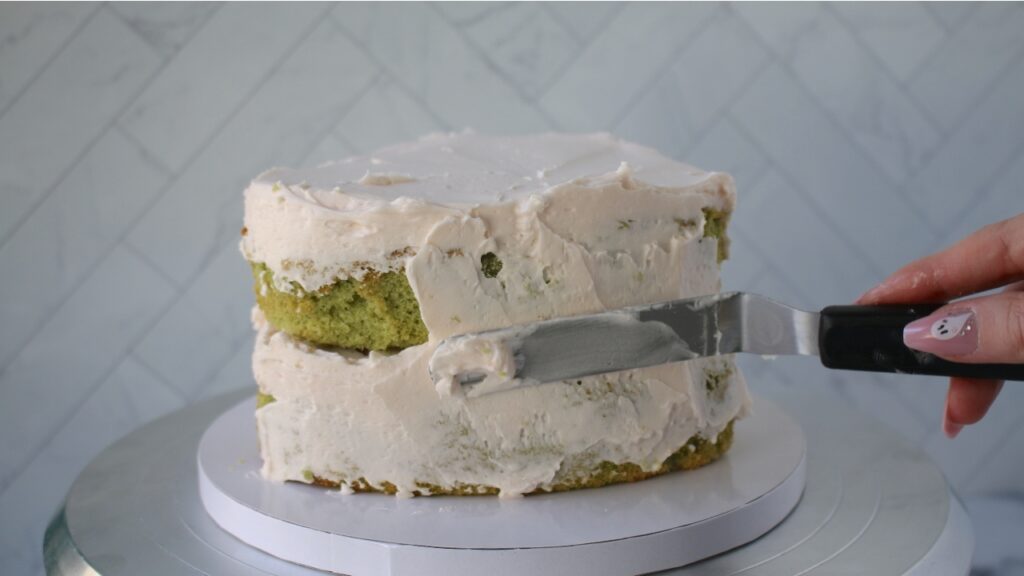
Smooth out the frosting to make a crumb coat. Add some more frosting to make sure you catch all the crumbs! Keep smoothing out the buttercream and put the cake in the freezer for 5 minutes.
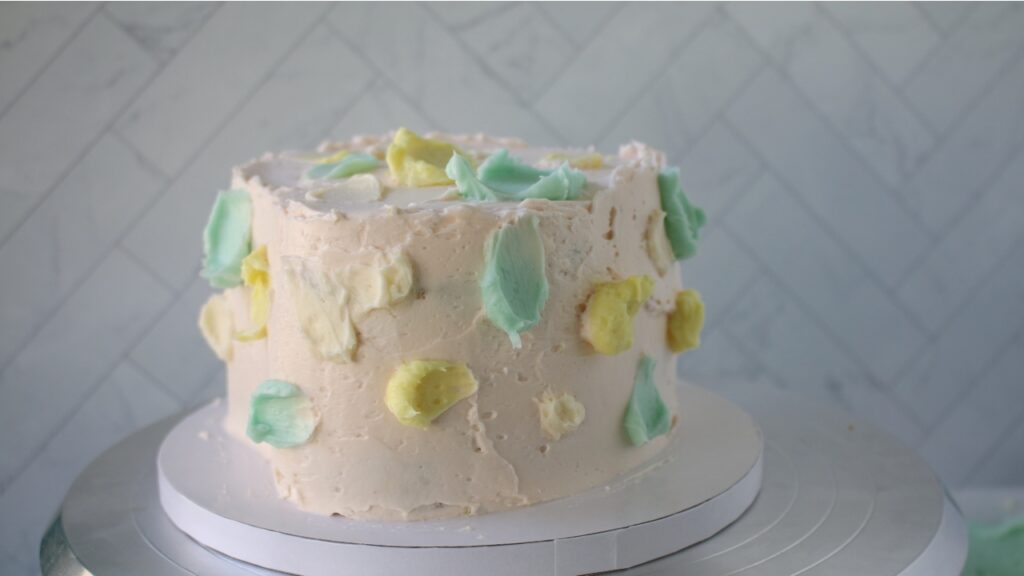
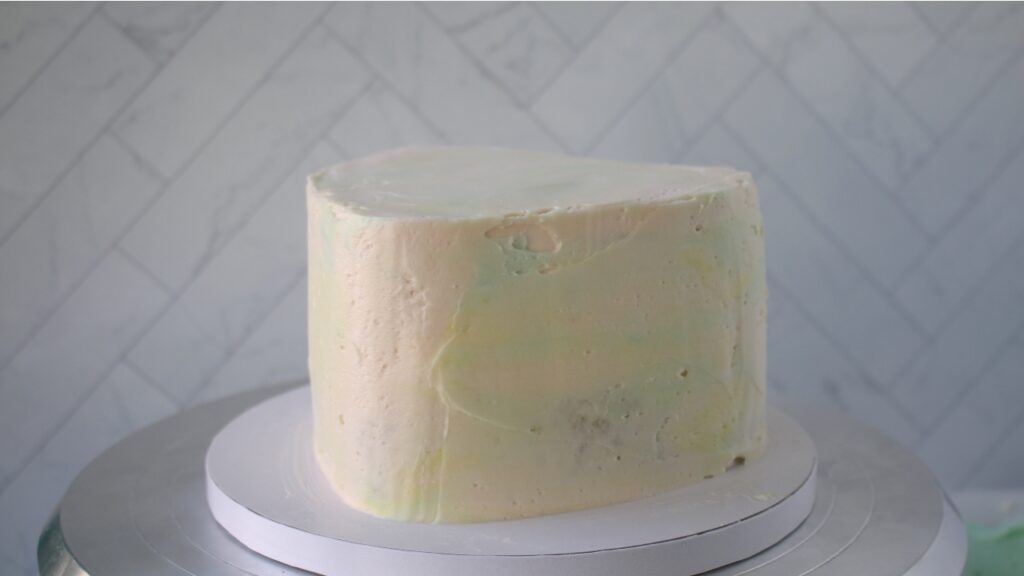
After 5 minutes, add a second layer of strawberry buttercream and smooth with a cake scraper. Then add dabs of blue and yellow icing. Turn the turntable with one hand and slowly smooth out the dabs with the scraper.
Step 4: Add the Details
Add a #2 piping tip a piping bag and fill with 1/4 cup yellow buttercream and set aside.
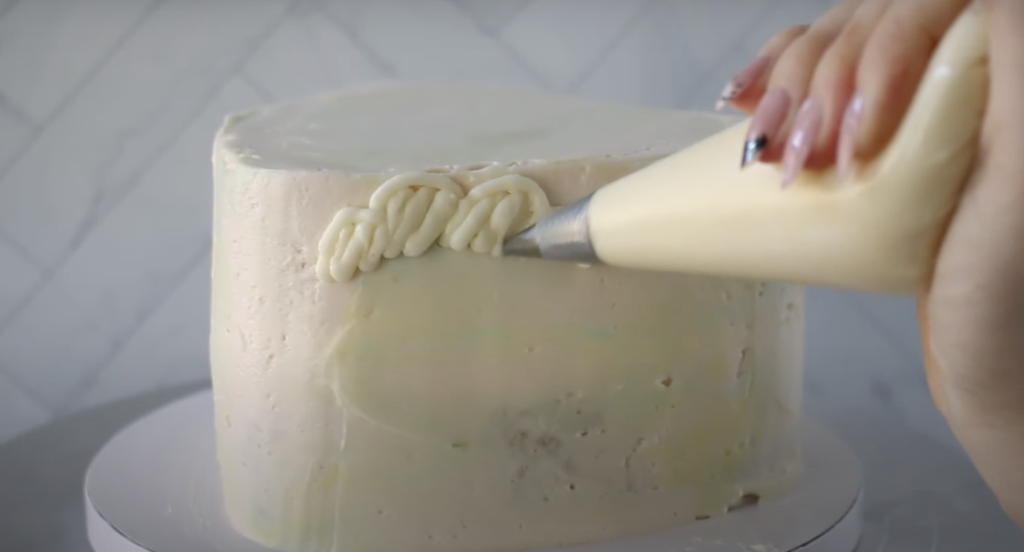
Use the #4 piping tip and white buttercream to pipe on the clouds. Start with some curved lines and fill in. Then use an offset spatula or knife to gently smooth it out flat.
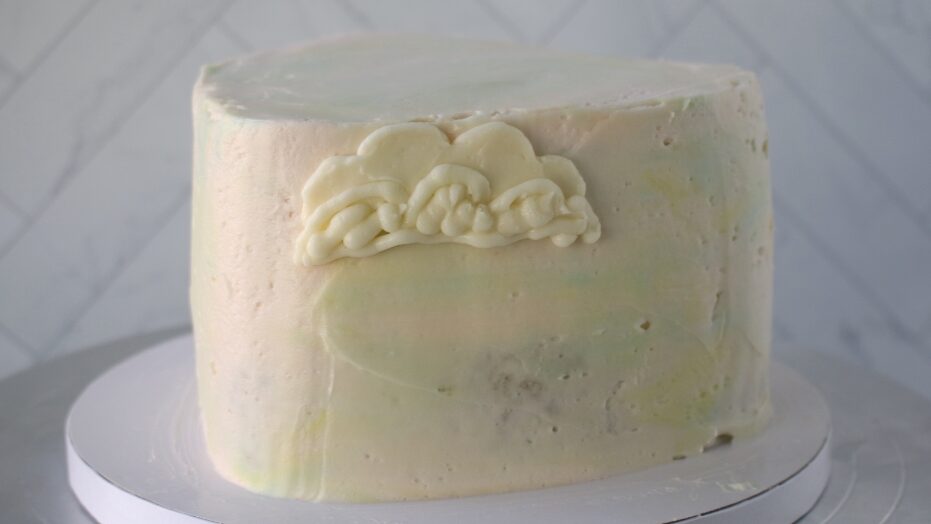
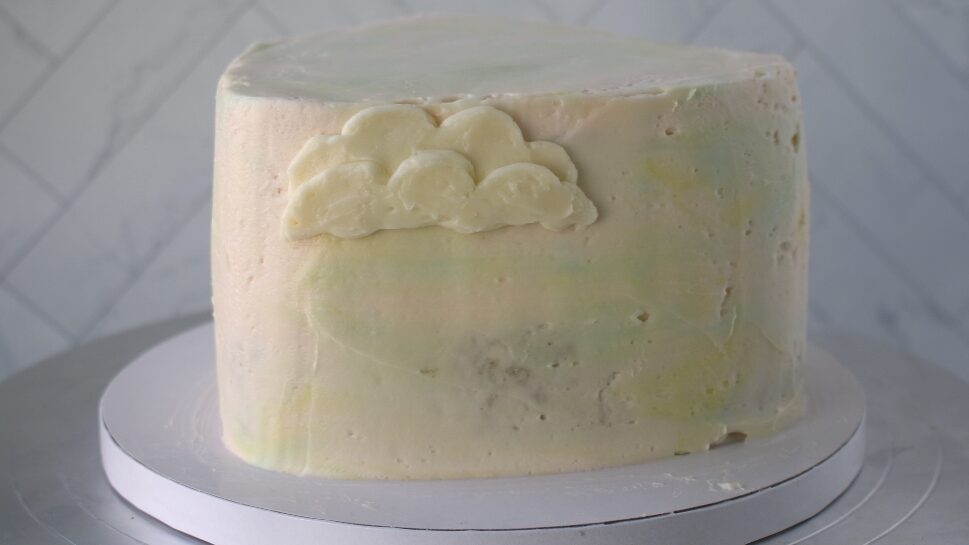
Repeat the same steps above for a double cloud.
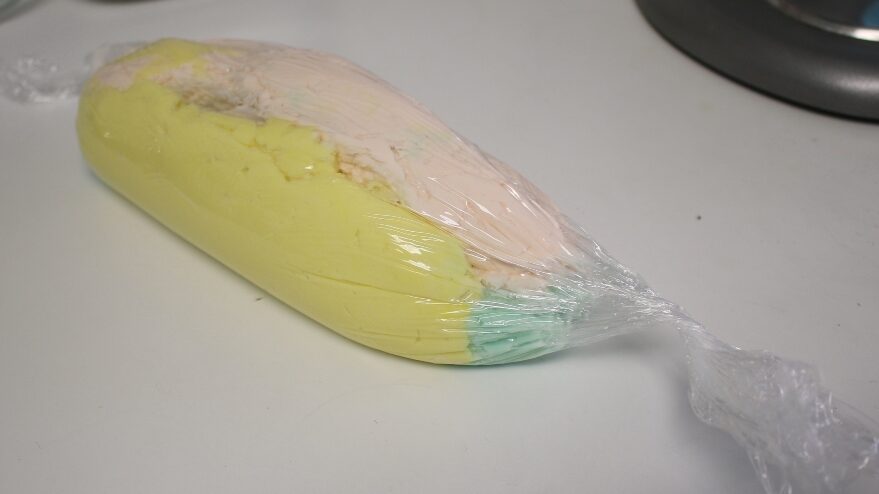
To make the multi colored piping bag, lay a piece of plastic wrap on the counter. With a spatula, spread the buttercream colors side by side.
Roll the plastic wrap over the buttercream and twist the sides. Then cut off one side. Prepare a piping bag with the Ateco French #869 tip. Add the multi colored buttercream bag you made into the piping bag.
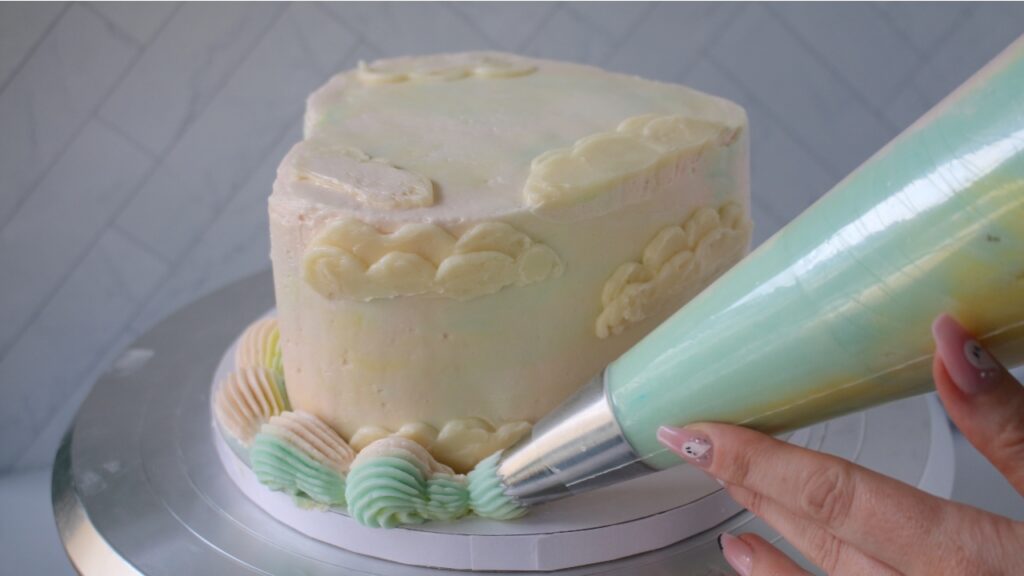
First, pick what side of the cake you want to be the back. This is where we will start and end the piping. Sometimes it’s hard to finish the border perfectly so we can hide it on the “back side” of the cake.
At a 45 degree angle, apply even pressure and let the buttercream pipe out into a shell shape. Then, slowly bring the tip down and away from the cake drum.
If you’re nervous, practice beforehand on a plate or parchment paper!
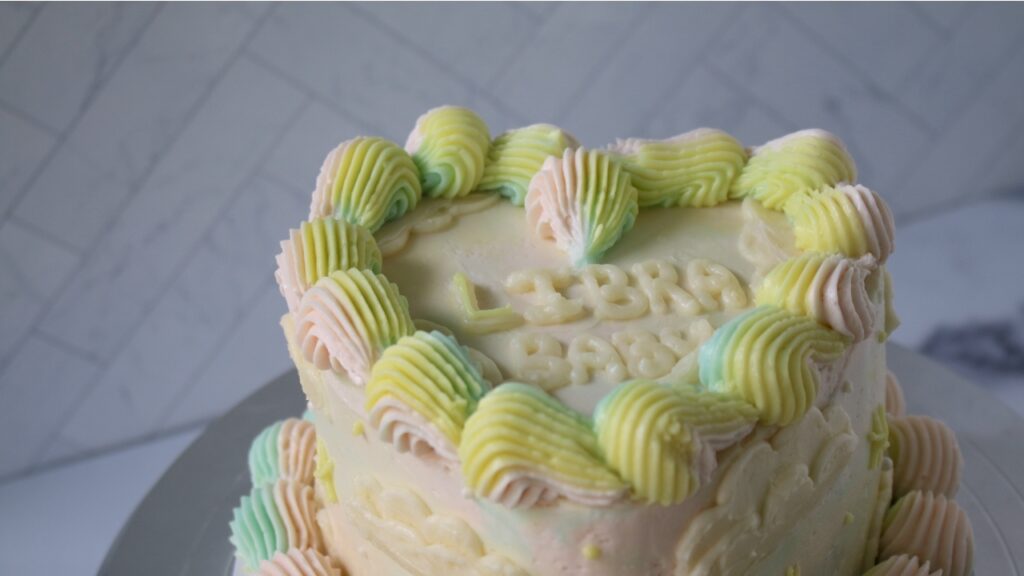
Pipe a border on top. Pipe one shell in the center to accentuate the heart shape.
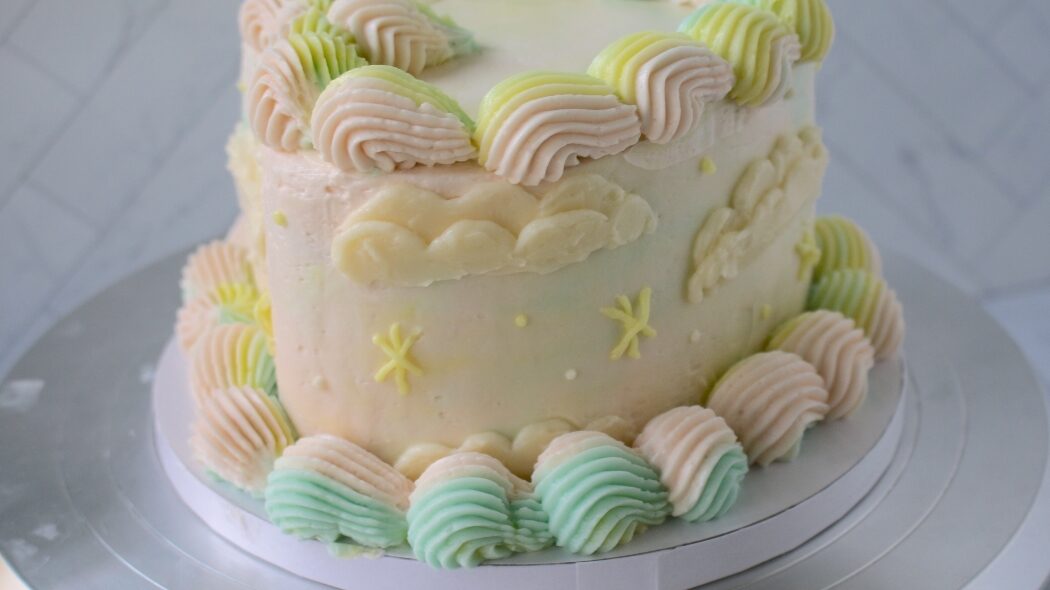
With the #2 tip and yellow buttercream, pipe on stars and add little dots.
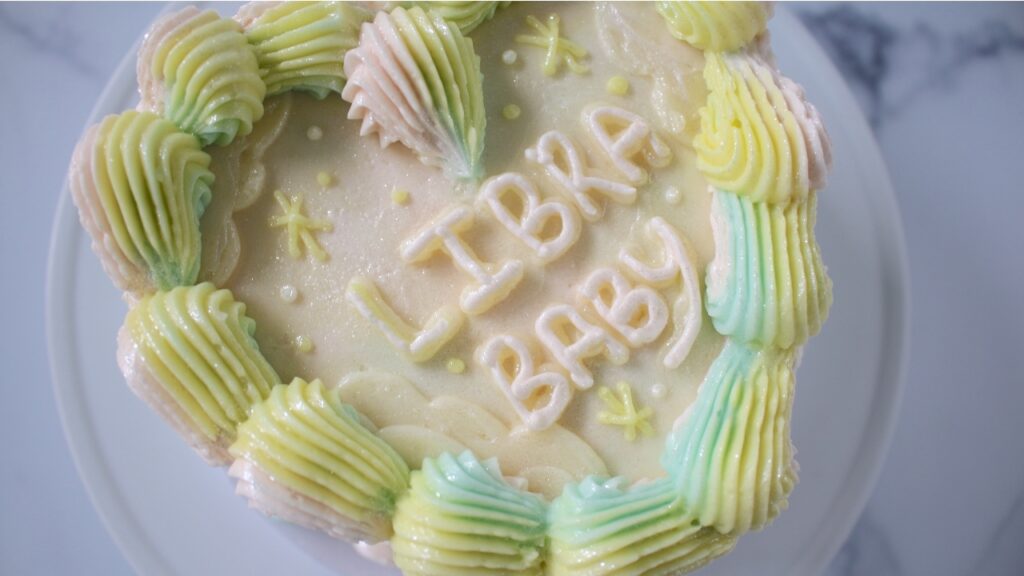
Were going to pipe what I call bubble letters! Even if you aren’t great at writing with buttercream (I’m still practicing), I think this “double letter” method makes them look better than just one layer of icing.
Use a #4 tip with white buttercream. Pipe out the letters. Then in another piping bag, fill with leftover buttercream, cut a small hole across the tip, and pipe over the white letters.
Add more stars and dots. To finish, spray on edible glitter with a dusting pump.
The horoscope cake is complete! Happy birthday Libra babies! 🙂

RECIPE CARD
6-inch Horoscope Heart Cake: Libra Baby
Equipment
- Stand mixer with paddle attachment or handheld mixer
Ingredients
6-inch Matcha Heart Cake
- ½ cup unsalted butter (room temperature) (113g or 1 stick)
- 1 cup granulated sugar (200g)
- 1 tsp vanilla extract
- 2 eggs (room temperature)
- 1 ½ cups all-purpose flour (180g)
- 2 tbsp matcha powder (baking grade)
- 1 tsp baking powder
- ¼ tsp kosher salt
- ½ cup buttermilk (or whole milk) (125ml)
- 1 batch faux Swiss meringue buttercream
Instructions
6-inch Matcha Heart Cake
- Make sure all the ingredients are at room temperature. Preheat the oven to 350℉ (177℃). Butter or spray the sides of the cake pans with cooking spray. Trace the heart cake pan on parchment paper and cut out. Place the parchment in the pans.
- Whisk together the flour, matcha powder, baking powder, and salt. Set aside.
- In a stand mixer with the paddle attachment or a handheld mixer, beat the butter on high speed for 1 minute. Add the sugar and beat on high speed for 2 minutes. Scrap down the bowl with a rubber spatula.
- On low speed, add the vanilla and mix. Then add the eggs one at a time, mixing in-between additions.
- Add half of the flour mixture and mix on low. When mostly incorporated, add half of the buttermilk. Repeat for the other half of flour and buttermilk. Mix until just combined.
- Pour into the heart pans and bake on the center rack for 20-25 minutes or until a toothpick inserted into the center of the cake comes out clean.
- Transfer the pans to a wire cooling rack. After 5 minutes, use a knife to gently release the sides of the cake for the pan. Turn out the cake using oven mitts (the pans will still be hot). Let the cakes cool completely before icing.
Decorate
- Place the cooled cake layer onto a cake board or a plate.
- Separate the buttercream into 4 parts. Set aside one portion for white icing.
- Dye another other portion with 1 small drop electric blue. Dye the third portion with 1 small drop electric yellow.
- Flavor the last portion with ½ teaspoon strawberry emulsion and mix together. This will naturally dye the buttercream light pink.
- Fill the cake with the strawberry flavored portion. Optional: add fresh strawberries. Then, frost the cake with the rest of the strawberry buttercream.
- Add dabs of yellow and blue buttercream around the cake. Slowly smooth out with a cake scraper.
- To make clouds, add small dabs of white buttercream next to each other and smooth with an offset spatula.
- Spread the leftover buttercream over a piece of plastic wrap. Gently roll it and twist the ends of the plastic wrap. Cut a hole on one side. Add to a piping bag prepared with the Ateco French #869 tip.
- Apply even pressure and pipe a border on the bottom and top of the cake.
Notes
- Store the cake in the refrigerator for up to 4 days.
- Helpful tools: 6-inch heart shaped cake pans | Wilton #2 tip | Wilton #4 tip | 8in cake drum | Wilton French star tip #869 | Offset spatula | Piping bags | Dusting pump | Edible glitter (white diamond) | LorAnn Strawberry emulsion | Americolor electric yellow, electric blue, electric pink
