Buttercream Cactus Cake

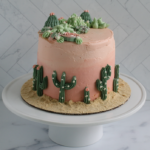
This cactus cake tutorial will show you how to make succulents, cacti, and a perfect pink sunset out of buttercream! Perfect for a cactus themed party or for someone who loves succulents.
This site uses affiliate links which may result in a small commission at no cost to you. Thanks for supporting Midwest & Wonder!
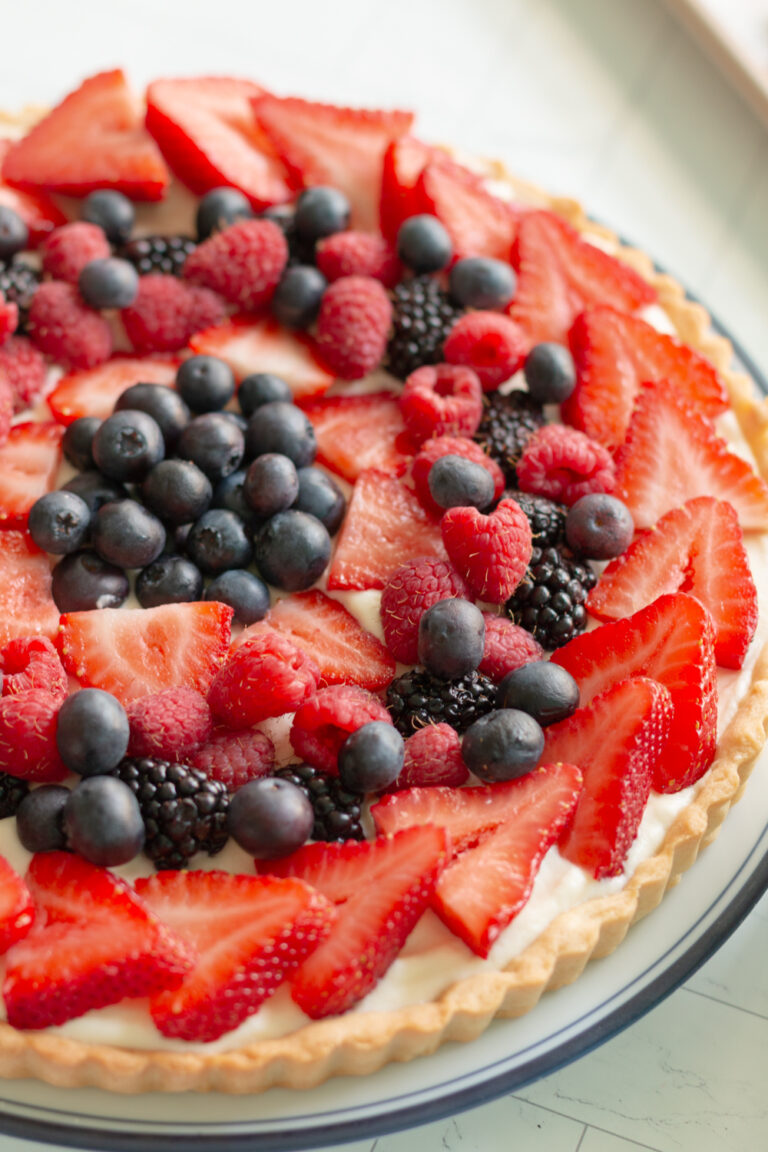
There’s something beautiful about a pinkish red sunset over a desert. Maybe it’s the nostalgia of watching wild west movies when we were kids or the colors of a sandy desert that create a dreaming feeling. This pastel moody scene inspired me to decorate this cake in pastel hues topped with succulents that you can safely eat 😉.

What You’ll Need to Decorate This Cake
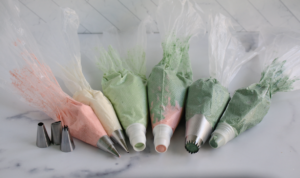
To make our succulents, I used a variety of piping tips. I will list the tips below from left to right as shown in the image above. I recommend using couplers to make switching out tips easier and to save on piping bags. You don’t have to use all of these tips, you can use the ones that you have! This cactus cake definitely falls into the intermediate
#114 Leaf Tip (not pictured)
Ateco Standard Plastic Couplers
Graham Cracker Crumbs (Or use a food processor to turn cookies into crumbs)
Parchment Paper (Cut into small, 2 inch squares for piping flowers)
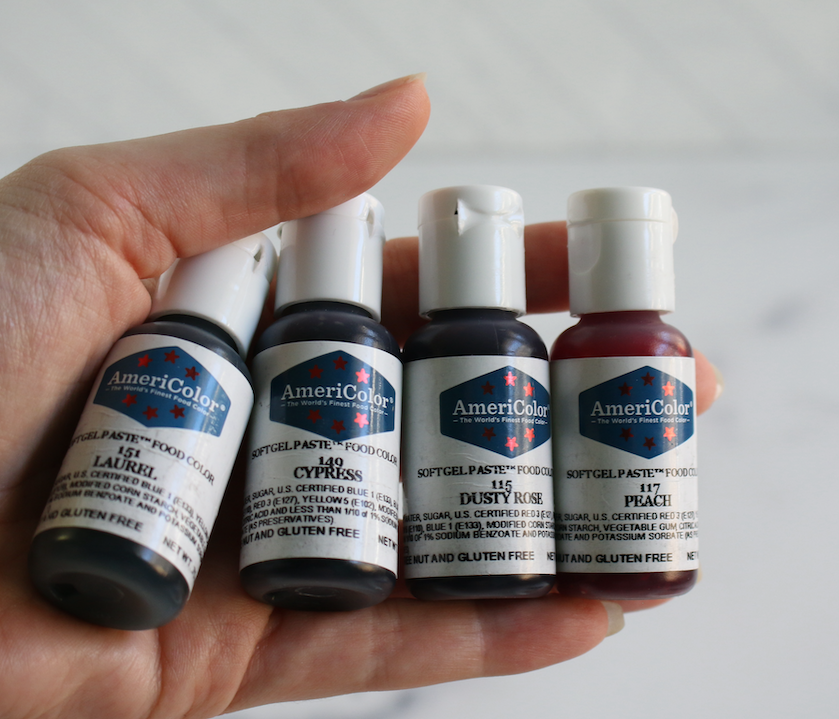
Gel Food Coloring
There are 4 gel food colorings used to dye our buttercream:
Step #1 Bake Your Cake
Follow my easy homemade vanilla cake which is full of delicious vanilla flavor. It’s tender and moist but sturdy enough to frost and then filled it with sour cherry jam. If you don’t have sour cherries, you can subsistute it for your favorite fruit jam or skip this step! I felt like since the outside of this cake is decorated, why not also add some color to the inside 🤗.
Follow the recipe and make sure you allow for enough time to cool the cake layers!
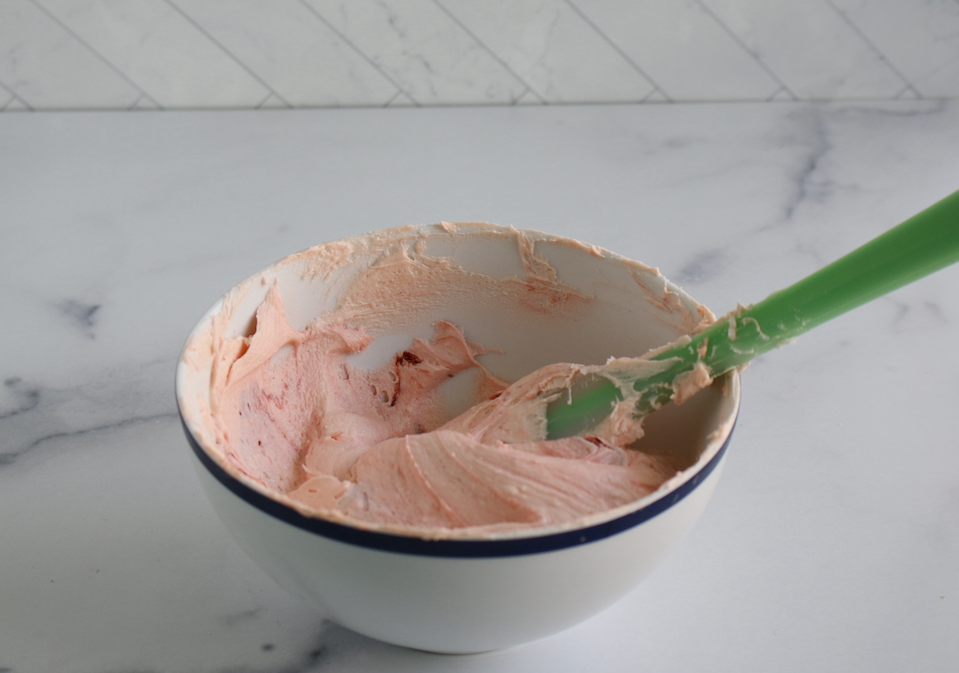
Step #2 Buttercream Prep
For the buttercream, I used my easy American buttercream recipe. Please double this recipe in order to have enough frosting to pipe lots of succulents. Keep the extra white frosting for the crumb coat and for some little cactus details.
| COLOR | AMOUNT | GEL |
| Light Pink | 1 cup | 1 drop peach + 1 drop dusty rose |
| Dark Pink | 1 1/2 cups | 1 drop peach + 3 drops dusty rose |
| Light Green | 1 cup | 1 drop laurel |
| Dark Green | 1 1/2 cups | 3 drops cypress |
Watch the Video!
Step #3 Prep the Piping Bags
Below are instructions for step by step on how to fill the piping bags as shown above from left to right.
- Firstly, add the #13 tip to a piping bag and fill it with 1/2 cup of light pink frosting.
- Then, add a #3 tip to a piping bag and fill it with 1/2 cup white frosting.
- Add a coupler to a piping bag and fill it with 1/2 cup light green frosting.
- As shown above, add a coupler to a piping bag and fill one side with dark green frosting and one side with dark pink frosting. Use a small spatula, butter knife, or off set spatula to add the buttercream to the sides of the bag.
- Add a coupler to a piping bag and fill it with 1/2 cup dark green frosting.
- Finally, add the #869 tip to a piping bag and fill it with 1/2 cup dark green frosting.(This tip is too big for a coupler.)
Step #4 Assemble the Cactus Cake
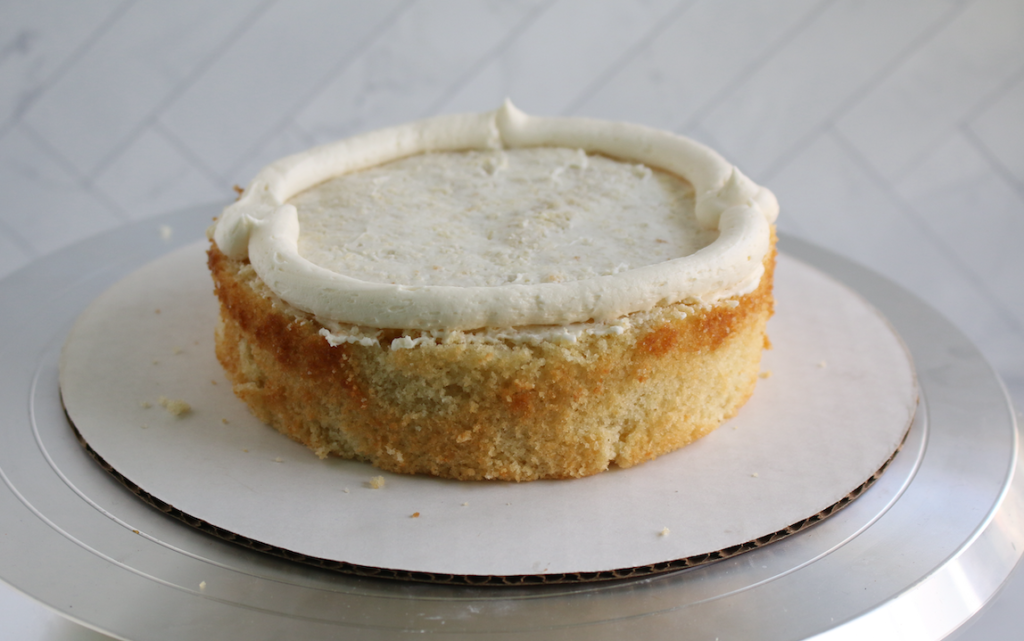
After your cake layers have cooled, make sure to cut off the cake tops if it has a dome in order for it to be flat. Then add buttercream to your first cake layer and pipe a ring if you’re adding filling! If you add a buttercream ring then you can prevent filling from spilling out the sides. But if you aren’t adding filling you can skip this step.
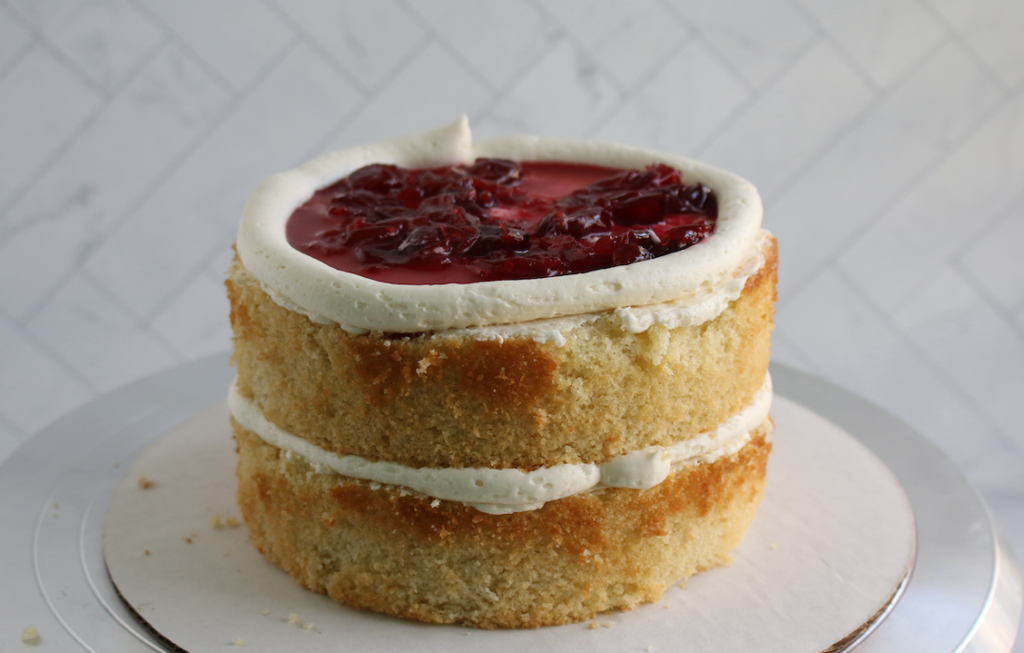
If you are adding a filling, repeat the same process for the second layer. Then, place your third layer on top.
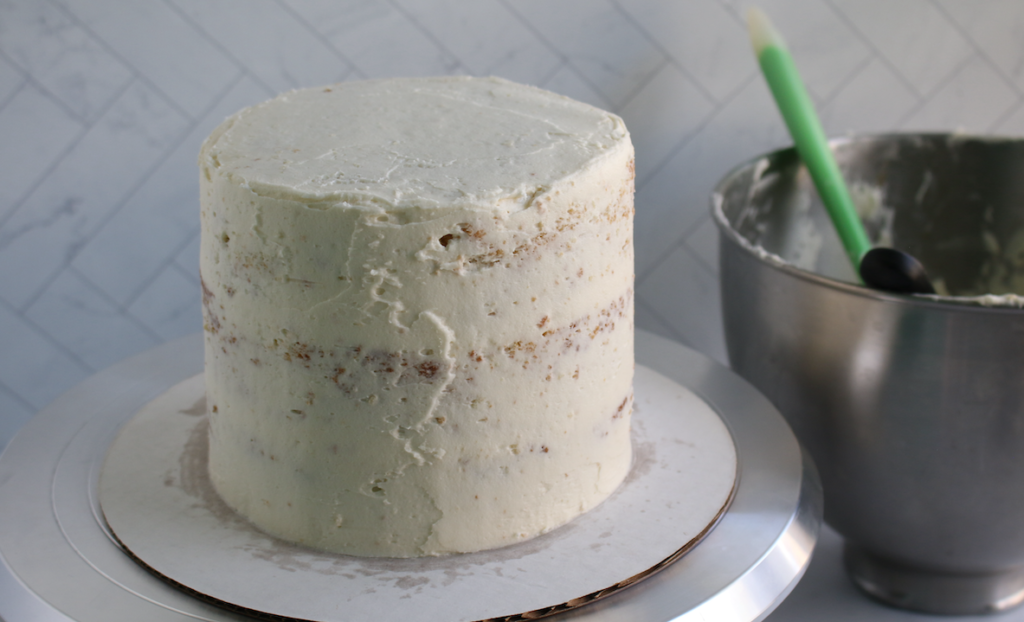
Next we want to add a crumb coat. Start by adding buttercream on the top of the cake and evenly spread it out around the sides. Use a cake scraper to remove any excess buttercream. Crumb coats are thin layers that “catch the crumbs” and don’t need to be thick! Then, place the cake in the refrigerator or freezer to chill for at least 5 minutes.
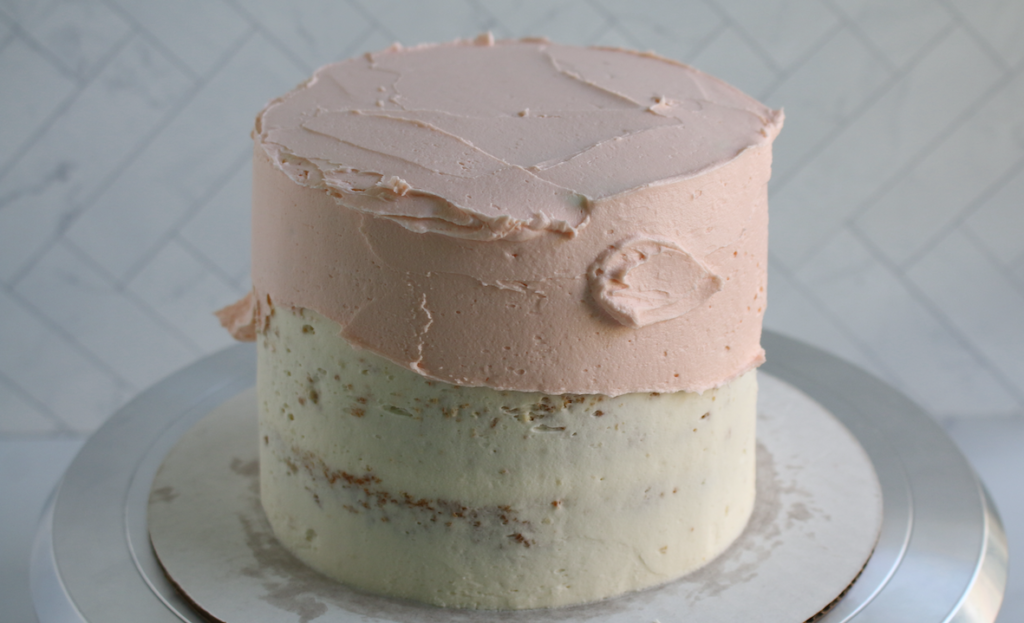
Take out the cake from the fridge. To give our cactus cake a warm sunset, start by adding light pink buttercream to the top of the cake and then half of the cake.
Then, add the dark pink buttercream to the bottom half. This doesn’t need to be perfect, we will smooth it out.
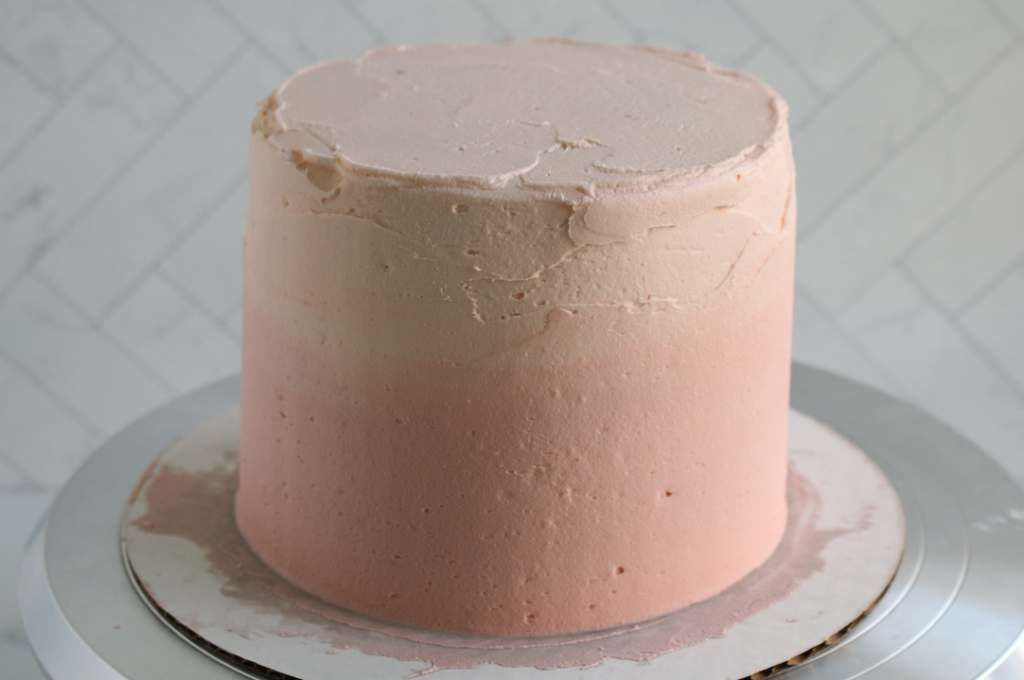
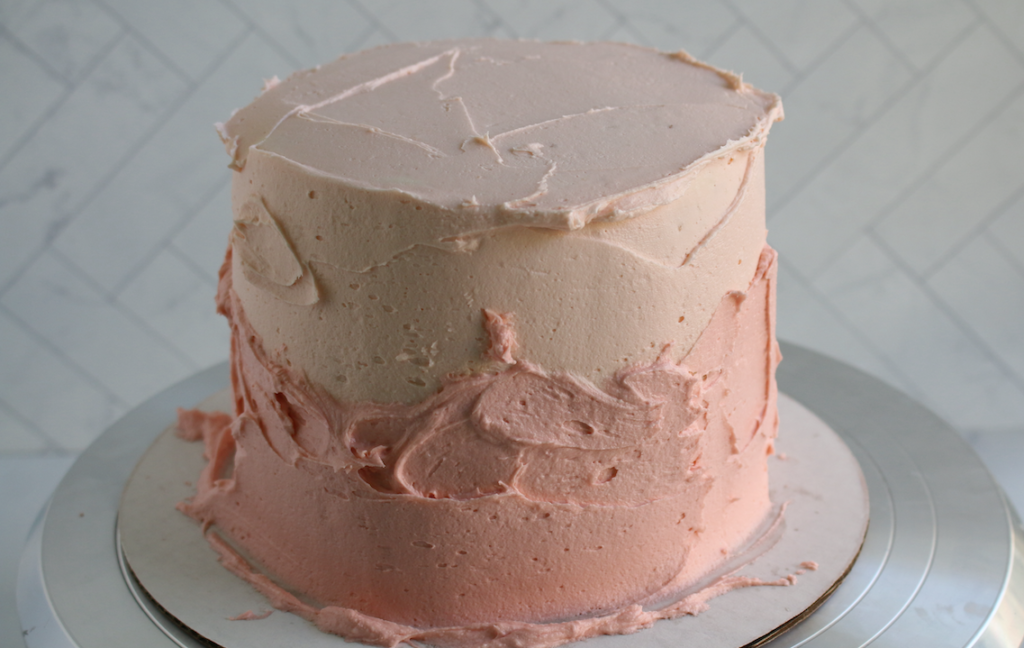
I actually used a chopping block to smooth out my cake, but you can use any cake scraper or spatula you have.
(I don’t recommend the generic cake boards you buy on Amazon, I used one and as you can see they stain easily from the buttercream. What I recommend are Wilton cake boards, they have never failed me!)
Step #5 Assemble the Desert
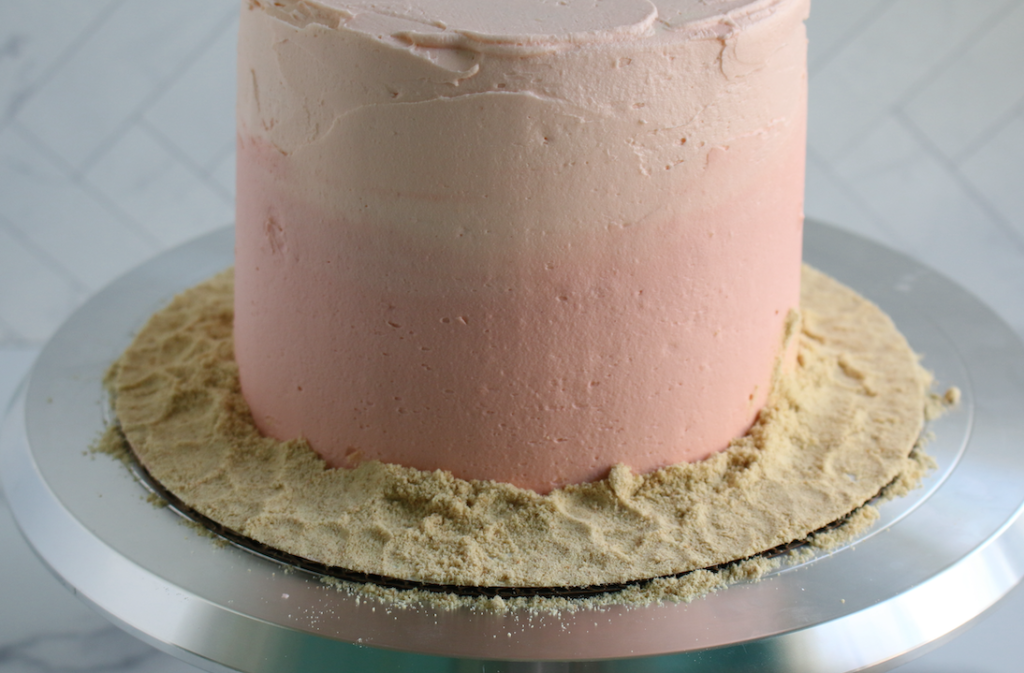
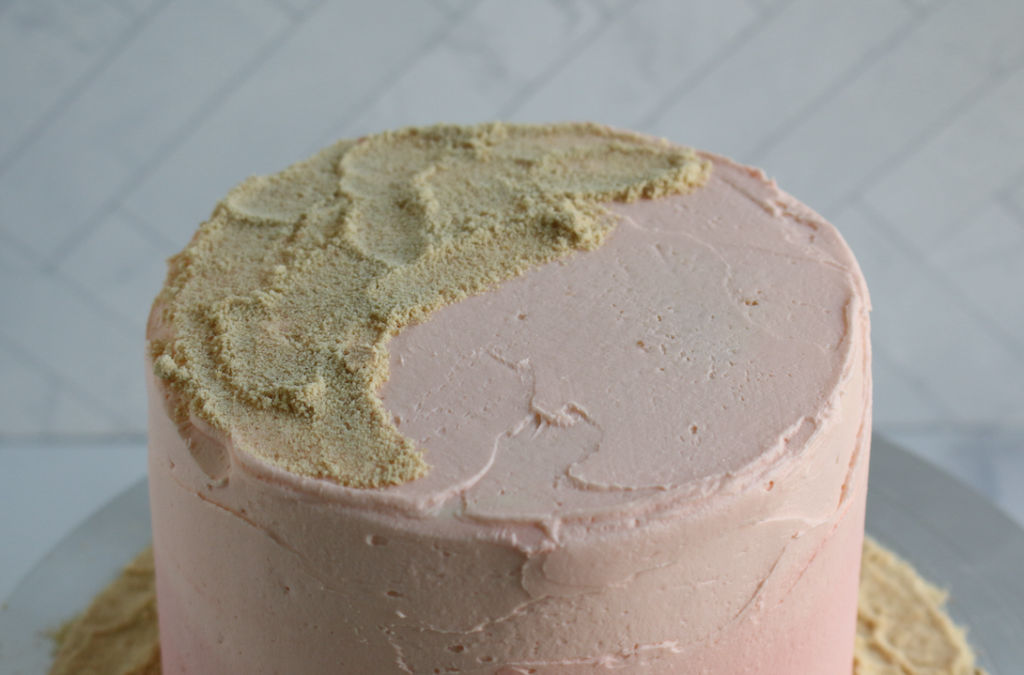
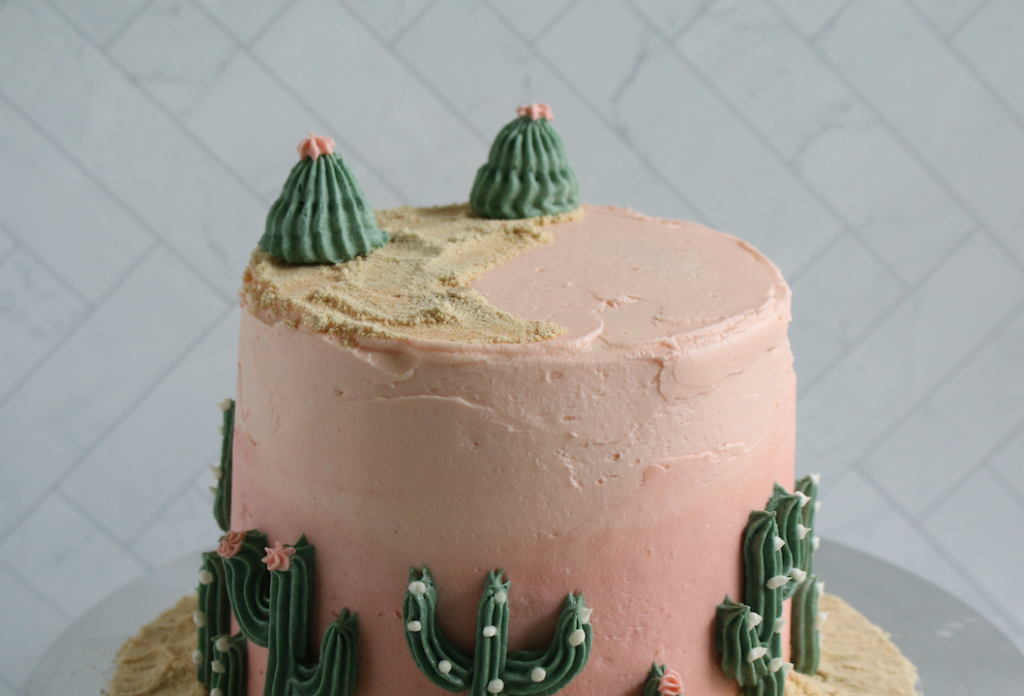
A cactus cake needs some sand! You can buy graham crackers already in crumb form. If you just have the crackers, use a food processor to turn them into crumbs. Add your graham cracker crumbs to the cake board. You can add more buttercream very thinly onto the board so that they will stick. Then, add your crumbs to the top of the cake in a “C” shape on one side.

Use the #21 open star tip to pipe a straight line, starting from the bottom of the cake and dragging up. Then, pipe curved cactus “arms” to complete. I’m not an expert on desert plants, but I read that cacti and succulents are different. All cacti are succulents, but not all succulents are cacti! I settled on calling this a cactus cake, because when I hear the word cactus, I think of desert and thats the vibes were going for!
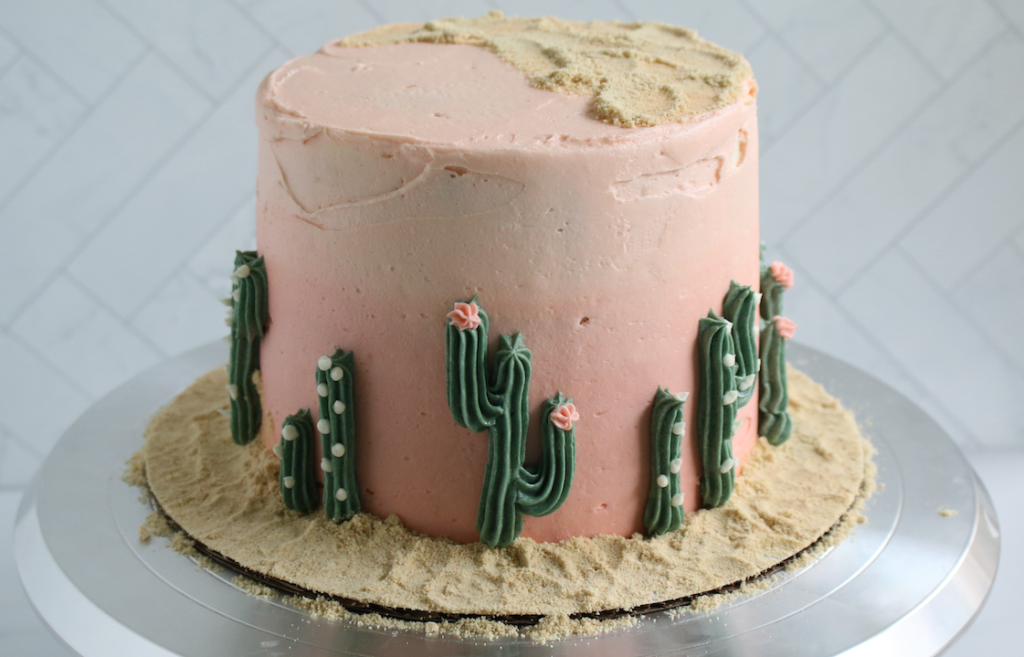
Continue to pipe different shaped cactus which will create variety. To add some details, pipe white dots using the #3 tip and pink flowers using the #13 tip.
Step #6 How to Pipe Cute Succulents
Please watch the video for visuals!
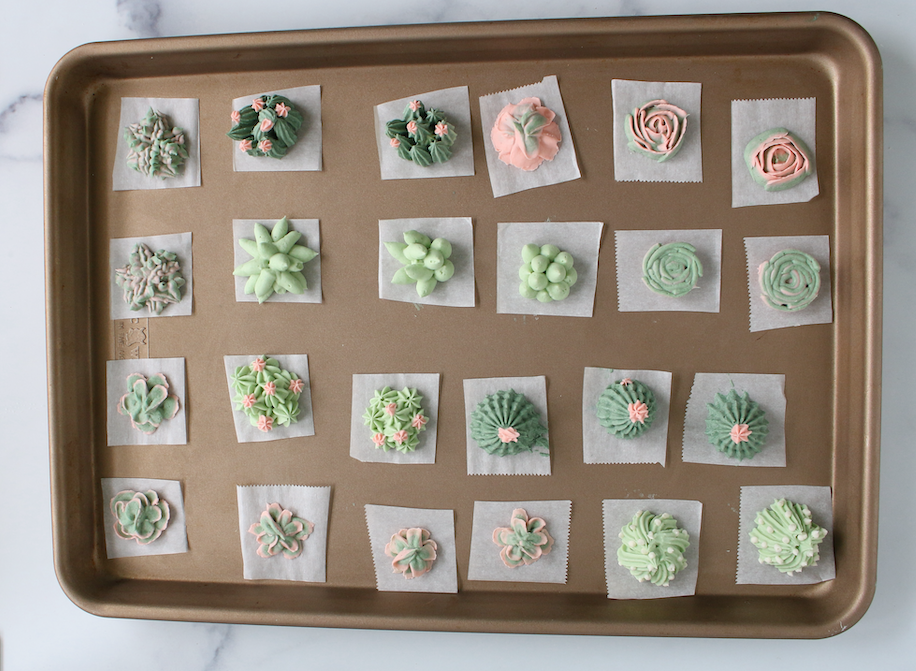
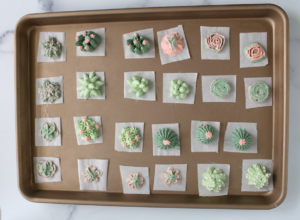
Before you begin, take out a baking tray so we can place the buttercream succulents onto it for freezing.
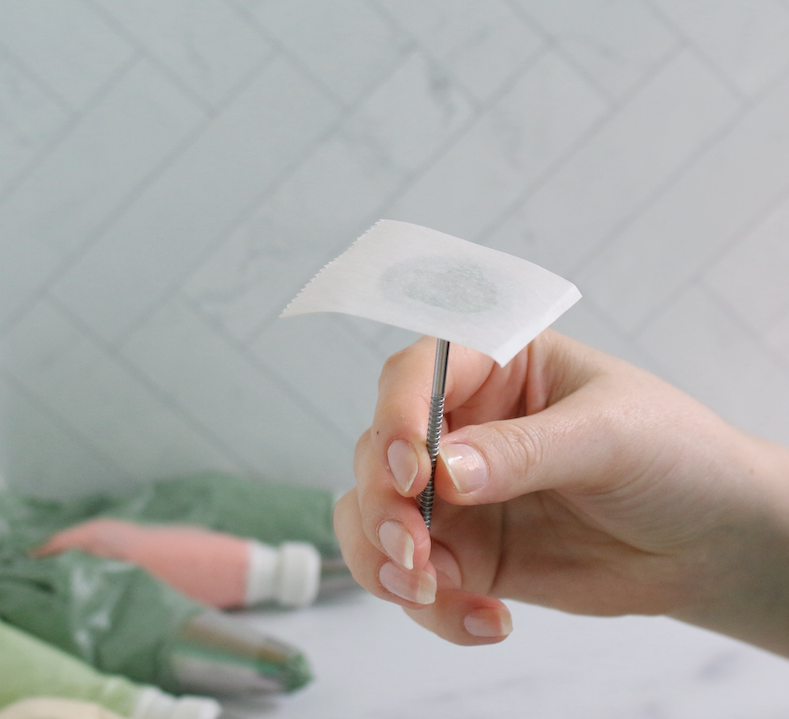

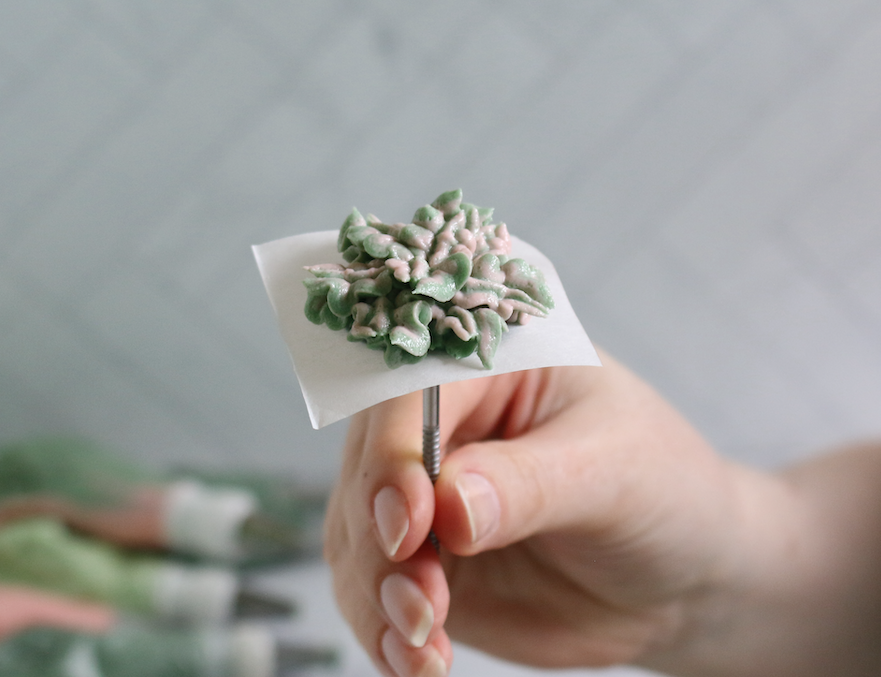
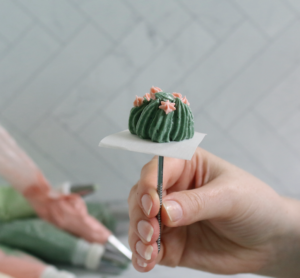
Pipe a small dot of buttercream onto the center of the nail before placing a parchment square otherwise the square will move around.
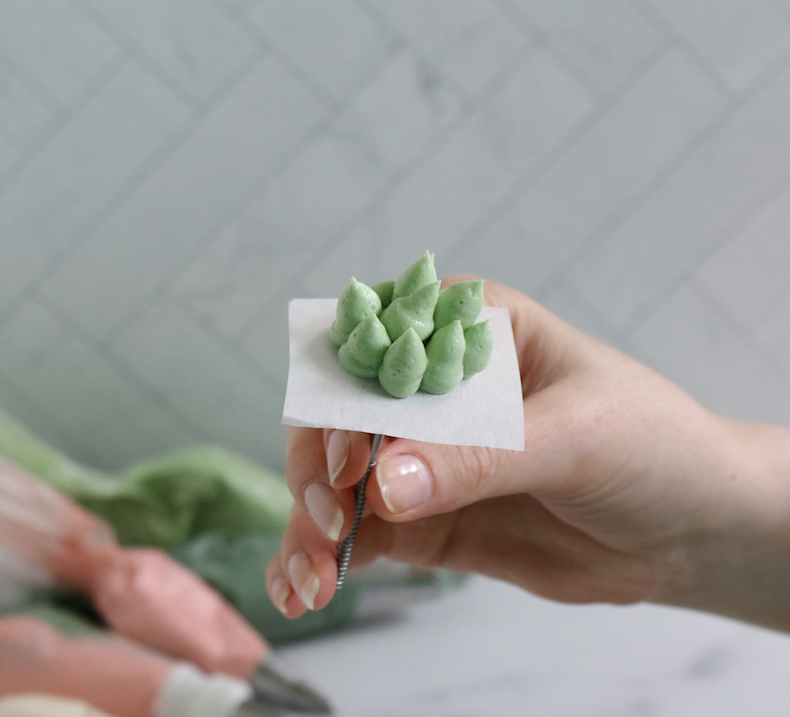
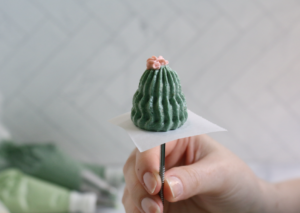
Using the #869 tip, push out buttercream and pull the bag straight up. Stop applying pressure, gently push the tip down and then pipe again. Repeat one more time. Add a little pink flower with the #13 tip.
Carefully remove the succulents off the flower nail and onto the baking tray. Don’t remove the parchment paper!

Starting with the image on the left, use a #21 tip and pipe a dollop of buttercream in the center of the nail. If you pipe a center, then rest of the buttercream can be stable. Finish with a pink flower using the #13 tip.
Secondly, pipe buttercream straight up in the center of the parchment paper using the #8 tip. Add more buttercream around the center. Move these onto the baking tray.
Flowers
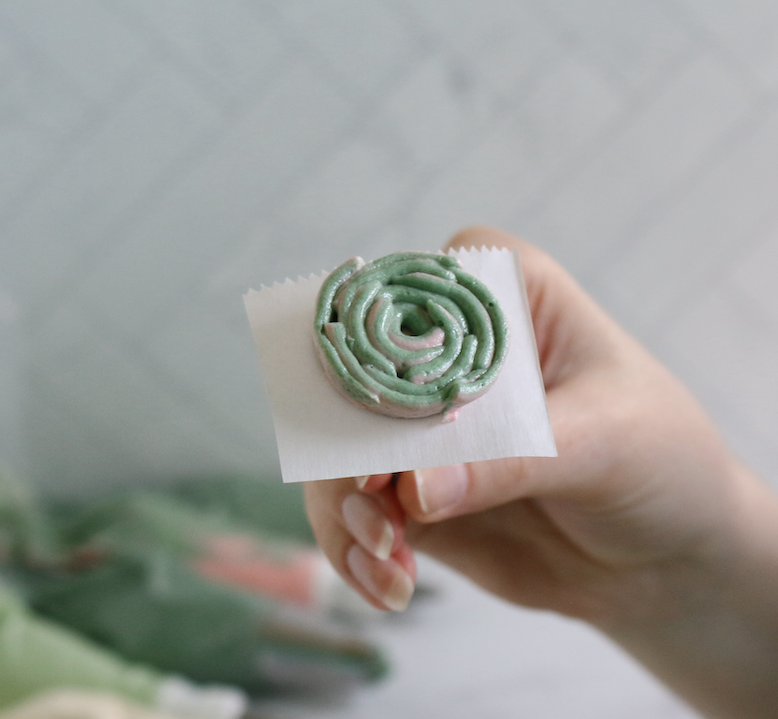
To pipe a thick succulent rose, add the #104 tip to the two tone buttercream bag. Pipe a small dollop in the center of the parchment paper. Angle the larger opening of the tip up. Create small petals by piping horizontal around the dollop. Pipe longer petals as you get to the outside. If you want a thinner rose, then switch the tapered side of the tip to point up.
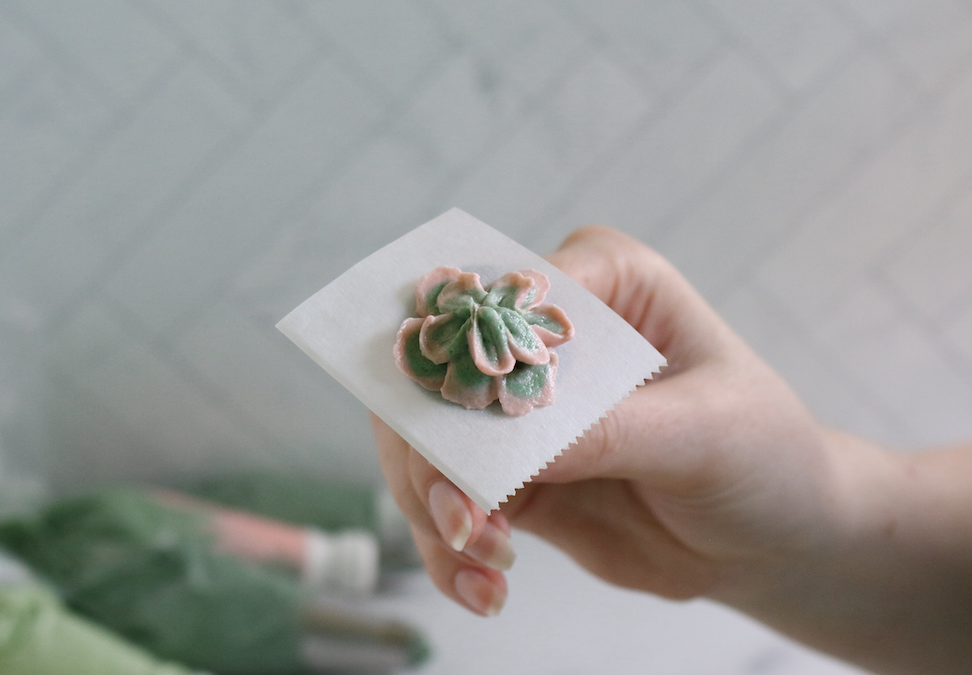
Use the #104 tip and two-toned buttercream. With the tapered side of the tip pointing up, create small “U” petals. Keep creating petals, piping them side by side. Then, add another layer of petals.
To create a different textured succulent, use the leaf tip #114. Start piping leaves in the center and pull them out towards the edge of the parchment. Continue to pipe leaves, then pipe smaller leaves on top!
Freeze your buttercream succulents in the freezer for five minutes.
Step #7 Creating a Succulent Garden
Once it’s been five minutes, take your buttercream succulents out of the freezer. We don’t want these to thaw because they are easier to work with when frozen. They can start to sweat as they come to room temperature but I haven’t had many issues with this. Otherwise, a little sweating buttercream won’t harm the cake!
Start by adding your taller succulents on top of the graham cracker crumbs. If you don’t like how they are arranged, you can move them because they are frozen but work fast as the heat from your hands will start to warm the buttercream.
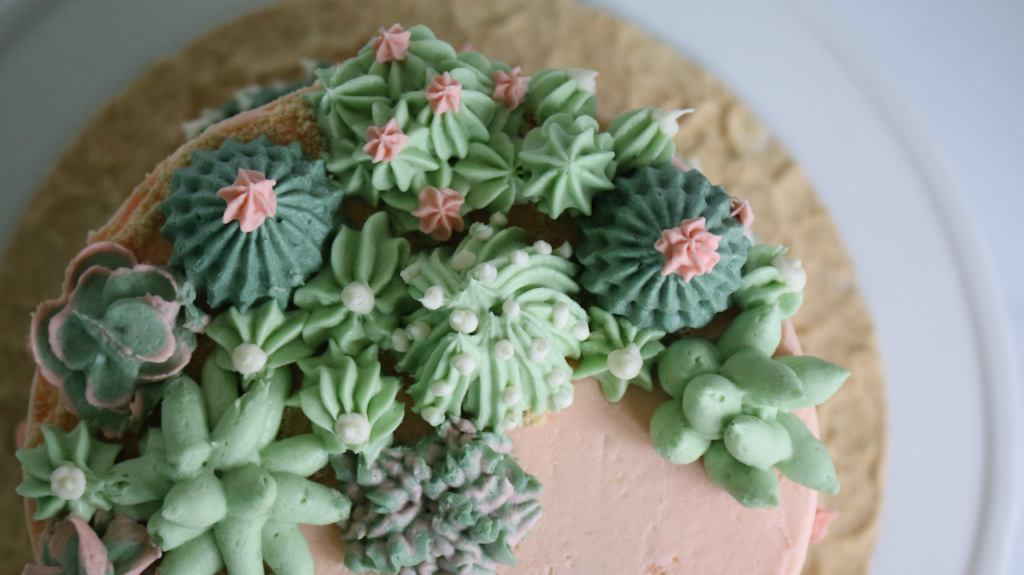
Here is a closer look at how to arrange the succulents. Finally, when you’re happy with the placement, pipe green buttercream dollops using the #21 tip to fill in any spaces.
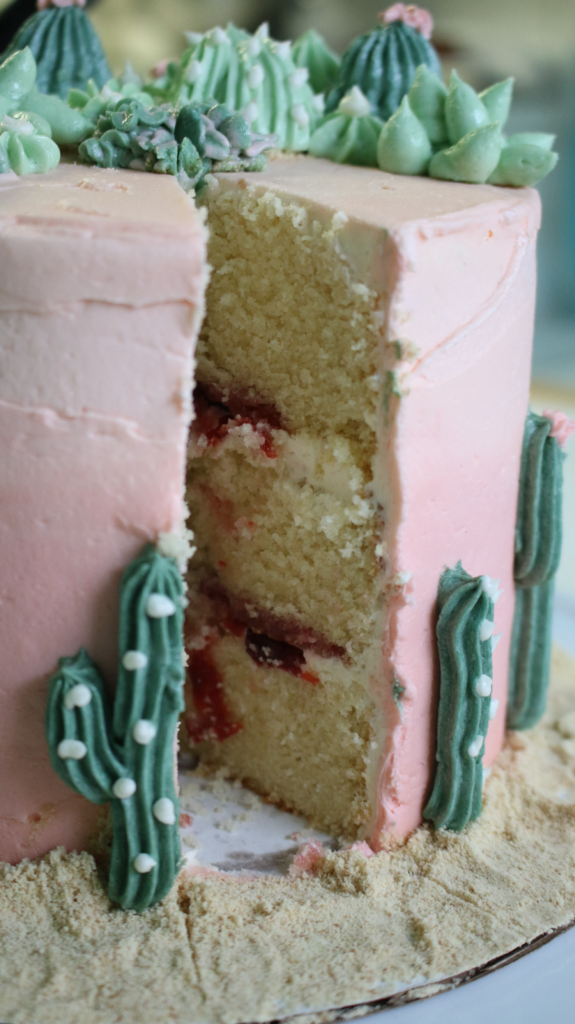
The cactus cake is finished!
RECIPE CARD
Buttercream Cactus Cake
Materials
Gel Food Color
Baking Preparation
Instructions
Baking Preparation
- Bake the vanilla cake and let it cool. In the meantime, make the sour cherry jam or fruit jam of your choice. You can skip the filling if you prefer.
- Make a double batch of the American buttercream recipe. If you only make one batch, you will not enough enough to fill the cake, frost it, and pipe decorations.
Dye Buttercream
- Light pink buttercream: add 1 cup of buttercream into a bowl, mix in 1 drop peach + 1 drop dusty rose. Dark pink buttercream: add 1 ½ cups of buttercream into a bowl and mix in 1 drop peach + 3 drops dusty rose. Light green buttercream: add 1 cup of buttercream and mix in 1 drop laurel. Dark green buttercream: add 1 ½ cups buttercream mix in 3 drops cypress gel dye.
Prepare The Piping Bags With Metal Tips
- You can pipe many designs with different piping tips. Prepare a piping bag by adding in a metal tip, cutting just enough of the tip so it won't fall out. Prepare the following:#13 tip and fill with ½ cup of light pink frosting. #3 tip and fill with ½ cup of the leftover undyed buttercream. #869 tip and fill it with ½ cup dark green frosting.
- For couplers: Prepare two piping bags with couplers using the same instructions above only using a plastic coupler instead of a metal tip. Fill one bag with ½ cup light green frosting, and the other with ½ cup dark green frosting.
- For two tone buttercream: Prepare a piping bag with a coupler. Use a small spatula, butter knife, or an offset spatula to add the remaining ½ cup dark green frosting to one side of the bag, and add ½ cup dark pink frosting to the other side. It's okay if they mix slightly.
Assembling The Cactus Cake
- After your cake layers have cooled, use a serrated knife to cut off cake tops if it has a domed. Add a cake board onto a turntable or table. Smooth the undyed buttercream onto the first cake layer and pipe a ring if you’re adding filling to prevent filling from spilling out of the sides. If you aren’t adding filling you can skip this step. If you are adding a filling, repeat the same process for the second layer. Then, place your third cake layer on top.
- Crumb coats are thin layers of buttercream that “catch the crumbs.” Add buttercream on the top of the cake and sides. Use an offset spatula to smooth out the buttercream. Use a cake or bench scraper to gently help remove excess buttercream. Then, place the cake in the refrigerator or freezer to chill for at least 5 minutes.

- Take out the cake from the fridge. To make the sunset, add light pink buttercream to the top half of the cake. Then, add the dark pink buttercream to the bottom half.

- Go over the cake with a bench scraper, gently pressing into it to remove excess buttercream.

- Gently smooth a little bit of buttercream over the part of the cake board you can see. Use your hand to press graham cracker crumbs onto the bottom of the cake and the board. If you have full crackers, use a food processor to turn them into crumbs. Use a spoon to add crumbs to the top of the cake in a “C” shape on one side.

Decorating
- Please watch the video for visuals! Use the #21 open star tip to pipe cactuses onto the sides of the cake. Use firm pressure and pipe a straight line, starting from the bottom of the cake and dragging up. Pipe curved cactus “arms.” Continue to pipe different shaped cactus which will create variety. To add some details, pipe white dots using the #3 tip and pink flowers using the #13 tip.

- Take out a baking tray to put the buttercream succulents onto it for freezing. Cut 2-inch parchment squares. Hold a flower nail in your non-dominant hand. Pipe a small dot of buttercream onto the center of the nail and press a parchment square on top.

- Using the #869 tip, pipe a big dollop buttercream and pull the bag straight up. Stop applying pressure, gently push the tip down and then pipe again. Repeat one more time. Add a little pink flower with the #13 tip. Remove gently from the flower nail using the parchment paper and place onto the baking tray.
- Use a #21 tip and pipe a dollop of buttercream in the center of the nail. Pipe additional lines leaning onto the center. Finish with pink flowers using the #13 tip.
- Use the #8 tip to pipe a small dollop for the center. Add more buttercream around the center.

- For a rose, screw on the #104 tip with the coupler ring to the two tone buttercream bag. Pipe a small dollop in the center of the parchment paper. Angle the larger opening of the tip facing the ceiling. Create small petals by piping horizontal around the dollop. Pipe longer petals as you get to the outside.

- For a flat flower, use the same #104 tip and two-toned buttercream. Point the tapered side up, create small "rainbow" petals. Keep creating petals, piping them side by side. Then, add another layer of petals.

- Attach the leaf tip #114 to the two-toned buttercream bag. Start piping leaves in the center and pull them out towards the edge of the parchment. Continue to pipe leaves, then pipe smaller leaves on top.

- Freeze your buttercream succulents in the freezer for five minutes. It's much easier to place frozen succulents on the cake.
- Remove the parchment paper and arrange them on top of the graham cracker crumbs. Work fast, your hands will heat them up. Use the #21 tip to pipe little dollops to fill in any spaces.

Notes
- Cover the cake with plastic wrap or in an airtight container. The cake can be left at room temperature for two days and then I suggest refrigerating. You can freeze iced cake slices in airtight or freezer safe containers for up to two months. Let it thaw before serving.