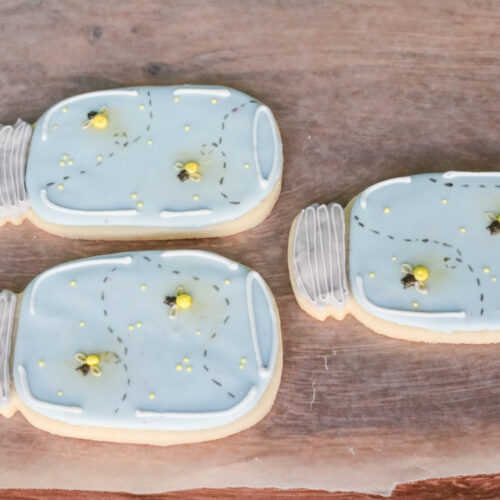
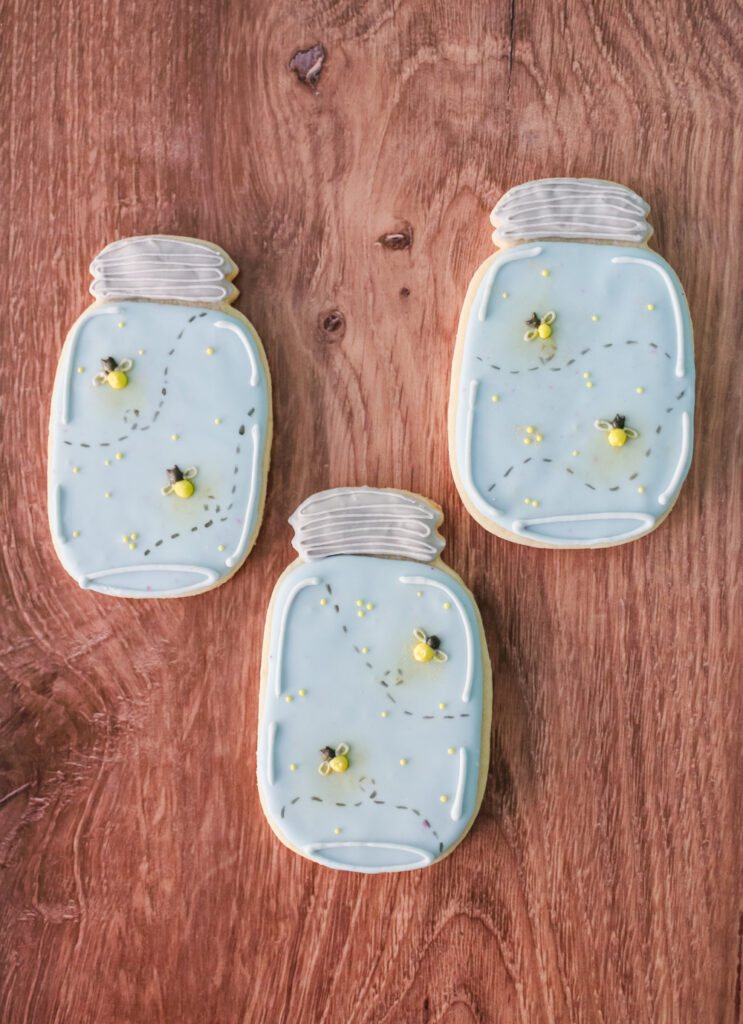
Firefly Mason Jar Sugar Cookies
Firefly Mason Jar Sugar Cookies
Learn step-by-step how to decorate firefly mason jar sugar cookies to celebrate the summer months. These sugar cookies are buttery and soft and pair perfectly with a homemade royal icing recipe.
This site uses affiliate links which may result in a small commission at no cost to you. Thanks for supporting Midwest & Wonder!
Sometime in late June, I’ll look out the window at night and notice the little flashes of light. Fireflies (also known as lightning bugs in the midwest), make me so happy! It’s nostalgia and the vibe of summer rolled into one.
I really wanted to this capture this fleeting summer moment and what better way than on a sugar cookie (temporary art).
What You Need To Get Started
These are all of the tools and dyes that I use to make these cookies. If you’re into decorating sugar cookies, I recommend investing in the tools that will help you make your cute sugar cookies.
- Piping bags
- Scribe tool (or toothpick): this tool helps to manipulate the royal icing
- Mason jar cookie cutter
- Fondant powder: an ivory colored powder that will be the fireflies “glow”
- Luster dust: adds some shine to the cookie!
- Food safe brushes (mine are no longer sold): dedicate these brushes to your baking and decorating
- Edible food safe markers: for drawing the firefly trail
a note about food dye
Food gel dye is different from liquid food dye. Gel is thicker and won’t change the consistency of your royal icing. Gel dyes are also much more concentrated which means you can use less!
- Americolor super black dye: for the fireflies head
- Americolor lemon yellow dye: for the fireflies body and dotted details
- Americolor wedgewood dye: for the mason jar
- Americolor slate dye: for the lid and wings
watch the video tutorial
Step 1: Bake Sugar Cookies
Start by gathering your ingredients for my soft cut-out sugar cookie recipe. It doesn’t take long to make the dough, but it should be chilled for at least half an hour. You’ll want to make sure you plan enough time for chilling, baking, and decorating.
After the sugar cookie dough has been chilled, use a rolling pin to roll out the dough to 1/4-inch thick. Use the mason jar cookie cutter to cut out shapes.
Place the cookies onto lined baking trays with parchment paper or silicone baking mats and bake cookies for 9-10 minutes. Transfer the sugar cookies to a wire rack to cool.
Step 2: Make Royal Icing
While the sugar cookie cool, make the royal icing. I use my easy two ingredient royal icing recipe. You can also make royal icing a day ahead and keep it in the refrigerator in an airtight container. Just make sure to give it a stir before using.
My royal icing recipe uses powdered sugar and pasteurized egg whites. I don’t add vanilla extract because the icing pairs perfectly with my sugar cookies, but if you’d like you can add 1 teaspoon. This recipe creates pipe-able icing consistency which is great for flooding large spaces.
Step 3: Dye The Icing
The cookies are mostly decorated with the blue pipe-able icing. Add half of the royal icing into a large bowl, then divide the rest of the icing into 3 bowls. Add 1-2 drops of gel food dye and mix. A little goes a long way. If the color is not dark enough, add 1 extra drop, mixing in-between. The black icing will need closer to 6-7 drops. Keep in mind that as icing drys, it get darker in color.
I like to mix my icing in small bowls with a rubber spatula. Unless a different consistency is in the chart below, use the pipe-able consistency that the recipe makes.
After mixing the icing, add it into piping bags, tie the bag closed or use a rubber band to prevent crusting, and cut the tip very small. You can always cut it larger if needed.
Sugar Cookie Decorating Tips
- Add the base layer of blue icing (also called flooding the cookie) for all the cookies. By the time you’ve flooded all of the cookies, the first cookie you started with will be dry enough to move onto the next step.
- Royal icing will dry with a very thin crust. It might look dry, but it actually takes 8-12 hours to fully dry.
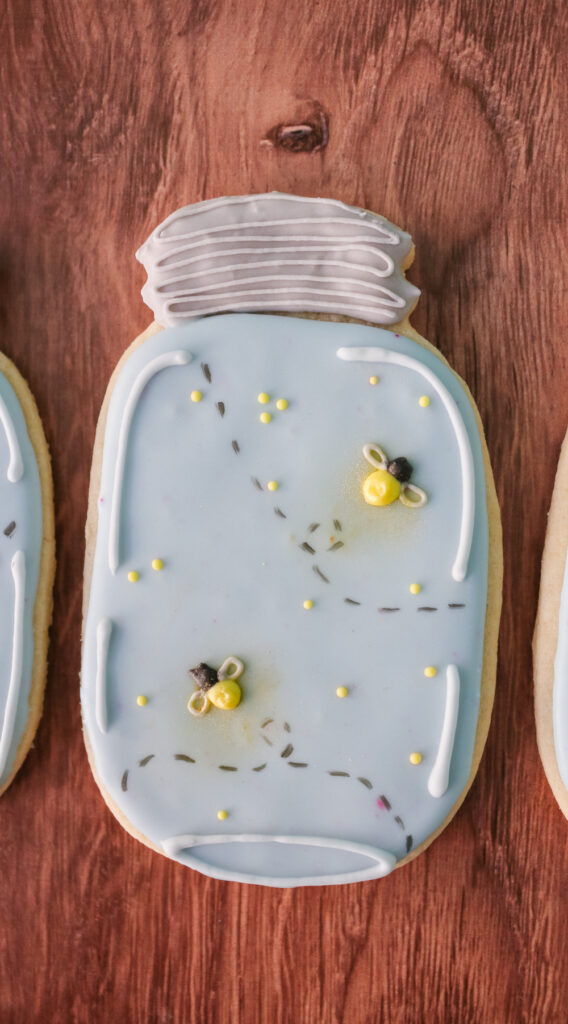
How To Decorate Firefly Mason Jar Sugar Cookies

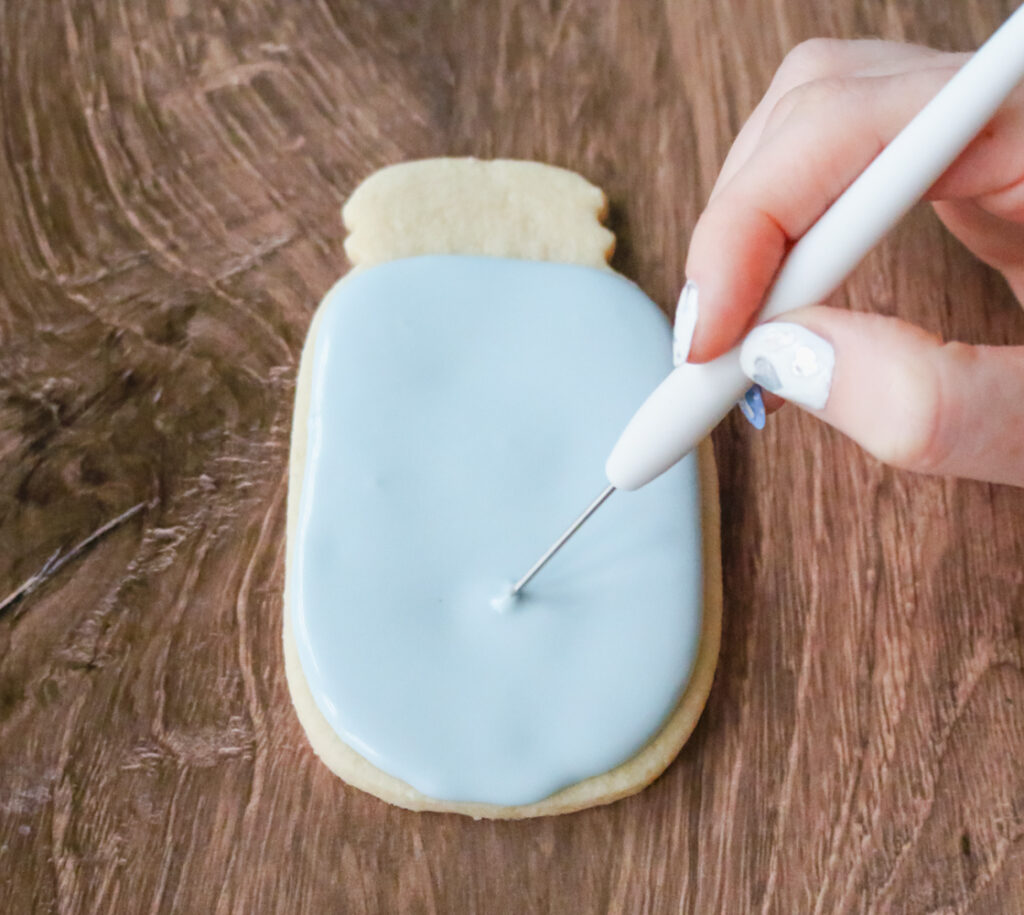
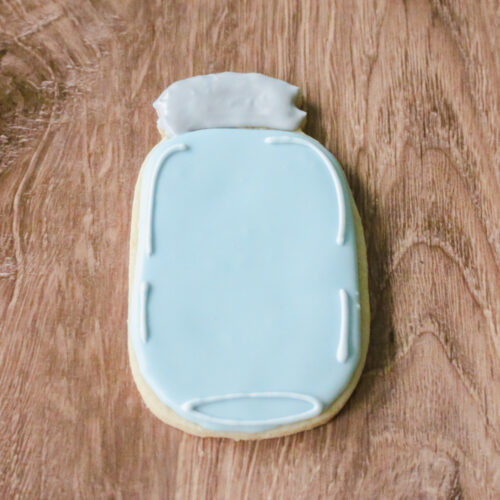
Outline the cookie with blue icing, then fill it in. Don’t flood the lid. Use a scribe tool to pop any air bubbles.
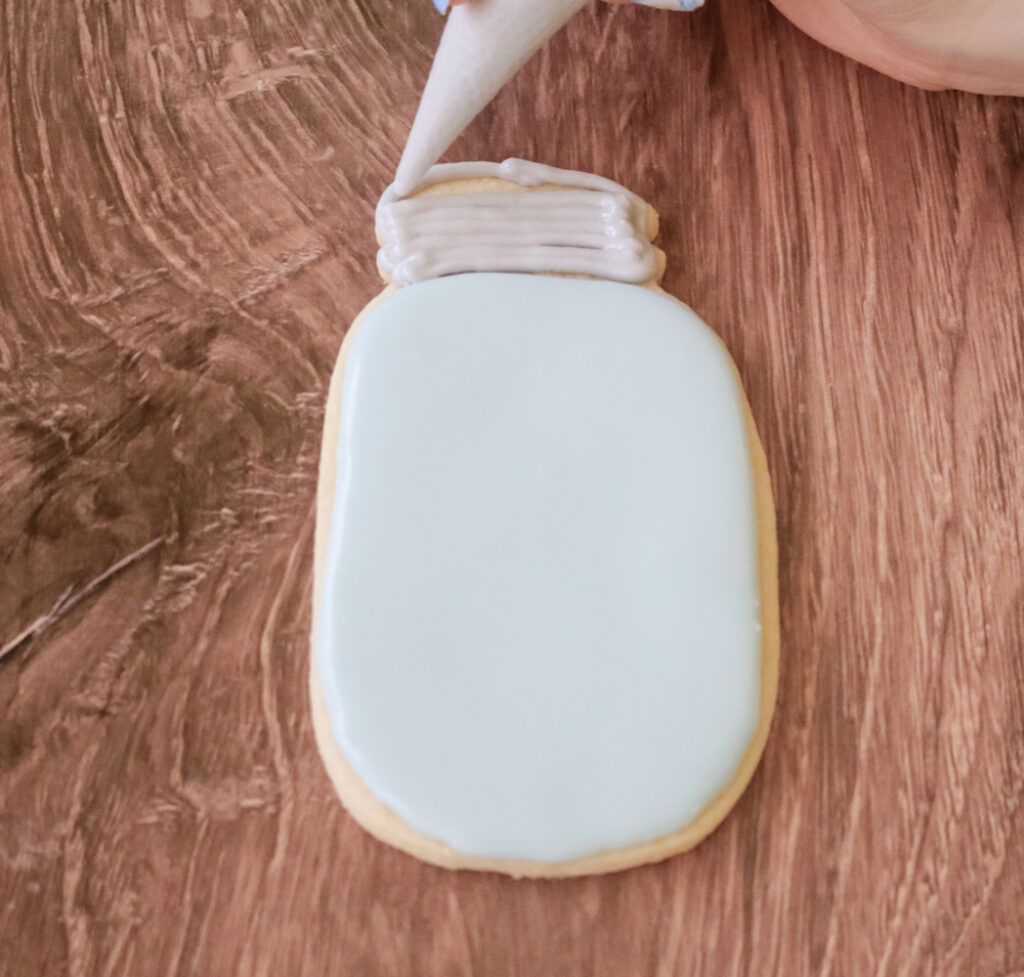
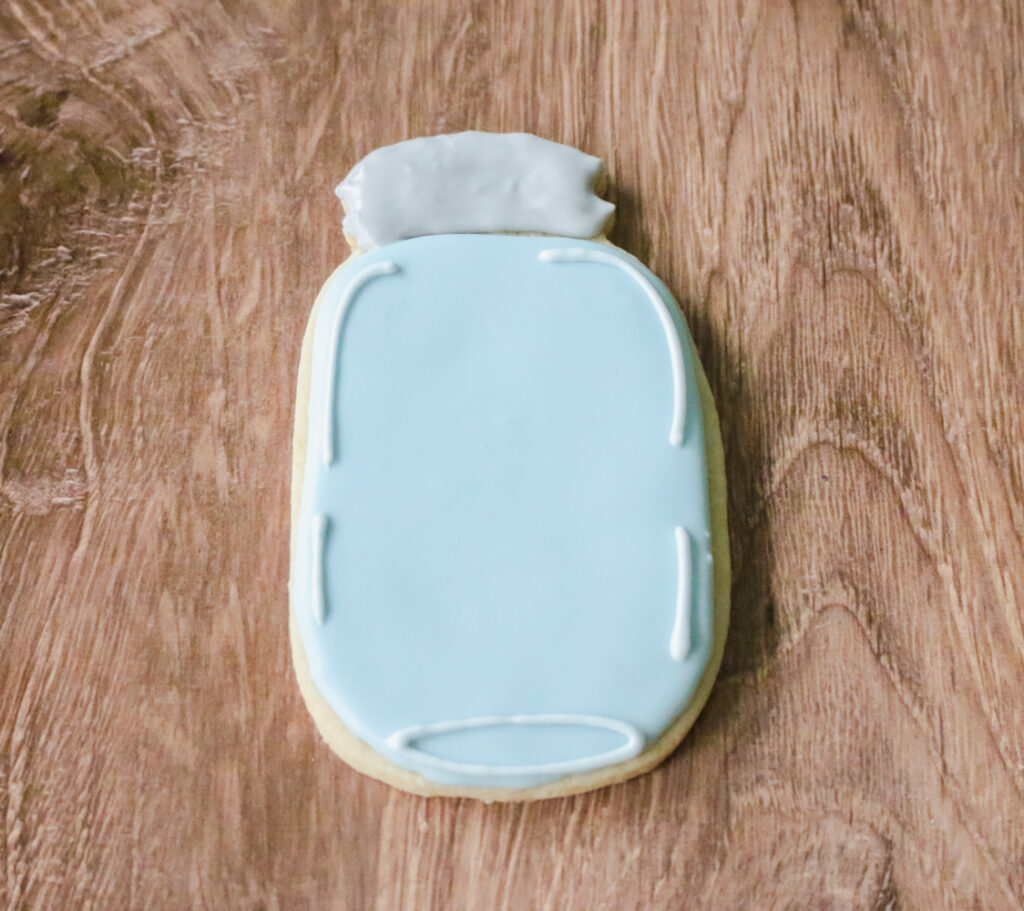
Once you have flooded all of the cookies, go back to the first cookie you iced. Use the grey icing to outline and fill in the mason jar lid. Then, use the blue icing to add a long oval for the bottom of the jar, and lines to on the sides to make it look more jar like.
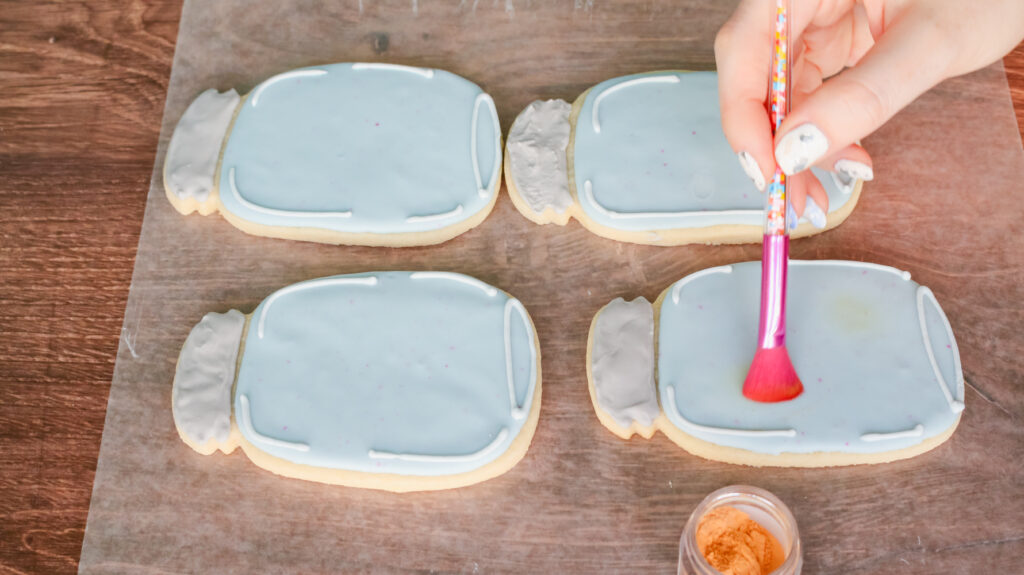
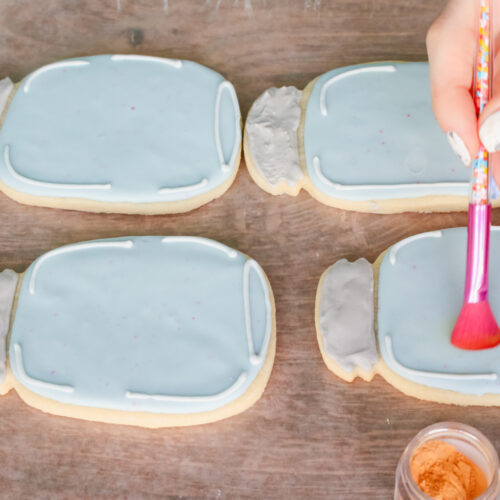
Once the cookies are dry to the touch, it’s time to add details! Use a good safe brush to VERY GENTLY brush on the fondant powder. It’s so easy to crack cookies with too much force, so go slowly.
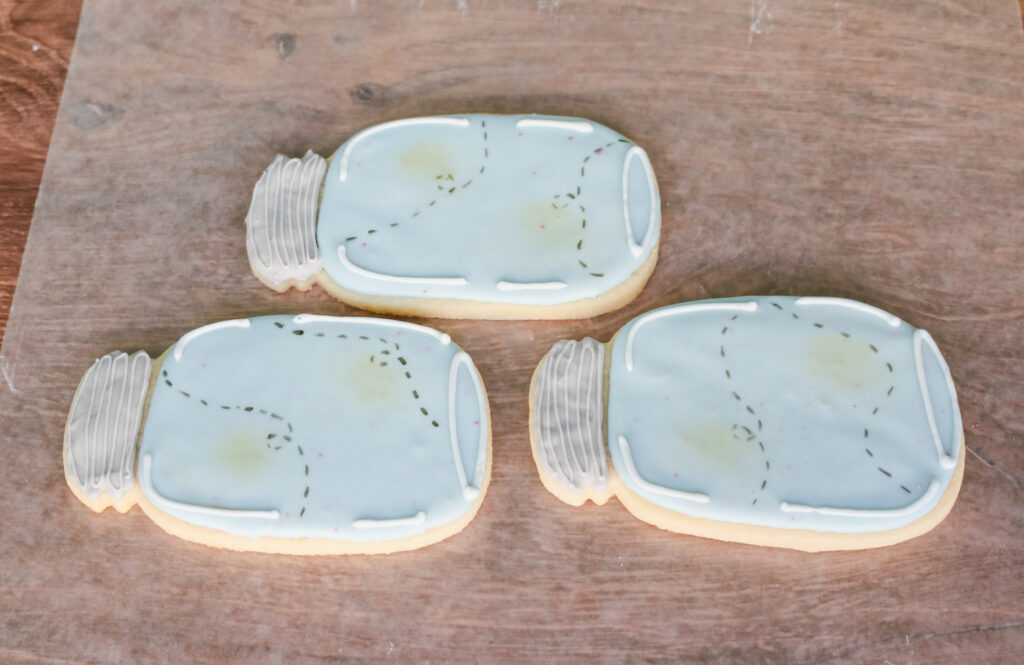
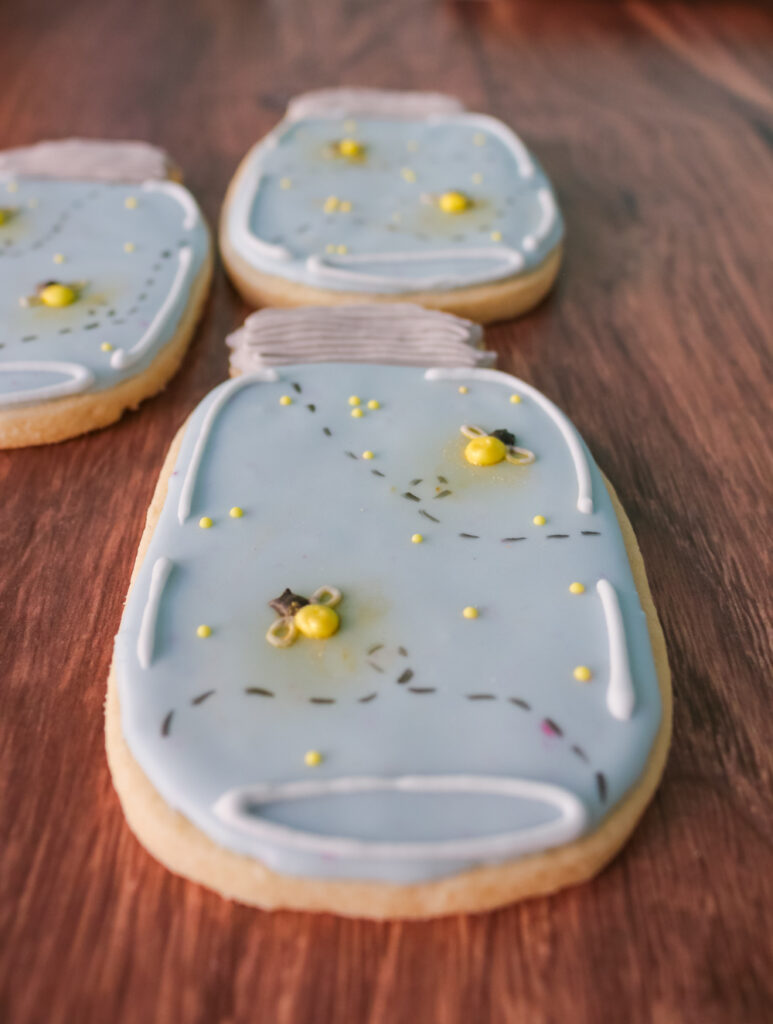
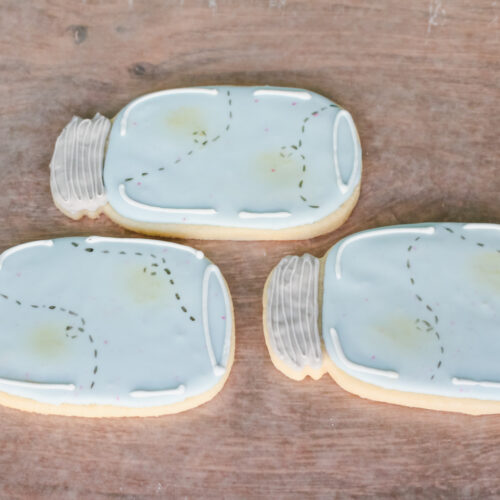
Use the grey icing to add lines onto the jar lid. Then, use the edible food marker to add the firefly “trail” lines.
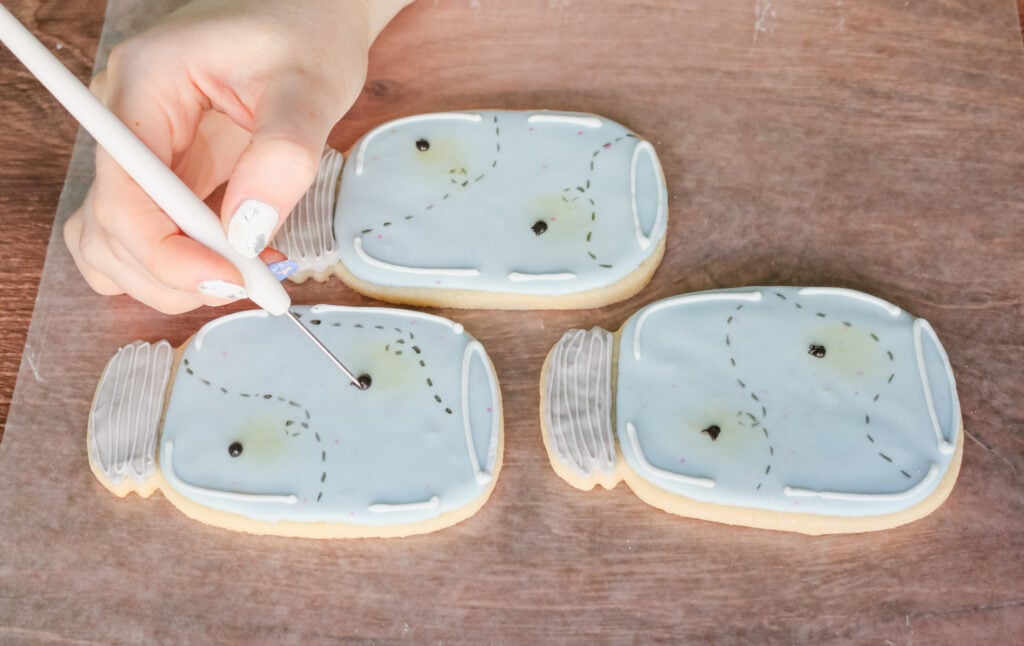
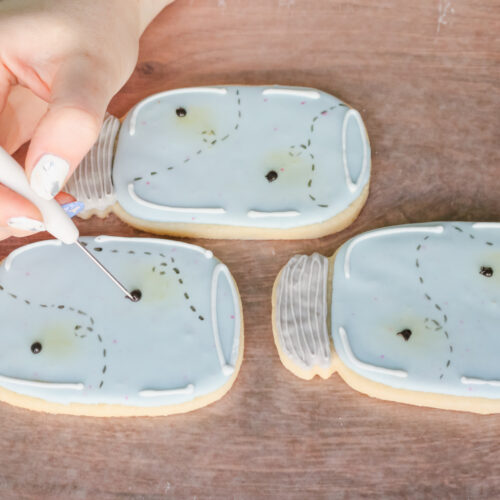
With the black icing, pipe two little dots. Use the scribe tool to drag the icing upwards to create two antennae.
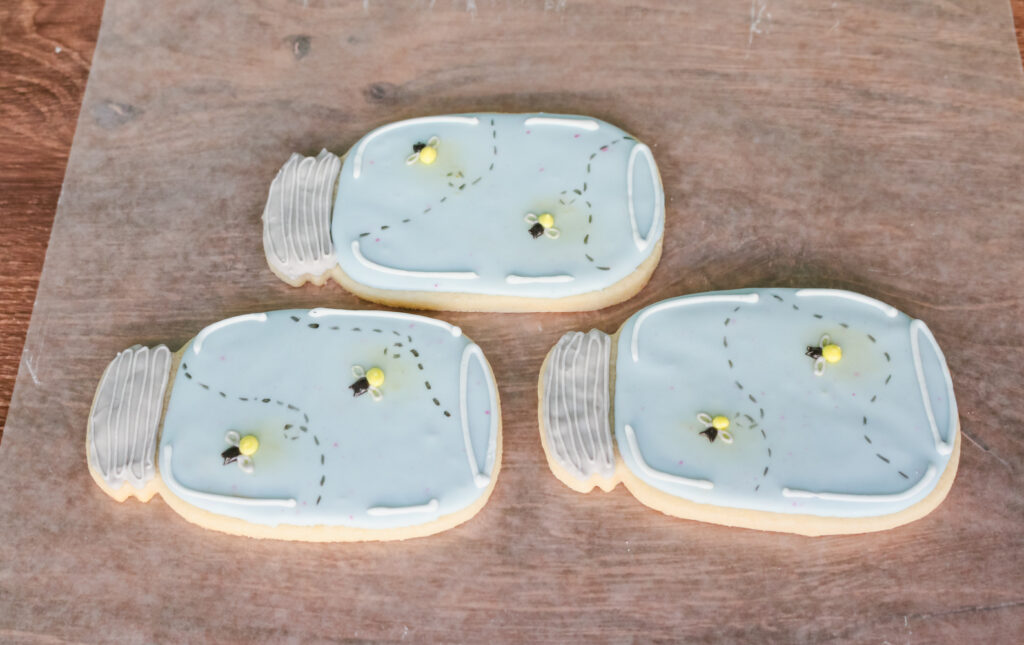
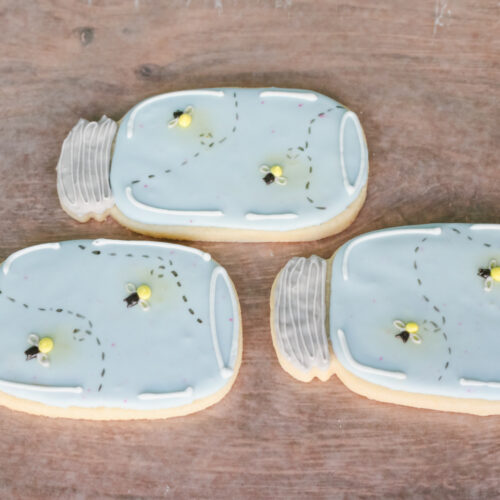
Use the yellow icing to pipe the body and the stiff consistency grey icing to pipe little wings.
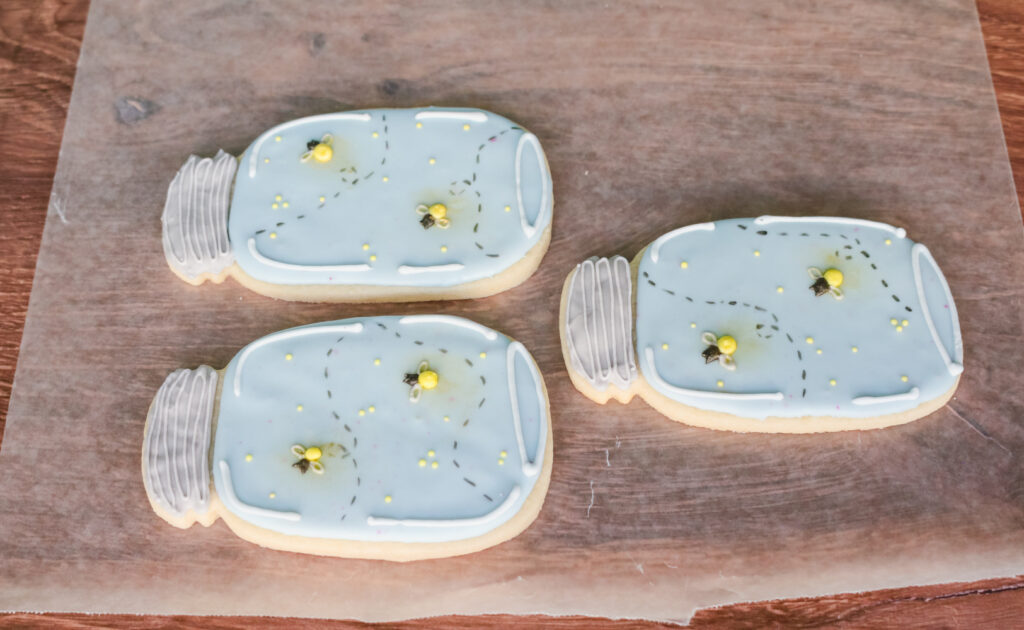
Add little yellow dots with the yellow icing for added details!
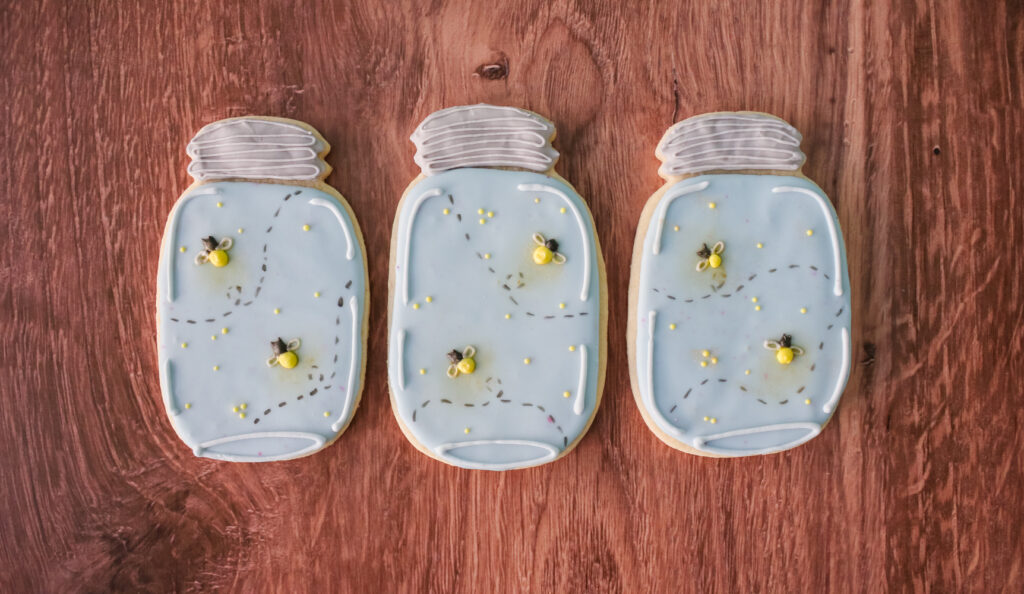
Add on the edible luster powder with a food safe brush for some more glow and detail! The firefly mason jar sugar cookies are done – just let the dry for 8 hours or overnight before serving or packaging.
How To Gift Sugar Cookies
Make sure the royal icing has completely dried before warping them up!
You can add one fully dried cookie into a cellophane bag and tie with ribbon. These cellophane bags come in multiple sizes.
To really take the cookie gifting to the next level, place the cookies in a gift box with crinkle paper. After trying a few different boxes, I think these boxes are the best and they hold three mason jar cookies.
How To Store Cookies
Decorated and undecorated sugar cookies can be stored in an airtight container at room temperature for up to a week. You can freeze undecorated cookies in an airtight container for up to 2 months. I don’t recommend freezing decorated cookies because during the thawing process, the condensation can change the texture.
RECIPE CARD

Firefly Mason Jar Sugar Cookies
Equipment
Ingredients
Sugar Cookies
- 1 batch soft cut-out sugar cookie recipe
Royal Icing
- 6 egg whites or 6.8 fl oz pasteurized liquid egg whites
- 8 cups powdered sugar (920g)
- 2 tsp vanilla extract optional
Instructions
- Bake the soft cut-out sugar cookie recipe and let them cool completely. In the meantime, make the royal icing. This is a double batch of my easy royal icing recipe so that you'll have enough to flood and decorate 24 medium to large sized cookies.
- Attach the whisk attachment to your stand mixer. If using liquid egg whites, measure out 6.8 fl oz. If using fresh eggs, separate your egg whites from the yolks. In the bowl of a stand mixer, add your egg whites. Beat the egg whites at low speed until frothy, about 30 seconds.6 egg whites , 8 cups powdered sugar, 2 tsp vanilla extract
- Add powdered sugar one cup at a time and mix on low speed in-between additions. (Add optional vanilla extract) After all the sugar is added, set the speed to medium-high and beat until stiff peaks form (5-8 minutes). When removing the whisk attachment, the peaks should stand up without running back into the bowl.
Decorating The Firefly Mason Jar Sugar Cookies
- The cookies are mostly decorated with the blue pipe-able icing. Add half of the royal icing into a large bowl, then divide the rest of the icing into 3 bowls. Add 1-2 drops of gel food dye and mix. A little goes a long way. If the color is not dark enough, add 1 extra drop, mixing in-between. The black icing will need closer to 6-7 drops. Keep in mind that as icing drys, it get darker in color.
- Fill piping bags with the icing. You don't need a piping tip, just cut the tip very small with scissors. You can always cut the hole larger if needed.
- Outline a cookie with blue icing, then fill it in. Don't flood the lid. Use a scribe tool to pop any air bubbles.

- Once you have flooded all of the cookies, go back to the first cookie you iced. Use the grey icing to outline and fill in the mason jar lid. Then, use the blue icing to add a long oval for the bottom of the jar, and lines to on the sides to make it look more jar like.
- Once the cookies are dry to the touch, it's time to add details! Use a good safe brush to VERY GENTLY brush on the fondant powder. It's so easy to crack cookies with too much force, so go slowly.
- Use the grey icing to add lines onto the jar lid. Then, use the edible food marker to add the firefly "trail" lines.
- With the black icing, pipe two little dots. Use the scribe tool to drag the icing upwards to create two antennae.
- Use the yellow icing to pipe the body and the stiff consistency grey icing to pipe little wings. Add little yellow dots with the yellow icing for added details!
- Add on the edible luster powder with a food safe brush for some more glow and detail! The firefly mason jar sugar cookies are done – just let the dry for 8 hours or overnight before serving or packaging.